Thursday, March 7, 2013

UPDATE: A Work in Progress

Although I really want this blog to contain great recipes, it is also a place where I can explore my mistakes.  I have been somewhat embarrassed to show my failures, but a large percentage of what I actually do is cooking the same thing over and over again trying to get it right.  The first time might be perfect, but the second or third, or even forth time might not be.  For the most part, my recipes fail because I simply don't follow the recipe to the letter or I invent a completely new recipe out of my head.  Or, I try recipes that are new and not rigorously tested like vegan or gluten-free options.  I'm confident enough in my cooking skills that I feel I don't need to pay close attention to every step.  However, I can be overly confident, and that's where mistakes are made.   

This blog was made to document my progress, to show when things went right or wrong, and to bring a more scientific approach to my cooking.  Looking back over these past weeks, it is amazing to see what has come out of my kitchen, but it has also made me very aware of the changes in the way I approach food.  In school, some of my instructors had us keep a journal for each class, which I found very rewarding.  Writing down both my thoughts and feelings about the food I made, and the specific ways in which I created it (changes to the recipes, cooking times, equipment, what I would do differently next time) was a valuable way of analyzing my progress.  This blog has been all that and more.  

So, today, I would like to share some of the things that went wrong in my kitchen over the past few days.  This kind of analysis, I have learned, is extremely beneficial.  Hopefully, it will mean the next meal will be even better.

First off, in my last post about Potato Leek Soup with Spicy Sausage, I mentioned I had trouble with the raw sausage I had bought.  I feel pretty dumb about it all because I forgot, for a minute, how to actually cook raw sausage.  But I did go back and fix it.  All it took was cooking the sausage first, then cutting it and frying the coins:


These little sausage bites were crispy and delicious and made a perfect garnish to my hot Brussels sprouts slaw (even though I slightly overcooked the brussels, as you can see from the olive green color...they should be a fresh, spring green).


Secondly, I tried the paleo pizza crust again.  I knew my first attempt was less than adequate, but the major problem with the original recipe was that it contained mozzarella.  I can't eat mozzarella, so I had to find another way to bind the cauliflower together.  My first attempt was to add more egg to the mixture, but that just made it soft and eggy...not crispy like I wanted it to be.  This time, I added in only 1 egg and about 1/2 cup garbonzo bean flour.  I use garbonzo bean flour all the time, and it crisps up nicely, so I though that adding it the cauliflower would create a nice dough for the crust.  I pureed the cauliflower, egg, salt, and garbonzo bean flour together so it created a fine dough.


You can clearly see that it did not work out as well as intended.  And, yes, I did oil this baking sheet!  I think I didn't add enough flour to the mixture because the dough was very wet.  The taste was actually very delicious (we still enjoyed it!), but I have yet to make it perfectly.  Eating gluten-free is sometimes quite hard.  But I do feel like I'm on to something...I think I just need more flour...or maybe a different kind of flour?  I need something to both make a dry dough and hold the cauliflower together.  Well, I will keep trying.  And I'll let you know of my progress!

Although I did go to school to learn how to cook, I'm obviously still a novice.  I have not yet perfected anything, though a lot of good food comes out of my kitchen, and it keeps getting better.

If any of you are interested in seeing a real master, I recommend watching Jiro Dreams of Sushi.  It is about a man who spends his whole life devoted to perfecting the art of sushi.  It is both humbling and inspiring.  It reminds me that I have my whole life to make mistakes, but hopefully, someday, I will get things right. :)

Wednesday, March 6, 2013

Potato Leek Soup with Spicy Sausage

This past week, I thought that spring had finally come!  It has been warm and sunny, with clear, blue skies.  I've been spending a lot of time in the garden and have already planted some lettuces (mesclun which includes a variety of greens, and mizuna, which is an Asian mustard green...slightly spicy like arugula) and some cilantro!  Grocery stores are starting to stock early spring veggies like leeks, Brussels sprouts, and asparagus.  Now is the time to start stocking up on these bright green veggies because they are higher quality and cheaper!  Eating seasonally is a practical way to save money, but it does mean that you have to be a bit creative in the kitchen.  When your pantry is overflowing with new, tender greens, it's time to find many uses for them!

Although the weather is warming, the past couple days have been gray and rainy.  It is still March after all.  And that means more hot soup!  This week I made an old time favorite: leek and potato soup.  As good as this soup is on it's own, neither me or my husband can stay away from spice, so I decided to add in some spicy sausage.

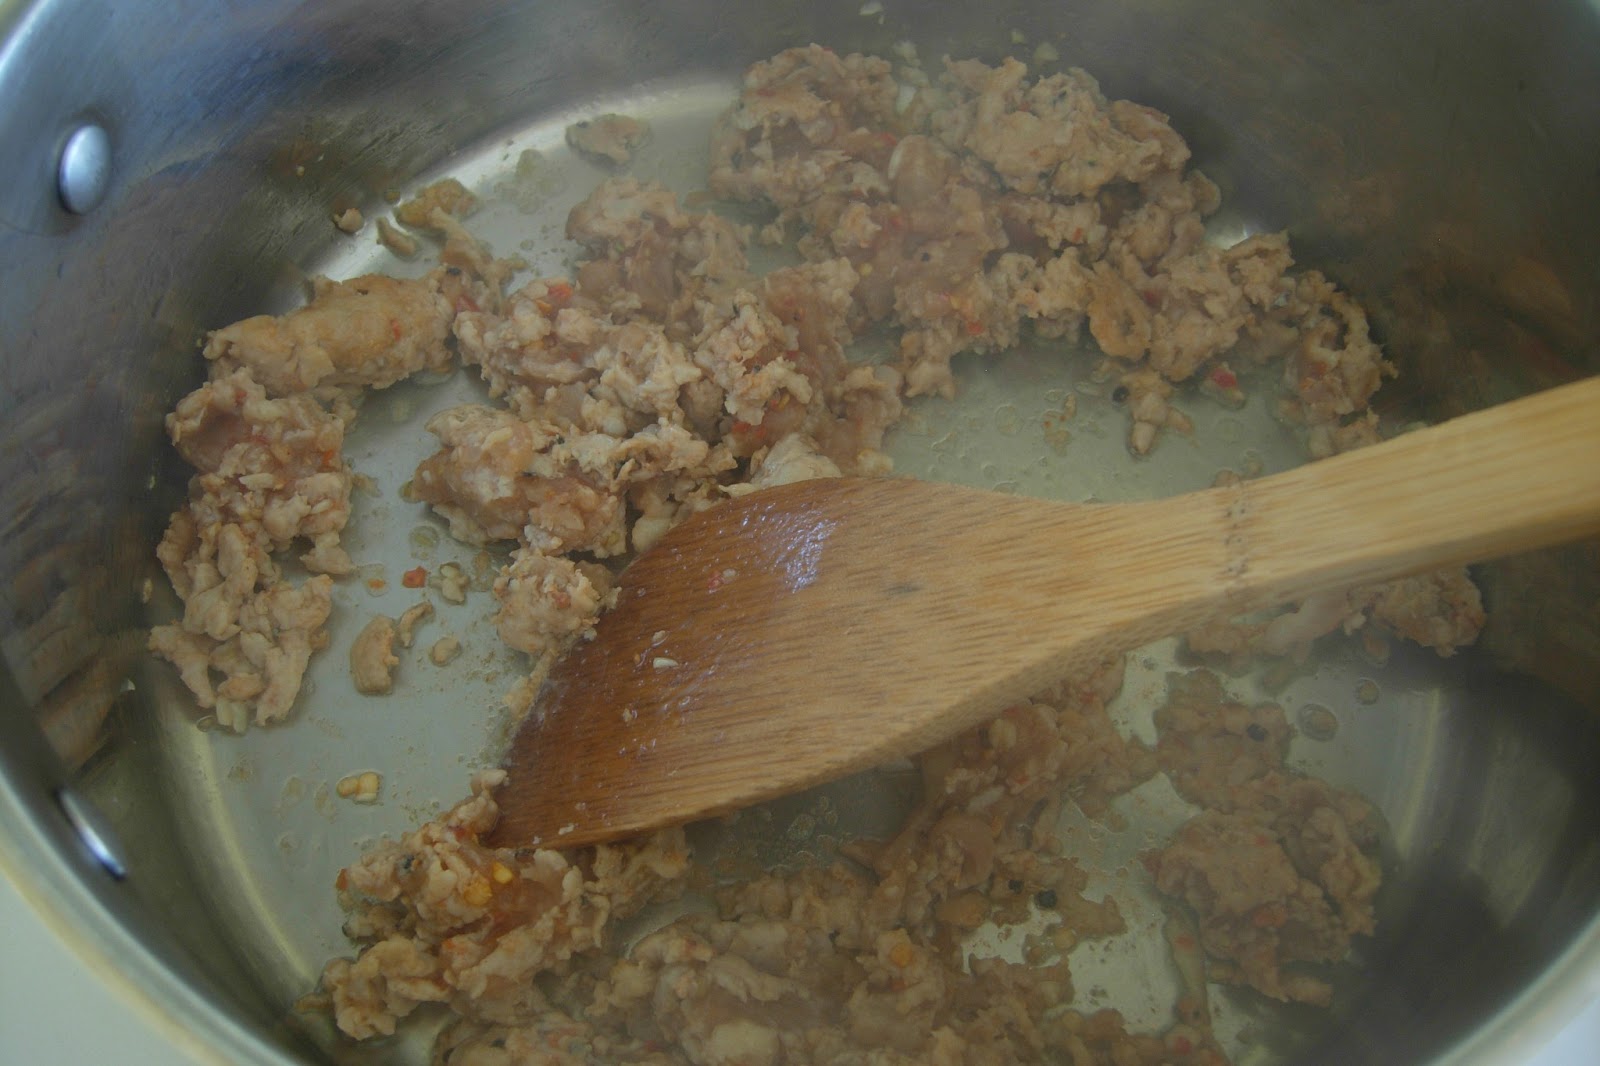
My original intention was to fry up some sausage links (cut into coins) until they were nice and crispy and use them like croutons on top of the soup.  However, I bought some "homemade" sausage that is made in-house at my grocery.  I love that the meat department cases the bulk sausage they make because it is a very fresh option.  I have made sausage in school, and it is a pain in the butt, so I can empathize with their efforts...because the sausage they made was not cased well at all.  There was a lot of air within the casing, so the sausage was loose and impossible to cut into coins.  What I realized (too late) was that boiling or frying the sausage links whole would have firmed up the meat and allowed for me to cut them.  Instead, I opened the casings and sauteed up the meat inside.  This won't be an issue if you buy pre-made sausage, but I mention it because you could use both pre-made cased sausage or bulk sausage for this recipe.

I also wanted to mention that I used chicken sausage.  I buy this because we don't eat pork, but I have to admit that it is quite inferior to pork sausage for one main reason: fat.  Pork sausage has a LOT of lard in it.  I know, I've made it.  Most sausage recipes are almost 1 to 1 meat and fat.  This makes them, of course, delectable, and also allows for them to be fried until they are brown and crispy.  Chicken sausage, on the other hand, has very little fat in it.  Plus, poultry fat just doesn't hold up well to cooking.  It is thin and watery, and does not stand up to frying.  So, when I fried my chicken sausage, it didn't become crispy.  The taste was good, but the texture was slightly rubbery which was odd in the smooth, silky soup.  However, I don't want to give up.  I think I need to boil the cased sausage until it's firm, then cut the link into coins and fry them again in oil.

I'm always fascinated by how one ingredient can change a whole dish.  In this case, I did not succeed at making a lovely, crispy sausage crouton.  So, I recommend if you're interested in making this dish (and you eat pork), use a pork sausage.  Or use the sausage in a totally different way.  Tiny sausage meatballs would be great, or don't put sausage in the soup...you could instead put it on garlic toast to accompany the soup.  

T.E.A.'s Potato Leek Soup with Spicy Sausage

1/2 pound spicy chicken sausage
olive or coconut oil, as needed for frying
2 leeks (about 2 full cups), cleaned well and sliced thin
3 medium potatoes, but into bite sized cubes (I used a yellow, waxy potato so I could keep the skin on.  If you use russet potatoes, you have to peel them)
2 TB garlic, minced
1 quart chicken broth plus more water if needed
salt and pepper to taste


NOTE: to keep your potatoes from turning brown/pink while you cook, immerse them in water.  They will stay fresh until you're ready to use them!


1. In a large soup pot, heat a little oil on medium high heat.  Add in sausage and saute until cooked through, about 5-8 minutes.


2. Remove sausage and any extra fat, and set aside and keep warm.


3. Add in leeks to pot and saute until wilted and soft, about 8 minutes.


4. Add in garlic, saute 1 minute or until fragrant.


5. Add in potatoes, chicken broth, and a sprinkle of salt.  Bring to a boil, reduce to a simmer and cook until potatoes are tender.


6.  Turn off heat and strain solids from broth.  Keep the broth and set aside.  Add solids to a food processor and puree until silky smooth, adding in broth when necessary.


7.  Add pureed mixture back into broth, and stir until smooth.
8.  Add in sausage and warm soup back up or garnish with warm sausage.


Friday, March 1, 2013

Gluten Free Brownies

I thought I was going to have to write this recipe off as a failure.  Yet, when I talked to my husband about it, I admitted that I didn't follow the recipe to the letter.  In fact, I added in things that I knew might prove to be a mistake.  How un-scientific of me to write off a recipe when it hasn't been tested properly!

I found this recipe on a cute little blog (http://barefeetinthekitchen.blogspot.com/2013/02/dark-chocolate-brownies-gluten-free-casein-free-recipe.html) and it was exactly what I had been looking for.  In my quest to find low-carb alternatives to tried and true favorites, I wanted a great gluten-free brownie recipe.  I had found a vegan brownie recipe, and although it proved tasty, it was also heavy on the wheat flour.  This recipe, on the other hand, uses almond and sorghum flour.  My first question was "What is sorghum flour?"  I didn't google it, but I did look at the Bob's Red Mill section of my grocery trying to find it.  They have a huge selection of GF (gluten-free) options, as well as many nut flours, but I could not find sorghum.  However, I was not fazed because I knew I could find an alternative.  My first thought was ground flax seed!  I have been using ground flax meal in smoothies and granola for a few weeks now, and since I heard it could be an egg-replacer (because it congeals when cooked), I thought it might be a good ingredient to hold the brownies together.  The recipe called for 1/2 cup almond meal and 1/2 cup sorghum flour, so I just substituted 1/2 cup flax meal for the sorghum.  I had no idea if this would work, but I was delusionally confident that the brownies would be delicious.  That was my first mistake.

My second mistake I'm not going to take full credit for because cooking times can be very inconsistent when baking.  The recipe might call for a certain temperature and time, but if your oven is on the cold (or hot) side, your temp and time will not be the same.  You must get to know your oven intimately in order to judge how long your baked goods will take.  This recipe said that these brownies need to be cooked for 30-35 minutes.  I know I have a good, hot oven, and most of my baked goods take less time than most.  I decided to set the timer for 25 minutes thinking that would give me enough time to catch the brownies before they overcooked.  Twenty-five minutes was, unfortunately, too long.  The brownies were not burnt, but the edges got very dark, and the overall consistency was dry.  I should have known better because this recipe only makes enough batter to fill a 9" cake pan half-way, which means it shouldn't take long to cook.

The consistency was also very chewy...which was due to the flax meal.  Although my spice/coffee grinder grinds the seeds very fine, flax seeds have a very thick outer shell which doesn't break down easily.  It just breaks down into smaller, chewy bits.  In small amounts, this is nothing to worry about...it just means your getting your daily dose of fiber.  But in large amounts, like these brownies, the flax meal was overly chewy and stuck in our teeth unpleasantly.

Initially, like I said, I wasn't sure this recipe would be something I would try again.  But despite the less pleasant texture, the flavor was actually really good.  I just wanted a softer, gooey brownie.  Last night, I was craving chocolate again, so I gave this recipe another shot.  Instead of adding so much flax meal, I concentrated on making nice, soft almond meal to make up most of the flour bulk.  I used my spice grinder to grind the almonds fine (though a food processor might also work) like the first time, but added in 3/4 cup almond meal to 1/4 cup flax meal.  I also cooked them for less time, about 15 minutes.

As I said, I made these last night.  As of 10am this morning, they were all gone.  They were that good.  I fixed my mistakes, and produced a thin, but soft, gooey, luscious brownie.

Would sorghum have produced a perfect brownie to begin with? Probably. But that's not what I'm about.  I like using what I have and seeing what new combinations can be made because you might discover something delectable!


T.E.A.'s Gluten Free Brownies
(adapted from Barefeet in the Kitchen)

1 cup dark chocolate chips (I use 60% chocolate)
1/2 cup coconut oil
3/4 cup almond meal (homemade by grinding whole, unsalted almonds into a fine meal)
1/4 cup flax meal (ground like the almonds)
3/4 cup brown sugar
1/2 tsp salt
1/4 tsp baking soda
2 eggs
1 tsp vanilla

Equipment:

9" cake pan
spice/coffee grinder or food processor
double boiler or microwave

1. Heat oven to 350F.  Oil a 9" cake pan with non-stick spray.
2. In a heat-proof bowl, melt chocolate chips and coconut oil over a double boiler or in the microwave. (If using the microwave, heat 30 seconds at a time, and stir in between to make sure chocolate does not burn)


3.  Combine all dry ingredient in a medium bowl and stir to combine.


4. Mix eggs and vanilla. Pour egg and chocolate mixtures into dry mixture and mix thoroughly.


5. Pour batter into oiled cake pan and bake for about 15 mins or until a toothpick comes out clean.
6.  Cool and enjoy.  These are also good chilled in the fridge!


This was my first batch.  They look ok, but were dry and chewy.  My second batch is below....SO much better!


ENJOY! :)

Thursday, February 28, 2013

Bacon, Beans, and Brussels

I really love this site: http://www.tastespotting.com/.  Not only are there beautiful pictures of food (that always make me hungry), but it is a great overview of all the food blogs out there.  It is one of the best sources of inspiration I have.  Last week, I was feeling a bit "dry" creatively, but after drooling over a couple pages of Tastespotting, I was able to find several recipes that I wanted to try and was able to easily create the week's menu.  The paleo pizza was the one I was most excited about, but I also found this recipe: (http://relish.com/recipes/great-northerns-with-leeks-and-bacon/).  It seemed super simple, but possibly a robust, deeply-flavored dinner.  Since Brussels sprouts and leeks are in season, they are abundant and cheap, so I bought a lot of both to make a huge pot of beans and Brussels.  Although we don't eat pork in our household, our friend introduced us to some yummy turkey bacon that I used in place of regular bacon.  It isn't as fatty, so mine did not fry up as crispy as I would have liked, but the flavor was what was important anyway.  I changed some of the components and added in a little vinegar and so I deem this recipe a success!  It made a great hot slaw dinner for us yesterday, but I also think this is a perfect side dish to just about anything.  It would be great with steak and mashed potatoes, or pork chops and applesauce!


T.E.A.'s Hot Brussels Sprouts Slaw
makes about 2 quarts

1 package Turkey bacon (about 10 slices), cut into strips
2 leeks, split lengthwise and sliced thin (see note below)
4-6 cups Brussels sprouts, shredded
1 TB garlic, fine mince
2-4 TB apple cinder vinegar
2 cups northern beans, cooked
salt and pepper to taste
olive oil as needed
water as needed

NOTE: It is important to wash leeks very well.  A lot of sand and dirt can get trapped between the layers.  Cut the leek lengthwise (without trimming the root...that will hold the layers together), then run the leek half under running water while peeling back the layers.  This should wash out all the trapped dirt.  Once washed, trim off the root end and the green part.  Only use the white, tender part of the leek...the green part is tough and bitter.


1. Wash leeks and Brussels sprouts and shred both in a large bowl.  I found slicing the Brussels sprouts in half, then slicing them easier than trying to cut them whole.


Leeks are one of my favorite vegetables.  They have a very mild, onion-y favor.  


Wash the Brussels well and peel of the outer layers if they seem brown or wilty.


2.  In a large pot or skillet, heat a little olive oil on medium high heat.  If you're using regular bacon, you can probably skip this step.  Add in bacon and fry until golden and crispy.  Take out of the pot and drain on paper towels.


3.  Put the pot back on the heat (adding more olive oil as necessary) and add in Brussels, leeks, and garlic.  Stir in the vinegar and a little water if needed.  Saute until wilted and soft, about 5-8 minutes, but still green and fresh looking. 


4. Add in beans and bacon and cook until all ingredients are warmed through.
5. Serve warm and enjoy!


UPDATE: My New Favorite Breakfast!

So, this isn't really anything new, but it is improved!  I have been doing research lately on Indian cuisine and I found a recipe that combines cabbage and chickpea flour into a fritter, much like the falafel I make for breakfast.  I had to try it out.  I keep cabbage in my fridge most of the time because it makes a great salad, or garnish, or addition to soups.  I just happened to have a dry salad (meaning no dressing) of shredded green cabbage, cilantro, and green onion in the fridge, so I put it in my falafel fritters one morning.  It is now our new, improved favorite breakfast!  The texture of the cabbage is great, plus the added flavor of the herbs and onions makes the fritters delectable.  After I added on some olive hummus (chickpeas two ways, haha), arugula, and a fried egg, I was in heaven.

T.E.A.'s New and Improved Falafel Breakfast Fritters
makes 4 medium fritters

1 cup chickpea flour
1 cup shredded green cabbage
1 TB chopped cilantro
1 TB chopped green onion
1/4 tsp paprika
1/4-1/2 tsp cayenne (if you like it spicy)
1 tsp lemon juice (or apple cider vinegar or rice vinegar)
salt to taste

Garnish:
1 cup arugula
1 TB olive hummus 
fried egg

I've already done these recipes, so you can see them here: http://theexperimentalalchemist.blogspot.com/2013/02/lets-garbonzo.html

Just add in the new ingredients and Enjoy!


Wednesday, February 27, 2013

Paleo Pizza


I've noticed that this "Paleo Diet" is really in style now.  Even friends I did not expect to be into diets are getting on board.  Like I said earlier, I'm not into "dieting," but I have done some nutrition research that indicates a low-carb diet is very beneficial..  This article is a short, but valuable overview of some of the latest nutrition findings: http://io9.com/5984275/the-worst-lies-that-mainstream-nutrition-has-told-you.  For that reason, I've been searching for recipes that provide me with the flavors and textures that I'm used to, but use little to no grains, even whole grains.  I've been finding more and more "paleo" recipes that are finding fun ways to skirt around carbs.  I recently found this Paleo Pizza recipe online and decided to try it out.  It uses cauliflower as the main ingredient in the crust instead of flour.  I have experimented with cauliflower in place of rice, and it actually, in my opinion, is a perfect substitute.  Tender, al dente cauliflower nibblets are almost synonymous to the texture of rice, plus cauliflower has the same, neutral flavor.  So, I couldn't help but think that, if done well, it would be a good substitute for a crust.  Also, I was excited about the toppings of this pizza because they are some of my favorites: olives, capers, anchovies.

The crust in the original recipe, however, contained mozzarella.  Since I don't eat dairy, and "fake cheese" is not a good substitute for the stringy texture of melted mozzarella, I decided to exclude cheese from the recipe altogether.  Because of this, I added in more egg to make sure that the cauliflower would stay together.  The end product was...well, not a great success in the sense that it wasn't at all like pizza crust.  It was more like a cauliflower omelet.  In hindsight, one egg might have held the cauliflower together and allowed for the crust to become crispy.  My other downfall was not drying out the cauliflower completely.  The original recipe made a point to say that the cauliflower needed to be very dry in order to work properly. I promptly ignored this, thinking it would be fine.  It, clearly, was not.  

Despite my downfalls, though, I actually would recommend trying this out.  Don't expect it to be a perfect substitute for crispy, gooey pizza goodness...that's not what it is about.  But is is a healthy dinner option that is fun and easy to make, and with all the delicious toppings, it has more than enough flavor to satisfy.  I know that I will be making this again, but next time, I'll try one egg, and super dry cauliflower.  Or maybe it will just evolve into Omelet Pizza and leave it at that! :)


Original Paleo Pizza Recipe
From: http://www.theironyou.com/2013/02/paleo-pizza-marinara.html

Crust

1 medium head cauliflower, cut into small florets
½ cup / 1.7 oz / 50 gr light mozzarella, shredded
1 large egg, lightly beaten
½ teaspoon fine grain sea salt
pinch of black pepper

Topping 

3 ladlefuls tomato sauce
3 tablespoons green olives, sliced
3 tablespoons black olives, sliced
1 tablespoon capers
1 tablespoon oregano
anchovy fillets (optional)
Olive oil as needed

Preheat oven to 450°F (220°C). Place a rack in the middle. Line with parchment paper a baking sheet and lightly grease it with olive oil.
In a food processor rice the cauliflower (not puree, rice grain size crumbles). Transfer to a microwave dish and microwave on high for around 8 minutes or until cooked.
Place the cauliflower rice in a colander, and with the help of a large spoon squeeze as much moisture out as you can. This is very important. The cauliflower needs to be dry. Otherwise you’ll end up with a mushy dough; not a crusty one. Alternatively you can place the cauliflower rice in a tea towel and twist it to squeeze out the moisture.
In a large bowl mix the cauliflower, egg, mozzarella, oregano, salt and pepper until well combined. 
Press the mixture onto the baking sheet. Bake for 15 to 20 minutes or until golden.
Remove from the oven and let cool from 5 minutes.
Spread tomato sauce evenly on the dough; top with sliced olives, capers and anchovies (if using). Sprinkle oregano on top and drizzle with olive oil. Bake in the oven for about 10 minutes.
Serve warm.


T.E.A's Version of Paleo Pizza

Crust:
1/2 head cauliflower, cut into florets
2 eggs 
salt and pepper to taste
optional: herbs of choice

Toppings:
1 cup tomato sauce (recipe below)
1/2 cup green and black olives, sliced
1/4 cup capers
1/4 cup anchovy fillets (I used the really yummy Turkish anchovies that I used for Pasta Puttanesca)
fresh arugula for garnish

1. Add cauliflower florets into a food processor and pulse until cauliflower resembles coarse meal.  In a bowl combine cauliflower, eggs, and seasoning.  Heat oven to 450F.


2. Line a baking sheet with parchment and oil with non-stick spray.
3. Pour cauliflower mixture onto parchment and spread out until about 1/2 inch thick.
4. Bake for 15-20 minutes until golden.


5.  Add on toppings, then put back into the oven until warm.


6.  Top with arugula and enjoy!


Tomato Sauce:

I decided I wanted something quick and easy, so I just threw some things together.  Plus, the toppings are strongly flavored and salty, so the sauce doesn't have to be overly complicated.

1 cup pureed canned tomatoes
1 tsp garlic, fine mince
sprinkle of dried oregano
salt and pepper to taste

Add all ingredients into a small saucepan.  Heat to a simmer.  Season to taste.   Use warm on pizza.