Wednesday, May 22, 2013

The Potato Pancake

My mother-in-law asked me to post this recipe months ago because when she visited this winter, I would make potato pancakes with fried eggs for breakfast every morning.  Well, this recipe is a bit overdue, but here it is!
Potato pancakes are one of my favorite breakfast foods, but I love them so much because they are much more than just breakfast.  There are so many different things that you can flavor or top them with to make them fabulous.  Here are a few tips on how to make a great potato pancake!

Picking your potato:

In this recipe, I used a sweet potato.  Well, it was called a Jewel yam in the store, but it is really just a different type of sweet potato with reddish skin, and bright orange meat. There are two great reasons to use sweet potatoes instead of your normal waxy or starchy potato.  First of all, sweet potatoes are packed with vitamins and minerals and they are fairly low on the glycemic index.  In other words, they are super healthy for you!  Secondly, sweet potatoes are extremely flavorful all by themselves.  They are rich and buttery and pair well with both sweet and savory ingredients.  I made a savory sweet potato pancake, however the full-bodied sweetness of the potato still shone through, so the flavor was wonderfully complex.


NOTE: If you're interested in the difference between a yam and a sweet potato, here are two interesting articles:
 http://www.marksdailyapple.com/difference-yams-sweet-potatoes/#axzz2U3JA1Woe
http://voices.yahoo.com/yam-vs-sweet-potato-nutrition-health-benefits-compared-2643896.html?cat=22

However, using regular potatoes is just as delicious.  You have a choice between a starchy potato which is drier and will be flaky inside when cooked (think baked potato) or waxy potato which is juicier and holds together when cooked (think red potato).  Both could work in this context, but I usually go for waxy potatoes because their skin is usually much thinner which is easier to eat.  A lot of the nutrients in a potato are in the skin, so I never like to waste it!  The only downside to waxy potatoes is that they can become gummy when overcooked.  This can potentially make your pancakes gooey inside if they are too thick, and you wouldn't want to use them for mashed potatoes because you'd end up with glue.  In this context, the potatoes are fried quickly and in a very thin layer, so either option should work just fine.

What to add:

I like my potato pancakes savory, so I added in some curry powder to spice them up.  However, there are so many ways to make your potato pancake special.  Many sweet or savory ingredients can be added to them, and you can also be creative with toppings! Here are a few combinations that I came up with to show you what's possible:

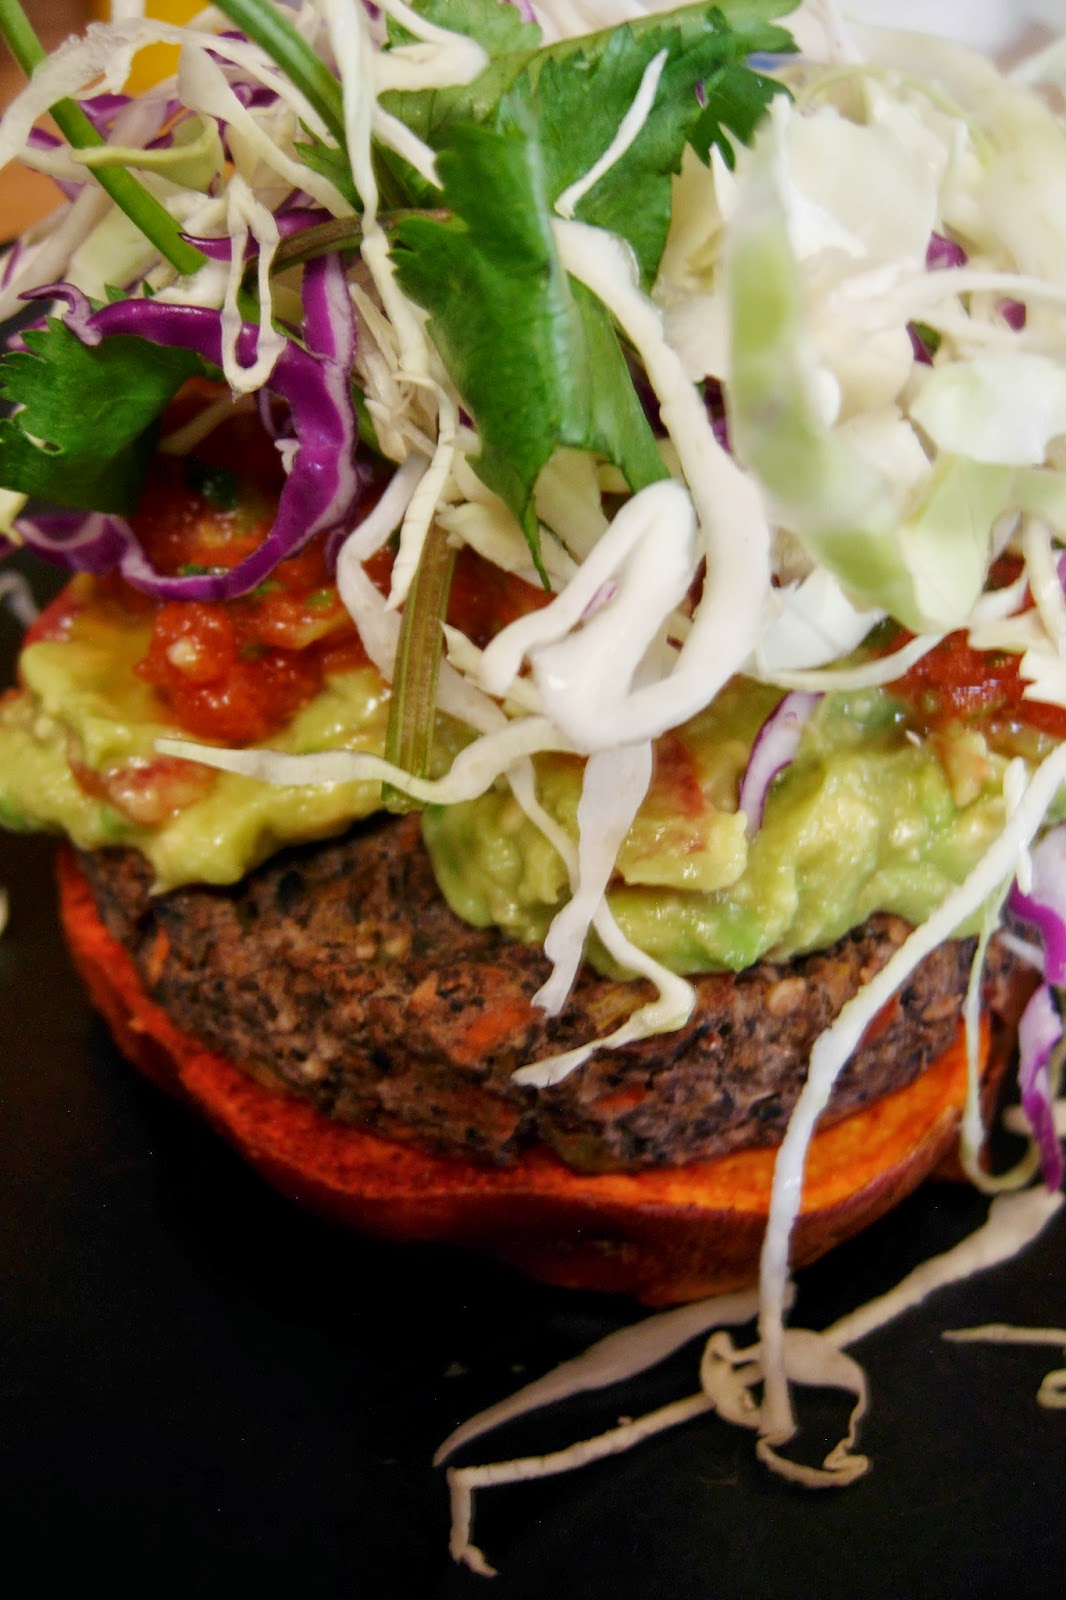
1. sweet potato pancake with curry powder, fresh cilantro, and chopped green onion topped with a fried egg

2. waxy potato pancake with chopped parsley and chives, a little lemon juice, topped with sour cream

3. sweet potato pancake with brown sugar and cinnamon topped with apple sauce

Here's a list of ingredients that you can add into the pancake batter:

-spices: curry powder, chili powder, sweet and smoked paprika, garam masala, cinnamon
-herbs: cilantro, parsley, chives, thyme, basil
-green onion
-minced garlic, ginger, or hot pepper
-lemon or lime juice
-cheese: cheddar, blue cheese, feta
-fried, crumbled bacon

List of toppings:

salsa
guacamole
fried or scrambled egg
sour cream
apple sauce
pesto
fresh greens: arugula, watercress, mixed baby salad greens
honey
yogurt
fresh berries
bacon or sausage

Here's the recipe that I made today.  The technique is the same for whatever potato you choose, and whichever ingredients you wish to put into the pancake.  They are basically just shredded potatoes with a little flour and egg, then pan-fried to delicious golden-y goodness!

T.E.A's Sweet Potato Pancakes
gluten-free version
makes 2 medium pancakes

1 cup shredded sweet potato with skin (a cheese grater or mandolin works great for this)
1 egg
2 TB garbanzo bean flour (you can substitute wheat flour)
1 tsp curry powder
1/4 tsp salt or to taste
oil for frying (I used a combination of coconut and olive oil)

1. Add all ingredients in a bowl.  Stir until combined.  The batter should not be too wet or dry. Adjust flour amount if necessary.


2. Heat a medium or large skillet on medium high heat.  Add in enough oil to cover the bottom of the pan.  When oil is shimmering, pour in pancakes.  Each pancake will be 1/2 cup of batter each.  Flatten each pancake with a fork to make sure it will cook evenly.


This is a fish spatula and I use it everyday...for everything.  I would highly recommend investing in one!


3. When the edges of the pancake start to brown, flip it over.  When each side is nicely golden, place pancakes on paper towels to drain.


4. Serve immediately or keep in a warm oven until ready to eat.  These will refrigerate, but they aren't nearly as good re-heated!


mmm...breakfast!  A couple fried eggs and a quenelle of guacasalsa...yum!
ENJOY!


Tuesday, May 21, 2013

Special Sauce

So, I set out yesterday to make some lemony tahini chicken and ended up creating the most delicious sauce ever.  Ha! :)  Well, ok, one of the most delicious sauces...and I can't take full credit for it because it was inspired by the cuisines I love the most: Mediterranean, Spanish, and Indian.  All three of these use simple, yet intense flavors.  Citrus juice, rich olive oil, raw garlic, plenty of roughly chopped herbs, and bold dashes of spices make each dish enticing.  These flavors go perfectly with hot summer days, and fresh summer produce!


The sauce I made uses a combination of these flavors and can complement a wide range of foods.  I slathered it on some chicken breasts, and baked them so the sauce formed a nice, golden crust.  However, I served the chicken on a bed of sauteed greens and veggies, and I realized that this sauce would be excellent on veggies, or even as a thick, coleslaw-like dressing for salads (or you can always put more liquid in for runnier sauces).  It would also go perfectly with seafood...I could see it as a perfect topping for shrimp tacos!
So, what is this "special sauce" you ask?  It's so simple: olive oil, tahini, lemon juice, garlic, curry powder, and salt.  It has the right balance of acid, fat, toasty-roasty umami (from the tahini), and spice!  It isn't spicy as in "hot," but it does pack in a lot of flavor.  Add in a little more cayenne, and you have yourself some spicy special sauce.  
I would recommend making it with the ingredients listed, however, I was thinking that smooth peanut butter might also work in place of tahini.  The only main difference between peanut butter and tahini (beside being made from peanuts or sesame seeds) is that tahini is much more savory than peanut butter.  To me, tahini picks up more roasted flavor from the sesame seeds, and so tastes more smoky than peanut butter.  Peanut butter is naturally more sweet, and so will create a sweeter sauce.  I have learned, though, especially with Asian cuisines that peanuts and peanut butter are delicious in savory dishes, so I think it would work in this context as well.
Also, as a side note, when you are buying tahini, try to get it unsalted.  That way you have full control over the salt content in your sauce.  Same with peanut butter: look at the label and check to see how much salt and sugar are added.  You might be surprised what is actually in your peanut butter besides peanuts! 

T.E.A.'s Lemon Tahini Sauce
makes about 1 cup or enough to cover 2 large chicken breasts

2 TB good quality olive oil
3-4 TB tahini 
juice of 1 lemon (about 3 TB)
1-2 cloves garlic, finely minced (I use a microplane for a super fine mince)
1 tsp curry powder (recipe here...scroll to the bottom of the page)
salt to taste

1. In a small bowl, whisk all ingredients, except salt, into a smooth, thick sauce.  Add more olive oil or lemon juice to adjust consistency.  Taste, and add salt as needed.

NOTE: Because meat needs to be well-salted, I added at least 1 tsp of salt to this sauce because I knew I was using it on chicken.  The sauce might need less depending on what it is used for.


Uses for sauce:

1. Slather on chicken breasts.  Bake at 400F for about 25 mins or until cooked through, but still juicy.


This sauce makes a beautiful, golden crust.

2.  Pour over sauteed or grilled veggies to make them pop!  Broccoli, green beans, kale, eggplant, and cauliflower would be perfect.


3. Use as a sauce over any red meat or seafood...lamb would be delicious.
4. Dilute sauce with a little lemon juice or olive oil and use as a salad dressing.
5. ENJOY! :)


Thursday, May 16, 2013

The Bun-less Burger

Bun-less black bean burgers are delicious! OK, so I've posted about black bean burgers before, but last night I discovered an even better way to eat them! In an effort to make a bun-less burger, I discovered the most fantastic bread substitute: sweet potato disks.  Basically, this is the same concept as having sweet potato fries with your burger, but using them as buns allows for stupendous stacking! 


This recipe is also a great example of how to get all different colored veggies into one meal.  It is not only super healthy and incredibly tasty, but also beautiful!

Sweet Potato "Buns" and/or Fries
Makes about 6 "buns"

1 large sweet potato or yam
olive oil
1 tsp paprika
1/2 tsp cayenne (or more if you like spicy!)
1-2 pinches smoked paprika, optional
salt and pepper to taste

1. Preheat oven to 400F. Wash the sweet potato, then cut into 1/2" disks.  For fries: cut disks into long, thick strips.


2. Oil the bottom of a casserole dish or baking sheet.  Place disks or fried onto dish and pour on 2-4 TB olive oil.  Sprinkle on spices and seasonings.  For fries: toss until well coated on all sides.


3. Bake uncovered until soft and slightly browned, about 25-30 mins.


Bun-less Black Bean Burgers
Makes 6 burgers

6 sweet potato "buns"
6 black bean burgers (recipe here)

Use a large round cookie cutter to make your burgers look professional!  Using fun-shaped cutters would be really fun for kids! :)


2 cups salsa
1 cup guacamole (avocado, minced garlic, juice of 1 lime, diced tomato, salt to taste)
cabbage slaw (red and green shredded cabbage with a little chopped cilantro)

Stack together and ENJOY! :)


Wednesday, May 15, 2013

Chocolate Pudding (It's vegan, ya'll!)

Searching on the Internet for vegan, dairy-free, grain-free, and low-sugar recipes brings up a lot of ridiculous foods.  Most of the them I discard because gluten-free bakers like to use a lot of weird flours, powders, and gums. Many of the grain-free recipes go to great lengths...using nuts or dried fruits or even ground meats in place of breads and crusts.  These recipes make me smile because they seem so outlandish, but when I look closer, some of them have real culinary potential.  I love that people all around the world are analyzing and learning and creating great (and some not so great) foods.  I named this blog the "experimental alchemist" because that's what I love doing, too!  I am one of millions of culinary alchemists who are always looking for the next great combination of flavors, or savvy cooking techniques, or trying to use familiar ingredients in mind-bending ways.

So, my newest dessert experiment was chocolate pudding made with white beans.  Now the recipe below might not sound that weird or different, but I thought it was a good example of vegan creativity.  And it fits my criteria: grain-free and low sugar desserts.  Although I think it's pretty cool, I'm not convinced it will win over the less-daring eaters.  I have to say that I love beans (we eat a lot of them...I'm making black bean burgers again today!), but as a dessert...?  For me, the texture of beans is fabulous in some applications, but when I'm expecting a creamy, smooth chocolate mousse, the mealy texture of beans just can't compete.  

Now, before I totally sell this recipe short, I have to say that I don't own a blender, and a food processor just can't puree the beans smooth enough for my liking.  I believe strongly that to make this recipe great, a blender is essential.  There is no other way to get the silky texture that I desire.  

On the bright side, this pudding is actually kind of delicious.  I was surprised at how is tasted...just like chocolate pudding.  Despite the slightly mealy texture caused by my food processor, this pudding was almost like chocolate mousse!  It was rich and slightly airy.  So, all in all, I actually would recommend trying this one out!

What I would change about this recipe:

1. Use a blender!!!!
2. Add in a little coconut oil (maybe 1-2 TB), melted, to give it that nice, smooth mouth feel.
3. Use a little less sugar.  I found the chocolate I used to be perfectly sweet without any addition.  But this is up to individual taste!

White Bean Chocolate Pudding
(adapted from HeathfulPursuit: http://www.healthfulpursuit.com/2013/02/vegan-chocolate-pudding-soy-free-nut-free-cookbook-news/)
makes about 4 small pudding cups

1 1/2 cup cooked white navy beans
about 1/2 cup non-dairy milk
1 cup dark chocolate chips 
1 TB brown sugar (Though I would probably use about 1 tsp next time)
pinch of salt
1 tsp vanilla extract
1 tsp coffee extract, optional

Other additions: I have not tried these, but they sound good :)

fresh mint
peanut butter swirl
jam swirl
pinch of cardamom, ground
nuts or dried fruit
granola topping
vanilla yogurt

1. In a blender or food processor, add in beans, milk, salt, and extracts.  Blend until very smooth and silky.  Add more milk as necessary.


2. Heat a double boiler (a sauce pan with water in the bottom and a stainless steel or glass bowl on top).  Add in chocolate and sugar.  Melt chocolate and stir until sugar is dissolved.  


OR
In a microwave safe bowl, add in chocolate and sugar.  Heat in the microwave 30 secs at a time, stirring between each heating, until chocolate is melted and sugar is dissolved.  (Watch the chocolate!! This method makes it easy for the chocolate to burn!)


3. Add melted chocolate to bean mixture and stir until well combined.  Pour pudding into pudding cups and cover with plastic wrap.  Refrigerate until set, about 1-2 hours (this pudding tasted even better overnight!).  Will keep in the fridge for about 3 days.


Being slightly less messy that me would be good! Haha!  Enjoy! :)


Tuesday, May 14, 2013

Cauliflower Tabbouleh

Tabbouleh is one of my favorite dishes.  I used to make it all the time because it is easy, fresh, and tastes delicious either hot or cold.  Tabbouleh is a salad consisting of Bulgar (cracked wheat), lemon juice, olive oil, garlic, diced veggies, and herbs.  I've been craving it now that the weather is hot.  However, I have been trying hard to find grain alternatives the past few months.  Sometimes, this means that I have to forgo some of my favorite foods...but sometimes, I discover an alternative that is even better (or at least as good) than the original!  In this case, I used cauliflower bits in place of Bulgar with great success.


I've been experimenting with cauliflower as an alternative to rice.  I have found that it is just the size and texture that I'm looking for.  Plus, I have found it easier to prep than rice!  There are two ways of preparation that I've tried: raw and quickly blanched.  For the raw cauliflower prep, I just wash and cut the cauliflower into florets, then quickly pulse it in a food processor until it is the size of rice.  I prefer the raw version in Tabbouleh because the texture is crunchier.  If you want a softer version of cauliflower rice, you can quickly blanch the cauliflower bits in boiling, salted water for about 1 minute.  This preparation is better for hot dishes, though it would be good if you want your Tabbouleh to be a warm side salad.

As you can see from the recipe below, there are many ingredients that you can add to make your salad even more amazing.  My version is relatively simple.  When I make it next time, I will add more veggies!

Cauliflower Tabbouleh

1 head cauliflower
1/4 cup (give or take) good quality olive oil
juice of 1 lemon
1 clove garlic, minced
1/2 cup black olives, chopped
1/2 cup green onion, chopped
large handful fresh Italian parsley, chopped
salt and pepper to taste


Other Delicious Additions:

1/2 cup fresh or roasted red bell pepper, diced
1/2 cup cucumber, diced
1 cup fresh tomato, seeded and diced
fresh mint, chopped
sweet or smoked paprika

Raw Preperation:

1. Wash cauliflower and cut into florets (about 1" large dice...otherwise they will be too big to process).  Add florets into a food processor and pulse until cauliflower is in rice-sized bits.  Pour into a large bowl.


2. Add lemon juice, olives, green onion, garlic, and parsely into cauliflower and toss to combine.  Pour enough olive oil in to coat all ingredients (this will be about 1/4 cup, but I would recommend pouring in a little bit at a time until you're happy with the taste).  Taste and season with salt and pepper as needed.


3. Serve cold.  Can be kept in the refrigerator for about 5 days.


Hot Preperation:

1. Wash cauliflower and cut into florets (about 1" large dice...otherwise they will be too big to process).  Add florets into a food processor and pulse until cauliflower is in rice-sized bits.
2. In a large pot of boiling, salted (like the ocean) water, add in cauliflower bits and blanch for about 1 min or until softened.  Drain immediately and set aside.
3. In a large skillet, heat olive oil (about 2-4 TB) on medium heat .  Add in green onion, olives, garlic, and parsley.  Stir until warmed.  Add in cauliflower and toss to combine.  Pour in lemon juice.  Stir until all ingredients are warmed through, about 2-3 minutes.  Do not overcook or brown.  Taste and season with salt or pepper as needed.
4. Serve immediately.  Can be cooled and kept in the fridge for about 5 days.

This also makes a great garnish for eggy breakfast!


ENJOY! :)

Friday, May 10, 2013

Easy Extracts

So...my posts have been a little slow this week because I caught a cold earlier in the week which upset me greatly.  I mean, who gets a cold in the middle of May?  When the weather outside is perfectly warm and balmy?  Everyone, according to the checkout lady at the grocery.  She informed me that many people were coming in buying cold medicine.  So, I was just one of the unlucky few.  Thankfully, I have found a really effective cold remedy...cleaning out my ears with hydrogen peroxide.  This might seem a little weird, but I have found that this method is used to clean out earwax, but it has also been shown to lessen the duration of colds.  Now, don't automatically take my word for it (do some googling or research or better yet, ask a doctor!), but I have found that cleaning my ears dramatically reduces my cold symptoms and duration.  Just 10 mins on each side once or twice a day.  I guess it makes sense because your eye, nose, and ears are all connected.
The other bit of drama was that my dog had another anaphylactic reaction in the middle of the night.  By the morning, he was covered in big hives.  He had a similar reaction last summer after being stung by a bee, and the vet thinks it was a spider or ant...I had no idea an ant could cause such a reaction!  Thankfully, though, after some steroids and a lot of benadryl, he is back to his old grumpy self!


Because of my slight illness, I have been cooking more simply this week.  Some chili (sooo comforting when you have a cold!), some lasagna with zucchini noodles (also comforting), and my easy fall back: stir fry salad.  So, unfortunately, I don't have a full meal to share with you.  However, I've been wanting to share a little tip with you which is both fun and will save you money: how to make your own vanilla and coffee extracts!

I don't know about you, but I like to buy organic vanilla extract.  Yet, this scruple of mine is not always kind on my wallet.  The extract available at the store is about 10 bucks for 3 oz.  That is just totally ridiculous.  I mean, why is it so darn expensive?  Well, for one, vanilla beans, in general, are very expensive.  Plus, if they are using organic alcohol, that also adds on the dollars.  I knew there had to be a better solution, so I set out to make it myself.

When I was in baking class, we learned three great ways to use vanilla beans.  Since they are terribly expensive (over a dollar each), you want to make sure that you're getting your full money's worth.  The three best ways to use a vanilla bean are using the fresh beans, adding them to sugar, and adding them to alcohol.  One vanilla bean can go through each of these processes and so could last for years!

When I set out to make my extract, I found whole vanilla beans in bulk.  They were on sale for 99 cents each (a bargain!), so I got two.  I found them in the bulk spice isle in the grocery, but they can also be found at specialty baking/cooking stores as well, such as Sur La Table.  On my shopping trip, I also stopped at the liquor store to buy really cheap vodka.  Now, I realize that my "organic" compunction went out the window at this point, but saving money became my main goal.  I found a 750ml bottle of (really crappy) vodka for about 7 dollars.  But cheap isn't bad in this case since you aren't going to drink it!  In hindsight, I would paid a little more to get some brandy or rum!  Since this extract is used in desserts, having more flavorful alcohol is always great.  My reason for getting vodka was that it is relatively flavorless, which makes the vanilla and coffee flavors shine.

Now, I have about 16 oz of vanilla and coffee extract in my pantry!  And all for UNDER 10 bucks!  

Uses for Vanilla Beans:

1. Use the fresh beans in homemade ice cream, panna cotta, whipped cream, frosting, etc.
NOTE: To remove the beans from the vanilla bean, split lengthwise, then take the back of your knife and run down the middle of the vanilla bean.  This should scrape out all the pulp from the middle of the bean.  Set aside vanilla bean exterior for other uses.

2. Add vanilla bean (pulp removed) to sugar to make vanilla sugar.  The beans should dry completely in the sugar and last indefinitely...if the sugar lasts that long!  Use vanilla sugar in any dessert recipe. Once the sugar is gone, you can add the dried beans to alcohol for vanilla extract.

3. Add vanilla bean (pulp removed) to alcohol to create vanilla extract.  Should last indefinitely or until consumed.


Vanilla Extract

2 vanilla beans, bean pulp removed
350ml alcohol (vodka, brandy, rum)

1.  Add vanilla beans into the bottle of alcohol.  Wait at least a week or until alcohol has darkened significantly and vanilla aroma and flavor are present.
2. Use in any recipe that calls for vanilla extract!

There are still some tiny beans at the bottom!


Coffee Extract

1/2 cup coffee beans
350ml alcohol (vodka, brandy, rum)

1. See recipe above and repeat for coffee extract.


I split my vodka between the vanilla and coffee.  If you aren't going to use the bottle the alcohol came in, you can use a glass or plastic container (washed and sanitized).  Try to make sure that the vanilla and coffee beans are completely covered by the alcohol.

Since alcohol is so great at extracting flavors, it is clear that you could make hundreds of different "extracts!"  Try different kinds of fruit: citrus, strawberry, raspberry, etc.  This would be delicious for cocktails!  You can even make black pepper or tomato vodka for Bloody Marys!  Or try some fresh herbs!  Go wild and have fun! :)