Thursday, April 25, 2013

Pho

I've never had Pho before, but I have heard that it is delicious.  There are many Pho restaurants around our area, but since we never seem to find the time to try them out, I decided to make it at home.  My street food cookbook came in handy again this week and provided me with a spectacular recipe.  

I have to say that I was really proud of the Pho I made.  It is delicious!  The slow-simmered beef broth is deeply, richly flavored with hints of cinnamon and cardamom.  This whole dish hinges around a great broth since the other ingredients are simple: rice noodles, cilantro, lime, bean sprouts.  On first glace, this soup looks simple...like most Thai soups you might find (although this one comes from Vietnam).  However, like Thai food, it may look simple, but the flavors are powerful.  Once I tasted this soup, I understood why it has become a Vietnamese staple, and why it is growing in popularity in the states.  It is the perfect bowl of soup: a full-bodied broth topped with a wide variety of flavors and textures.  It is chewy, slippery, crunchy.  Sweet, sour, spicy, and deeply savory.   

This is one recipe that I didn't try to change, mostly because it was my first time.  However, when you find a recipe this good, it is hard to find room for change.  I am pulling this recipe straight from my cookbook to share with you because it is just that amazing.  I did make a few changes, however, because I either couldn't find certain ingredients or I forgot to buy them.  Here are my changes and advice for making it in the future:


1. I used 2 1/2 pounds of center cut shank (which I found frozen).  This cut of meat has a bone with marrow in the middle surrounded by some meat.  Having bones with the marrow is very important because it adds deep flavors and fat...all which help to make your broth great.  I got bones with meat on them because I had hoped to shred the meat later.  However, this cut of meat is very fatty, and while we did eat the meat on it, it wasn't very great quality.  I would recommend following the recipe and getting marrow bones for the broth, and beef steak (cooked separately) for garnishing the actual soup.


2. The recipe recommends slicing your beef steak very thin and leaving it raw.  You are supposed to pour the boiling hot broth over it to cook the meat...but I do not recommend this. Unless you know your meat is safe, there is always the potential for food contamination.  I would cook your steak first, then slice it thin and use it as a garnish.

3. I used one less onion than the recipe recommends (because I though I was going to halve it), but the broth really needs 2.

4. Cooking time...this broth took 1 1/2 hours to simmer on the stove.  However, if you don't have that kind of time, I think this broth could be easily made in a large crock pot.  Just add your ingredients and set in on low all day.  This should make a really great broth.  

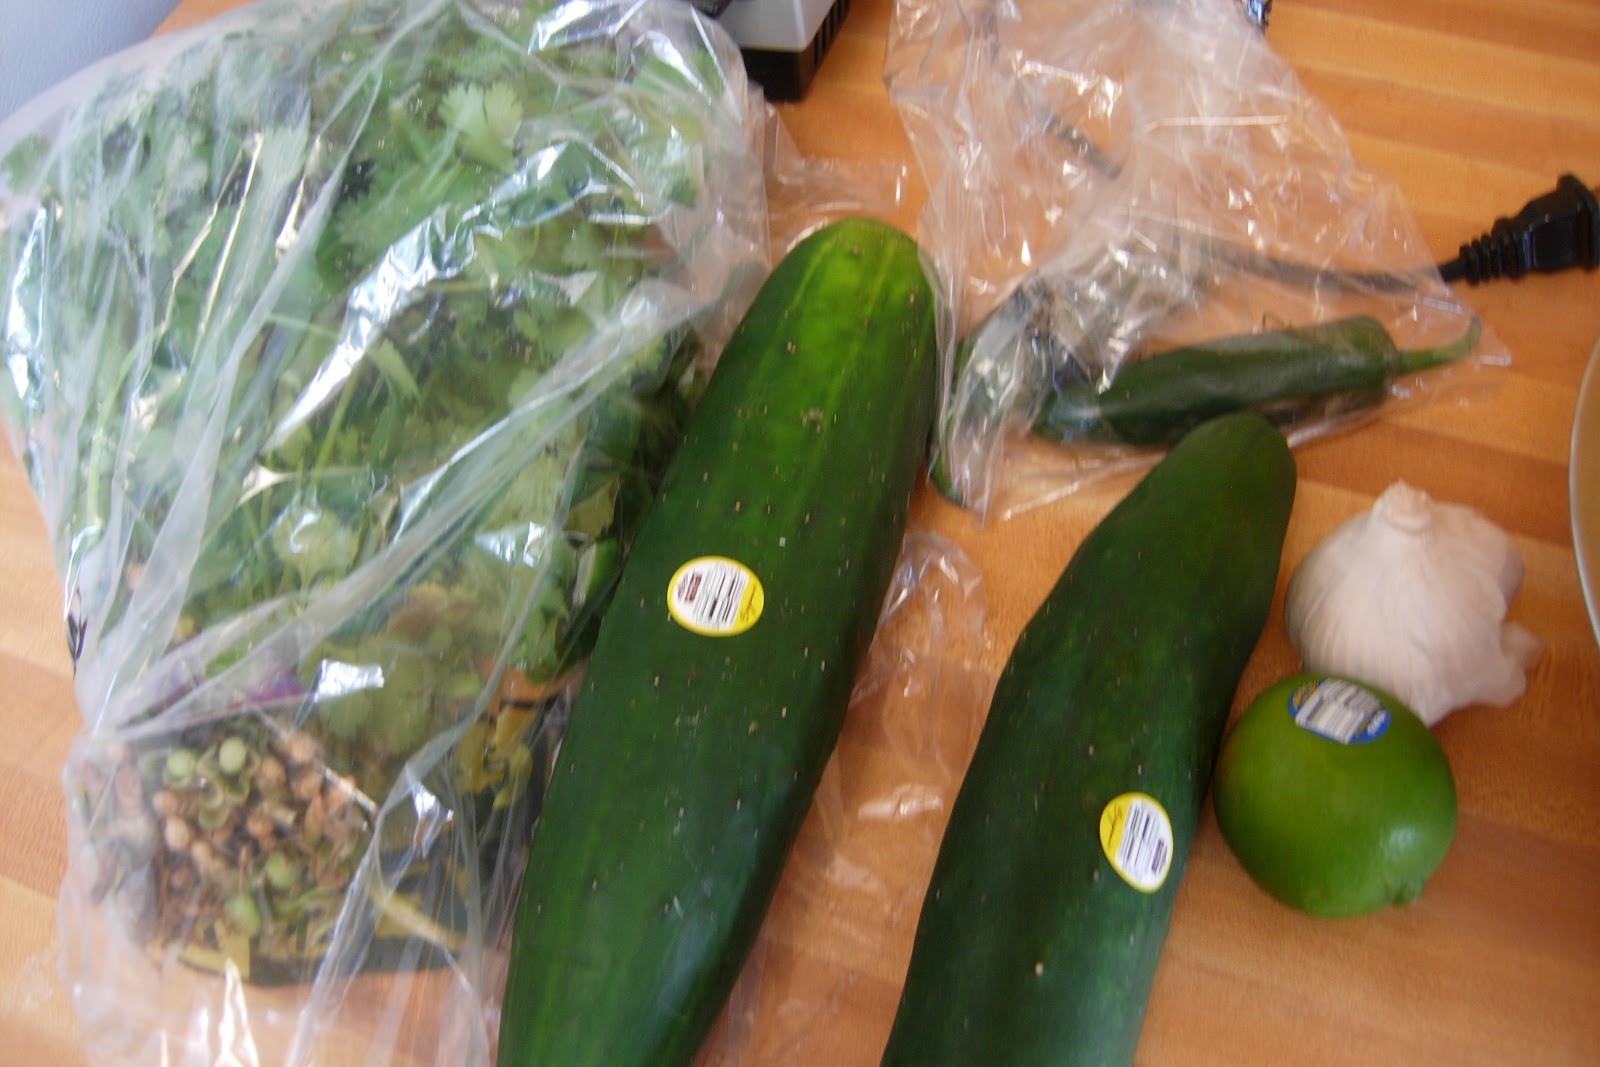
5. I changed up the garnishes a bit.  I made a salad with green shredded cabbage, sliced zucchini, cilantro, and green onion.  I also bought some sweet red chili sauce which was yummy on top.  I also sliced some serrano chilies for some spice.  Most garnishes that you like would go well!


Pho
adapted from The World's Best Street Food Cookbook


Broth:

4" piece of ginger, halved lengthwise
2 yellow onions, halved
5 lbs beef marrow bones (can use oxtail bones)
5 quarts of cold water
1/4 cup fish sauce
2 TB sugar
1 TB salt

spice packet:

1 cinnamon stick, broken into pieces as needed
1 tsp coriander seeds
1 TB fennel seeds
5 star anise (I didn't use these...I'm not a huge fan of licorice flavor)
2 cardamom pods
6 whole cloves garlic, peeled
*large tea ball or cheese cloth

Garnishes:

1/2 lbs beef steak, cooked and sliced thin
1 lbs flat rice noodles (like Pad Thai noodles), cooked according to packet directions

mint
cilantro
Thai basil
yellow onion, very thinly sliced
limes, cut into wedges
chili peppers, sliced thin
bean shoots
hoisin sauce
hot chili sauce
shredded green cabbage
thin sliced zucchini
sweet red chili sauce


1. Place ginger and onion on an oiled baking sheet and broil them until they begin to char.  Turn them over and repeat. Or you can grill these if you can!


2. Add all spices and garlic into a large tea ball, or wrap them up in cheese cloth or mesh bag.
(the cookbook says you can find spice packets pre-made at the store.)


Large tea balls are really useful!


3. Add bones to a large pot, cover with cold water, and bring to a boil.  Boil 5 minutes, then drain and rinse off the bones and pot.  (This steps helps to boil off some of the fat and "gristle" that you don't want in your broth.) 

Lightly boiled and rinsed bones


Add the bones back into the pot and cover with 5 quarts cold water.  Add in ginger, onion, spice packet, fish sauce, sugar, and salt.  Bring to a boil, reduce to a simmer.  Skim off any scum that rises to the surface (for at least the first 10-15 minutes or so).  Simmer for 1 1/2 hours.
(The cookbook recommends discarding the spice packet and then simmering another 1 1/2 hours, but my broth was really tasty after 90 mins, so I skipped that step.)


Skim off the scum that rises to the surface.  That way your broth will be clear and clean!


4. Strain broth into a large bowl and discard other ingredients.  Add broth back to the pot and keep hot.

I did not discard the meat around these bones.  I just shredded it and used it place of the beef steak.


5.  Time to garnish!  Add noodles and steak to bowl.  Add in sauces, lime juice, and veggies.  Pour hot broth over and enjoy a delicious meal!


Tuesday, April 23, 2013

Pupusas

Last night, my husband and I had a wonderful Skype session with his sister.  We set the laptop up in our kitchen so we could talk while I cooked, which was wonderful because it was like we were all making dinner together.  I had decided on a fun, easy recipe that wouldn't take up too much of my attention while I chatted: El Salvadorian Pupusas.
  
Pupusas are little masa dough pockets that are stuffed with a variety of ingredients, then fried and topped with pickled veggies.  I have made these before, and while they are fun to make, they take a little bit of practice to get them just right.  The hardest thing about this recipe is making sure the masa dough is the right consistency.  If it is too dry, it will just fall apart, but if it is too wet, it won't fry up properly.  So, it takes a little practice and experimentation to get just the right consistency.  In this case, I throw out all measuring devices and just go by feel.  The dough should be moist and pliable so they are easy to stuff.

The first time I made these, they were good, but clearly needed improvement.  This time around, I was able to get them nice and crispy on the outside, and the inside was filled with spicy chorizo chicken sausage.  It was a perfect combo.  They were good enough to eat on their own, and they can easily turn into finger foods.  This recipe would actually be wonderful for kids because they are both fun to cook and eat!  

I topped my pupusas off with a super spicy roasted tomato salsa and cabbage salad, but the cookbook recommended making "Curtido" or pickled cabbage and carrots.  I'll provide the recipe below because I think that combination of flavors would be fantastic.  However, you could turn these into little "pupusa nachos" and top them with cheese, beans, tomato, sour cream, and cilantro.  The best thing about this recipe is that the flavors are up to you.  Once you get the masa dough right, you can use any ingredient to stuff them, and have fun with a variety of toppings!

NOTE: Masa flour is inexpensive and keeps for a long time.  It is great to use for making homemade corn tortillas.  Look for it in the International Foods at the grocery!


Pupusas
Adapted from LonelyPlanet's The World's Best Street Food
Makes about 10 pupusas

Masa Dough:

2 cups masa flour (maize flour)
water as needed (I used about 2 cups)
salt to taste (about 1 tsp)
oil for frying

Filling:

1 pound chorizo chicken sausage (in bulk)

Other Filling Options:

cheese
beans
jalapenos
minced, cooked pork, beef or chicken

1. Place masa flour in a bowl and pour in a little water at a time until a moist, pliable dough forms.  Cover with wet paper towel or plastic wrap and set aside.  Heat oven to 400F.


2. In a large skillet, heat oil and saute sausage until fully cooked through.  Set aside to cool.

3.  Divide dough into seperate portions and roll into small balls.  Add more water as needed to keep dough pliable.  With each ball, make an indent in the middle with your thumb and press the outsides open to make a small bowl.  Fill the bowl with about 1 TB of sausage filling, then close the dough around the filling.  Next, press the ball flat with your hands until it is about 1/2" thick.


4. Heat a large skillet (you can use the same one you cooked the sausage in for more flavor!), heat enough oil to coat the bottom of the pan.  Fry pupusas on each side until they are light golden brown.  


When pupusas are done frying, you can either place them on paper towels to drain and eat immediately or place pupusas on a cooling rack on a sheet pan in the oven and bake for about 10 minutes.  I found that baking them allowed the oil to drain and keep them crispy on the outside.  This also keeps the pupusas hot if you are frying them in batches.


5. Serve hot with salsa, cabbage salad, or Curtido or other toppings.


Curtido 
(pulled from The World's Best Street Food)

1/2 green cabbage, shredded
1 carrot, grated
4 cup boiling water
1/2 cup water
1/2 cup apple cider vinegar
1/2 tsp salt
1 jalapeno or serrano, minced
3 green onions, minced

1. Place the cabbage and carrot in a large bowl. Pour over the boiling water to cover the vegetables and set aside for about five minutes.  Then drain, pressing out the liquid.
2. Return cabbage mixture to the bowl and toss with remaining ingredients.  Cover and chill for a couple of hours or overnight to lightly ferment.

ENJOY!!

Friday, April 19, 2013

"Fruit Water"

It's been really beautiful in Portland lately. I've been spending a lot of time outside, gardening.  My azalea bush out front is covered it hot pink blossoms and our grass grows several inches a day.  But ironically, it is cold and rainy again today.  I wanted to post a really great summer drink tip, but it seems silly when all I want to do with dress in heavy fleece and drink lots of milky rooibos tea.  But, what the hey, I'm going to do it anyway.  Maybe it will tell the weather gods to actually make it warm soon.  
While "food surfing" the intertoobs the other day, I found a post about making homemade vitamin water.  Now, to preface, I think that calling it vitamin water is kind of silly, since I immediately think of the sugar-laden "sports drinks" (no, I'm not opinionated about them or anything).  So, in light of that, I'll just call them "fruit water" though that sounds kinda lame.  I should come up with a better title.
Anyway, that all aside, Fruit Water is such a brilliant, easy idea to spice up your summer drinks.  They are fresh and healthy, and actually do contain the natural vitamins and minerals contained in fruit.  Basically, all Fruit Water is...is water with fruit in it.  Yep.  That it.  I've been hem-hawing (yes, that's a thing) about how to write this blog because, well, who needs to be told that it's kinda cool to put fruit in your water?  Well, I do I guess.
As much as I downplay it, Fruit Water actually has a lot going for it:

1. It's healthy and cheap.
2. You can control how much sugar (if any) is put into it.
3. It looks super pretty in a pitcher.
4. You can easily turn the concept into homemade lemonade or sangria
5. It makes water taste pretty darn great.
6. It helps keep you happily hydrated in warm weather.


Here is my first attempt at Fruit Water.  
NOTE: I used store-bought Limeade (gasp!) because I had some leftover from a party we threw for our friends.  In hindsight, I should have made homemade limeade which would have made our Vodka Limeades that much more pretentious.  But I was being lazy.  As usual.  And it totally destroys my point about controlling sugar content. Oops.  However, it was really delicious.

Strawberry Lime(ade) Water

strawberries
lime juice (or limeade)
water
ice (optional)
sugar or honey (optional)

Add ingredients in a food processor or blender.  Blend until smooth.  Enjoy!


This was my simple take on Fruit Water, but there are so many other options!  You can add in any fruit and through in a dash of fresh herbs or even spices!  You can chop the fruit and leave it whole, like a traditional sangria, or you can blend it until smooth for a smoothie-like consistency.

Here are some yummy combinations that I will have to try:

Blackberry Sage
Mango and Pineapple
Apple Mint
Pineapple Mint
Citrus Combo: orange, lemon, lime, grapefruit
watermelon lime
raspberry ginger mint


Homemade Lemonade: aka Sweet Fruit Water

about 5-6 lemons or limes, juiced
fruit, blended smooth (otional, though I LOVE peach lemonade!) 
water
simple syrup 
fresh herbs (optional)

1. To make the simple syrup, add 1 cup sugar to 1 cup water in a small saucepan and boil until sugar is dissolved.
2. Add fruit, water, and as much simple syrup needed to make it sweet (don't pour the whole batch of simple syrup in at once, hah) into a pitcher.  Stir, serve over ice and enjoy!
NOTE: simple syrup will keep in the fridge for a couple weeks and is great for cocktails, too!


Homemade Sangria

fruit, chopped or pureed (apple and pear are good options)
wine
ice, optional

1. Add into a pitcher, stir and enjoy

NOTE: I really LOVE vermouth sangria.  I buy Gallo sangria which goes for about 6 bucks a bottle.  It comes in extra-dry (which is my favorite) and sweet.  Both are delicious.
For those of you that don't know about vermouth, it is basically wine (usually white) that has been steeped with a variety of spices/herbs.  It has an herbal depth to it that regular wine lacks and can really enhance a cocktail.  It is traditionally used in martinis.


So, yeah, I'm ready for summer!  Time for lying in the sun with an ice cold Fruit Water and a good book! 


Wednesday, April 17, 2013

How to save a little money....

Food budgeting has been weighing on my mind.  I am always looking for ways to shop more efficiently, but lately, my skills and knowledge have been challenged.  I recently became a volunteer teaching kids how to cook on Monday afternoons.  My volunteer role is to buy all our necessary ingredients at the grocery with a set budget.  At first, I wasn't sure I would like this role (I wanted to be the teacher after all!), but it has already taught me so much.  I have to be honest...I always prided myself on being pretty good grocery shopper.  I buy most of my flours, grains, sugars, and beans in bulk, and I have been able to buy organic produce without going too far over budget.  Yet, ever since I started buying ingredients for the class on a very small budget, I have come to realize that I can do even better.  Since I only have a small amount of money to spend buying groceries for the kid's cooking class, I have had to spend a lot of time at the store measuring, counting, and weighing ingredients in order to come in under budget.  Suddenly, those prices per pound meant something serious.  I have had to be careful about the amounts that I buy: getting too little means that not everyone gets enough, but buying to much means that food is wasted.  I also have to be conscious of all the food choices available: can I buy organic produce even though it might cost a little bit more?  Should I buy fresh or frozen or canned?  If I buy a little more now, could we use it in a later class?


All these questions got me thinking and I realized that I could be doing this in my own life.  I started asking:

1. Does any food go to waste each week?  Am I throwing out produce that I didn't know what to do with or not eating all the leftovers?

2. Am I reaching for unhealthy foods in my pantry because I don't have healthy options available?

3. Am I prepared when I go shopping?  Or am I buying what looks good at the time?

4. Are there items in my pantry that I haven't used, but are still edible? Could I use that instead of buying something new?

I have answered "yes" to all these questions at one time or another.  In the past few months, though, and along with my volunteer budgeting project, I have learned how to start saying "no".  Recently, I have noticed that my fridge isn't full of extraneous produce or very old leftovers.  My pantry is somewhat clutter-free.  I still need a lot of practice, but here are the few tips that I've learned that make food budgeting an easy habit to get into.


1. MENU PLANNING

This has been one of the hardest steps for me, but I think it is the most essential.  In culinary school, we were taught that throwing food in the garbage was basically like taking dollar bills out of your wallet and throwing them in the trash.  That image has stuck strongly in my mind.  And I think that eliminating waste starts before you even set foot in the grocery.  Planning eliminates the chance of buying unnecessary ingredients, and it can also help to steer you away from unhealthy options.  
So, before I even go to the grocery, I like to take a quick look at my cookbooks, or even surf the Internet (tastespotting.com) for ideas and recipes.  Even finding two great recipes that you know you'll be able to cook that week is a good start. I like to look for at least two meat/protein dishes, and also have some salad ideas on hand.  After I have recipes, then I can easily make a comprehensive grocery list.


NOTE: It's great to include amounts on your list, too.  For example, you can put zucchini x3, milk x2, rice 1# (pound).  That way you know exactly what you need.

1.5 CHECK YOUR PANTRY BEFORE YOU GO

This is pretty self-explanatory, but it's a good reminder to look in your pantry/freezer/fridge and see what is still usable.  Maybe if you have an overabundance of rice, for example, you can build your menu around using it up.  Or you just won't have to buy more rice!


2. BUY ONLY WHAT YOU NEED

This is a step that I have only recently implemented.  My volunteer job has taught me that I should literally count how many carrots, apples, or zucchini that I need for a recipe.  There is no need to buy three zucchinis if I only need two.  This might only save you a few cents...but it all adds up!  This is especially important in the bulk section.  You can save a lot of money buying in bulk because many of the ingredients are cheaper, but you can also choose what amount you want, instead of  paying for a large amount in a pre-packaged alternative.  This means using the scales that are so graciously provided, and so often ignored.  I know that I would really load up on bulk items in the past, but I quickly realized that I wasn't saving money...in fact, I was spending more than I really had to.  And some of it would never be used.  It is better to stick to smaller amounts that are actually going to get used.

NOTE: Buying bulk spices is an especially great way to save money, and keep them fresh!


3. DOUBLE THE RECIPE (OR TRIPLE OR QUADRUPLE...)

I like to find recipes that I know we want to eat a lot of, then I try and make enough for two days.  If I make one recipe for dinner one night, there is usually enough for breakfast, lunch, or dinner then next day.  This saves cooking time, and money.
Another great way to use your doubled recipe is to freeze the extra.  Or, for example, if I'm making lasagna, I'll assemble two, bake one, and freeze the other.  That way, I'll have dinner on hand when I need it.

4. SET A SPECIFIC FOOD BUDGET AMOUNT 

This one is probably common sense as well, but a set amount will help buy only what is necessary.  I like to set my budget to a weekly amount and I try my best to stick to it.  I don't always succeed, but I do look over my receipt every week to see where I went over budget.  Could I have bought less of something?  Did I cave in and buy something I shouldn't have?


5. SALES/FLEXIBILITY/COMPROMISE....AND MORE IMPORTANTLY, SHOP SEASONALLY!

Every time I go into the grocery, there is something that trips me up.  If I have a recipe that calls for broccoli, but broccoli is too expensive, I tend to buy it anyway.  I could just leave it out of the recipe, but I have learned that flexibility is good to have in these situations.  Is there another ingredient on sale that I could add in instead?  Maybe cauliflower or Brussels sprouts?  This is where you can get creative and move away from the recipe's guidelines.
One of the major things that helps me not be surprised by prices at the store is to shop seasonally.  If you know what produce (or even meat!) is in season, you are more likely to find it in abundance, and at cheaper prices.  If you Google "seasonal produce" there are tons of charts that are available that show what fruits and veggies are in season when, and in what part of the country.  I printed one out for myself and taped it to my fridge so that I could have a reference when deciding what to cook.


I hope all these tips help.  Many of you are probably conscious of these tips already and could probably teach me a thing or two! Though, I find that repeating them helps me stay focused and prepared.  I find that my shopping trips are super easy and fast, plus once I get home, I know exactly what every bit of food is going to be used for.  And I know for certain that the money I did spent didn't go to waste!

Thursday, April 11, 2013

Rockfish Tacos!

Yesterday, I mentioned I had been inspired to make fish tacos after hearing a segment from The Splendid Table.  This radio program is featured every Sunday afternoon on NPR (or OPB...Portland's local station) and explores almost everything you ever wanted to know about food.  A woman called in wanting to know how she could improve on her fish taco recipe, and the answer she got gave me all sorts of ideas. 
A good fish taco starts with the fish itself: what kind of fish will you use?  Will you pan fry it or grill it?  Will you marinate it before cooking or will you create a flavorful batter for it?  Grilling can be healthier than frying, but each cooking method gives you a completely different flavor and texture.
Then comes toppings.  The Splendid Table recommended crema (a Mexican condiment much like creme fraiche or sour cream) for its smooth creaminess, and iceberg lettuce and tomato for crunch. I was surprised that iceberg lettuce was the topping of choice because I prefer shredded cabbage, but it made me think how diverse tacos can be!
For my tacos, I decided to pan-fry them since I don't have a working grill.  Plus, I had one beer left in the fridge...perfect for beer batter!  I also wanted an element of moisture, so I decided upon a cucumber salsa, which also brought in some heat.  Then I topped it with my ever-present shredded cabbage salad.
Was my combination successful?  I think so...however it is just one of many, many things that you can do.  And I'm not sure I can ever successfully recreate my first, glorious experience with fish tacos.  My first ever fish taco was eaten in Encinitas, California when I was on vacation with my family when I was about 16.  We initially went to southern Cali to go to the San Diego Zoo, which was spectacular, but some of my favorite memories were of the tiny little beach towns just north of the big city.  While driving south toward San Diego one day, we saw a huge sign declaring "Fish Tacos $1.99!"  None of us had ever had a fish taco, and since we were right next to the ocean where seafood is freshest, we jumped at the chance to try something new.  As it turns out, the restaurant was new and tiny with an open air porch.  We each ordered a couple of tacos and fruit smoothies and sat down to one of my most memorable lunches.  The fish was incredibly fresh and simply seasoned, and the smoothies cooled off the bright hot day.  I thought: "California life is pretty darn awesome!"  Not only was lunch amazing, but next door was an adorable little bakery that had the best cream-filled chocolate doughnuts I have ever had.  It is safe to say that we spent almost every meal after that at "our little fish taco place" knowing that there would be a chocolate doughnut at the end of it all.
My food sensibilities have expanded greatly since then, and although I love creating new recipes all the time, I know it is simple, classic food like those fish tacos that really speak to people.  They didn't just feed us, they created a whole "California" experience, so when I think of San Diego, I immediately am transported back to that tiny little restaurant in Encinitas.

This recipe, however, is my simple version, made with what I had available in my pantry.  I hope it will inspire you to mix and match as you see fit...and hopefully create some new great food memories!

T.E.A.'s Rockfish Tacos
serves 2 (or about 4 small tacos)

Beer Battered Fried Fish:

10-12oz of rockfish fillets
1/2 cup chickpea flour 
1/4-1/2 cup beer
salt and pepper to taste
pinch of cayenne or paprika (optional)
coconut oil for frying (or other high-heat frying oil)

1.  In a flat bottomed dish, whisk together flour, beer, and seasoning until smooth.  Dry off fish with a paper towel, then coat it well with the batter. 


2.  Heat a skillet on medium high heat until very hot or the oil is just about to smoke.  Place battered fish in pan and fry until golden brown on both sides.


3.  If your fish is very thick (1-2 inches), place fish in a 400F oven for about 10 minutes or until completely cooked through.  It should be white and flaky all the way to the middle, but still moist.  If your fish is thin, pan-frying may cooking it completely, so you can skip putting it in the oven.

You can see my fish was still pink in the middle!


4. Flake fish into bite-sized pieces for tacos and serve hot.


Cucumber salsa

1 large cucumber, small dice
juice of 1 lime
2 jalapenos, seeded and minced
1/2 cup cilantro, chopped
salt to taste

1.  Add all ingredients together.  This can be refrigerated beforehand in order to marinate the cucumber.


In hindsight, I would have cut the cucumber even smaller because it would have fit better in the taco.


Fish Tacos:

fried Rockfish
cucumber salsa
shredded cabbage with chopped green onion
small corn tortillas, warmed

1. On a warm tortilla, add hot fish, cucumber salsa, and top with cabbage...and Enjoy!