I love when I find a recipe that fills some unconscious desire of mine. Most of my desires are centered around finding healthier ways of eating. However, I still get those sugar cravings and I always wish that I could get my sweet fix, but not feel overly guilty for it. For one, I've been trying to go more grain-free, meaning we eat a whole lot less bread, wheat flours, rice, pasta, crackers, and chips. Secondly, I've been adding in more healthy fats like olive oil, coconut oil, and fat from nuts. I've also been taking more and more sugar, in general, out of our diet. So, when I stumbled upon this recipe, I was really excited. I found the perfect little sweet bite: garbanzo bean cookies. They fill all of my requirements: dairy-free, grain-free (meaning no gluten either!), low-sugar, with a dose of healthy fat. And they are deliciously rich and fudge-y right out of the oven. Plus, they are ridiculously easy to make, and even the raw dough tastes good!
I would highly recommend this recipe as it is a great substitute for regular chocolate chip cookies. The only downside is they are a touch more savory than the average cookie. Garbanzo beans are relatively neutral in flavor, but since they make up the bulk of this cookies, their taste still shines through. One alternative to garbanzo beans would be to use white beans instead. They have about the same consistency, but a different flavor. I'll have to try that next time! Also, I used molasses for the sugar component, though you could use honey or brown sugar.
My only real note about these is that I would recommend finding a raw peanut butter, if possible. I usually get peanut butter in bulk or make it myself at home. That way, I know that only peanuts are in it...no extra salt, oils, or sugar. If you buy peanut butter in the jar, make sure to look at the ingredients. Even the organic or natural butters tend to add a lot of unnecessary things. If there is added salt or sugar in your peanut butter, you don't have to add as much sugar into the recipe. I would recommend adding in a little sugar, then tasting the dough and adjusting from there. That way you have complete control over the sugar content.
Also, the blog I got these from said they weren't good cold. I disagree. I think the dough would be fantastic frozen into little cookie bites. And the baked cookies can be enjoyed at any time!
Garbanzo Bean Cookies
Adapted from Texanerin Baking (see link here)
makes 9-10 cookies
1 1/4 cup garbanzo beans
1/2 cup peanut butter
1/4 cup molasses
2 tsp vanilla extract
1 tsp baking powder
pinch of salt (unless your peanut butter contains salt)
1/2 cup chocolate chips
1. If you're using dried garbanzo beans, soak garbanzos overnight. Put in a pot with enough water to cover them. Bring to a boil, and boil for about 20 minutes or until al dente. Spread out on a baking sheet or large casserole dish to cool quickly. Use immediately or refrigerate or freeze for later use.
OR
If you're using canned beans, drain beans and rinse them well.
2. Preheat oven to 350F. In a food processor, add beans, peanut butter, molasses, vanilla, baking powder, and salt. Pulse until well combined into a smooth dough. It will be very sticky.
3. Pour dough into a bowl, and add in chocolate chips. Stir until well combined.
4. To form cookies, take about 2 TB of dough and roll into a ball. Flatten in slightly with your fingers.
5. Place molded cookies on a baking sheet covered with parchment paper. Bake for about 15 minutes or until outside is firm. The insides will still be gooey. Cool on a wire rack and enjoy!
Friday, May 3, 2013
Wednesday, May 1, 2013
What Can I Make Today?
Now that I've been helping teach kids how to cook, I've been very aware of how difficult it can be to break down a recipe in order for it to be understood. The kids we teach like to blindly throw themselves into cooking without glancing at the recipe. I sympathise. I used to do that all the time, and came out with very poor results. Thankfully, these kids have us to direct them towards the right cooking techniques, but it made me think how important analyzing a recipe can be. Even with directions, it can be hard to know exactly what the end product should taste like.
Throughout my schooling and experimentation, I've learned how to read a list of ingredients and be able to combine them to make a delicious dish. This comes in handy when I'm reading a recipe, or if I simply have to make something with the ingredients available in my pantry. Here's a look into my process.
Breaking Down the Recipe:
What if you only had a list of ingredients as a recipe? What would you decide to do with them?
In culinary school, I was told by one of my favorite teachers that the best chefs can read a list of ingredients and know exactly how to combine them into a dish. I was always fascinated by this, and think it is an important step in following any recipe. By closely analyzing what ingredients a dish contains, you can learn a lot about what the final product will look and taste like.
Take this list of ingredients, for example.
onion
carrot
celery
mushroom
bacon
white beans
tomato
chicken stock
What would you make with these ingredients? Is it a casserole? Soup?
How much of each ingredient would you put in the dish?
How would you prep the ingredients....small dice of onion or large?
What kind of each ingredient would you use? Fresh tomato vs. canned tomatoes?
What ingredients could you add to make it more interesting? Fresh herbs or spices?
How would you cook these ingredient...would you simmer/boil/bake/grill/saute?
How much do I need of each ingredient to make enough to feed everyone?
From these questions, you can see how quickly a recipe can turn into many different dishes. If you decide to throw all of these ingredients in a pot, then they become a soup. If you decided to throw them together in the oven, you get a sort of ratatouille casserole. If you decide to cook, then puree them, these ingredients could even be a hot dip!
Once you decide on a dish, then it is important to think of how you'll prep the ingredients. For this case, I decided to make soup, but there were several questions I had to ask:
How big will you cut the veggies?
Will you crisp up the bacon and use it as a garnish or will you saute it and add it into the soup?
Will I puree the beans to make a thick soup or leave it chunky?
Here is my version of this soup. But think of all the combinations you could make!
T.E.A.'s Tomato and White Bean Stew with Bacon
2-3 TB olive oil
1 cup onion, small dice
1/2 cup carrot, sm dice
1/2 cup celery, sm dice
1 cup mushroom, sm dice
10 strips bacon, cut into 1" slices (I used turkey bacon)
1-2 cups white beans
1 28oz can tomatoes, pureed
1 quart chicken stock
salt and pepper to taste
Fresh herbs (oregano, parsley, basil), optional
1. Soak white beans overnight or at least 8 hours. Drain and rinse, then add them to a pot with enough water to cover them. Simmer about 1 hour or until tender. Drain and set aside. (Or use canned beans and skip this step. Just remember to rinse off the canned beans...that gets a lot of the added salt off. Or buy beans with no salt added)
2. Heat a large soup pot on medium high heat. Add in oil and heat until it shimmers. Add in bacon and fry until browned and crispy. Remove bacon from pan and set aside. Pour off any extra fat (if any), but leave enough in the pot to saute the veggies.
3. Reduce heat to medium, put the pot back on the heat and add in all the veggies. Saute until soft and slightly caramelized, about 8 minutes. If the veggies are turning too brown or sticking to the pan, add a little water and reduce heat.
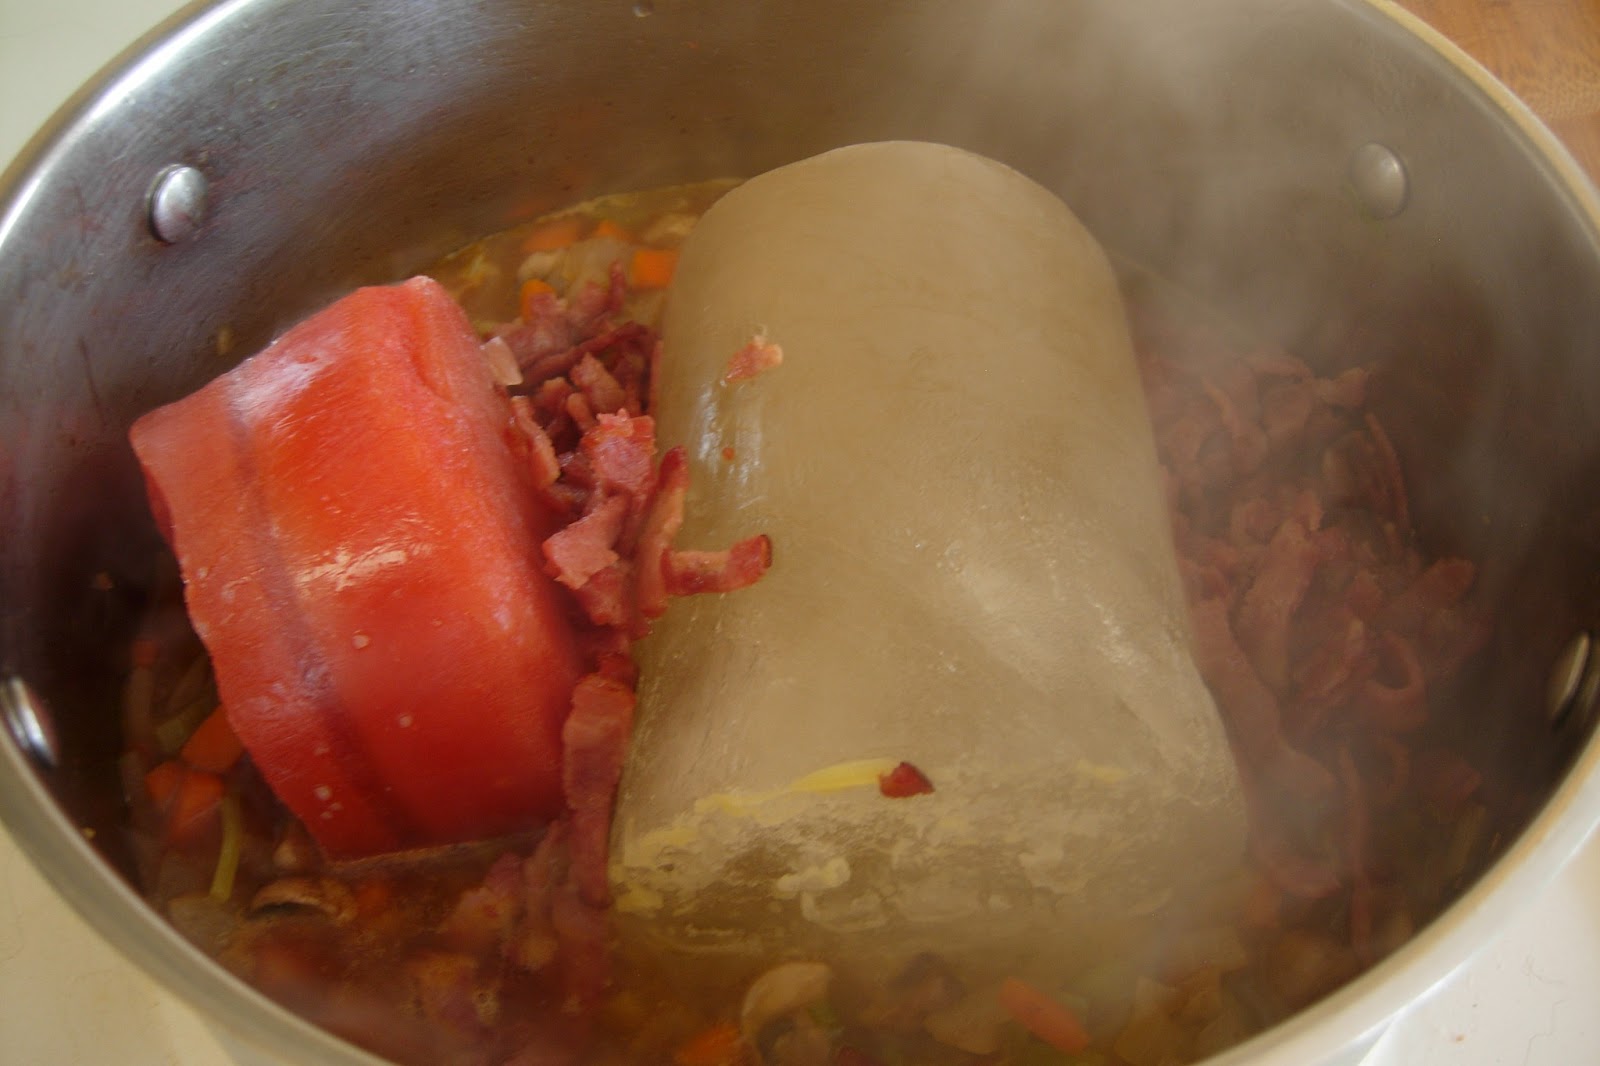
4. Once the veggies are soft, add in beans, bacon, tomatoes, chicken stock, and fresh herbs (if using). Bring to a boil, reduce to a simmer. Simmer for about 20 minutes. Serve hot and Enjoy!
| I used homemade stock that was frozen...and frozen tomato juice! |
Thursday, April 25, 2013
Pho
I've never had Pho before, but I have heard that it is delicious. There are many Pho restaurants around our area, but since we never seem to find the time to try them out, I decided to make it at home. My street food cookbook came in handy again this week and provided me with a spectacular recipe.
I have to say that I was really proud of the Pho I made. It is delicious! The slow-simmered beef broth is deeply, richly flavored with hints of cinnamon and cardamom. This whole dish hinges around a great broth since the other ingredients are simple: rice noodles, cilantro, lime, bean sprouts. On first glace, this soup looks simple...like most Thai soups you might find (although this one comes from Vietnam). However, like Thai food, it may look simple, but the flavors are powerful. Once I tasted this soup, I understood why it has become a Vietnamese staple, and why it is growing in popularity in the states. It is the perfect bowl of soup: a full-bodied broth topped with a wide variety of flavors and textures. It is chewy, slippery, crunchy. Sweet, sour, spicy, and deeply savory.
This is one recipe that I didn't try to change, mostly because it was my first time. However, when you find a recipe this good, it is hard to find room for change. I am pulling this recipe straight from my cookbook to share with you because it is just that amazing. I did make a few changes, however, because I either couldn't find certain ingredients or I forgot to buy them. Here are my changes and advice for making it in the future:
1. I used 2 1/2 pounds of center cut shank (which I found frozen). This cut of meat has a bone with marrow in the middle surrounded by some meat. Having bones with the marrow is very important because it adds deep flavors and fat...all which help to make your broth great. I got bones with meat on them because I had hoped to shred the meat later. However, this cut of meat is very fatty, and while we did eat the meat on it, it wasn't very great quality. I would recommend following the recipe and getting marrow bones for the broth, and beef steak (cooked separately) for garnishing the actual soup.
2. The recipe recommends slicing your beef steak very thin and leaving it raw. You are supposed to pour the boiling hot broth over it to cook the meat...but I do not recommend this. Unless you know your meat is safe, there is always the potential for food contamination. I would cook your steak first, then slice it thin and use it as a garnish.
3. I used one less onion than the recipe recommends (because I though I was going to halve it), but the broth really needs 2.
4. Cooking time...this broth took 1 1/2 hours to simmer on the stove. However, if you don't have that kind of time, I think this broth could be easily made in a large crock pot. Just add your ingredients and set in on low all day. This should make a really great broth.
5. I changed up the garnishes a bit. I made a salad with green shredded cabbage, sliced zucchini, cilantro, and green onion. I also bought some sweet red chili sauce which was yummy on top. I also sliced some serrano chilies for some spice. Most garnishes that you like would go well!
Pho
adapted from The World's Best Street Food Cookbook
Broth:
4" piece of ginger, halved lengthwise
2 yellow onions, halved
5 lbs beef marrow bones (can use oxtail bones)
5 quarts of cold water
1/4 cup fish sauce
2 TB sugar
1 TB salt
spice packet:
1 cinnamon stick, broken into pieces as needed
1 tsp coriander seeds
1 TB fennel seeds
5 star anise (I didn't use these...I'm not a huge fan of licorice flavor)
2 cardamom pods
6 whole cloves garlic, peeled
*large tea ball or cheese cloth
Garnishes:
1/2 lbs beef steak, cooked and sliced thin
1 lbs flat rice noodles (like Pad Thai noodles), cooked according to packet directions
mint
cilantro
Thai basil
yellow onion, very thinly sliced
limes, cut into wedges
chili peppers, sliced thin
bean shoots
hoisin sauce
hot chili sauce
shredded green cabbage
thin sliced zucchini
sweet red chili sauce
1. Place ginger and onion on an oiled baking sheet and broil them until they begin to char. Turn them over and repeat. Or you can grill these if you can!
2. Add all spices and garlic into a large tea ball, or wrap them up in cheese cloth or mesh bag.
(the cookbook says you can find spice packets pre-made at the store.)
3. Add bones to a large pot, cover with cold water, and bring to a boil. Boil 5 minutes, then drain and rinse off the bones and pot. (This steps helps to boil off some of the fat and "gristle" that you don't want in your broth.)
Add the bones back into the pot and cover with 5 quarts cold water. Add in ginger, onion, spice packet, fish sauce, sugar, and salt. Bring to a boil, reduce to a simmer. Skim off any scum that rises to the surface (for at least the first 10-15 minutes or so). Simmer for 1 1/2 hours.
(The cookbook recommends discarding the spice packet and then simmering another 1 1/2 hours, but my broth was really tasty after 90 mins, so I skipped that step.)
4. Strain broth into a large bowl and discard other ingredients. Add broth back to the pot and keep hot.
5. Time to garnish! Add noodles and steak to bowl. Add in sauces, lime juice, and veggies. Pour hot broth over and enjoy a delicious meal!
I have to say that I was really proud of the Pho I made. It is delicious! The slow-simmered beef broth is deeply, richly flavored with hints of cinnamon and cardamom. This whole dish hinges around a great broth since the other ingredients are simple: rice noodles, cilantro, lime, bean sprouts. On first glace, this soup looks simple...like most Thai soups you might find (although this one comes from Vietnam). However, like Thai food, it may look simple, but the flavors are powerful. Once I tasted this soup, I understood why it has become a Vietnamese staple, and why it is growing in popularity in the states. It is the perfect bowl of soup: a full-bodied broth topped with a wide variety of flavors and textures. It is chewy, slippery, crunchy. Sweet, sour, spicy, and deeply savory.
This is one recipe that I didn't try to change, mostly because it was my first time. However, when you find a recipe this good, it is hard to find room for change. I am pulling this recipe straight from my cookbook to share with you because it is just that amazing. I did make a few changes, however, because I either couldn't find certain ingredients or I forgot to buy them. Here are my changes and advice for making it in the future:
1. I used 2 1/2 pounds of center cut shank (which I found frozen). This cut of meat has a bone with marrow in the middle surrounded by some meat. Having bones with the marrow is very important because it adds deep flavors and fat...all which help to make your broth great. I got bones with meat on them because I had hoped to shred the meat later. However, this cut of meat is very fatty, and while we did eat the meat on it, it wasn't very great quality. I would recommend following the recipe and getting marrow bones for the broth, and beef steak (cooked separately) for garnishing the actual soup.
2. The recipe recommends slicing your beef steak very thin and leaving it raw. You are supposed to pour the boiling hot broth over it to cook the meat...but I do not recommend this. Unless you know your meat is safe, there is always the potential for food contamination. I would cook your steak first, then slice it thin and use it as a garnish.
3. I used one less onion than the recipe recommends (because I though I was going to halve it), but the broth really needs 2.
4. Cooking time...this broth took 1 1/2 hours to simmer on the stove. However, if you don't have that kind of time, I think this broth could be easily made in a large crock pot. Just add your ingredients and set in on low all day. This should make a really great broth.
5. I changed up the garnishes a bit. I made a salad with green shredded cabbage, sliced zucchini, cilantro, and green onion. I also bought some sweet red chili sauce which was yummy on top. I also sliced some serrano chilies for some spice. Most garnishes that you like would go well!
Pho
adapted from The World's Best Street Food Cookbook
Broth:
4" piece of ginger, halved lengthwise
2 yellow onions, halved
5 lbs beef marrow bones (can use oxtail bones)
5 quarts of cold water
1/4 cup fish sauce
2 TB sugar
1 TB salt
spice packet:
1 cinnamon stick, broken into pieces as needed
1 tsp coriander seeds
1 TB fennel seeds
5 star anise (I didn't use these...I'm not a huge fan of licorice flavor)
2 cardamom pods
6 whole cloves garlic, peeled
*large tea ball or cheese cloth
Garnishes:
1/2 lbs beef steak, cooked and sliced thin
1 lbs flat rice noodles (like Pad Thai noodles), cooked according to packet directions
mint
cilantro
Thai basil
yellow onion, very thinly sliced
limes, cut into wedges
chili peppers, sliced thin
bean shoots
hoisin sauce
hot chili sauce
shredded green cabbage
thin sliced zucchini
sweet red chili sauce
1. Place ginger and onion on an oiled baking sheet and broil them until they begin to char. Turn them over and repeat. Or you can grill these if you can!
2. Add all spices and garlic into a large tea ball, or wrap them up in cheese cloth or mesh bag.
(the cookbook says you can find spice packets pre-made at the store.)
| Large tea balls are really useful! |
3. Add bones to a large pot, cover with cold water, and bring to a boil. Boil 5 minutes, then drain and rinse off the bones and pot. (This steps helps to boil off some of the fat and "gristle" that you don't want in your broth.)
| Lightly boiled and rinsed bones |
Add the bones back into the pot and cover with 5 quarts cold water. Add in ginger, onion, spice packet, fish sauce, sugar, and salt. Bring to a boil, reduce to a simmer. Skim off any scum that rises to the surface (for at least the first 10-15 minutes or so). Simmer for 1 1/2 hours.
(The cookbook recommends discarding the spice packet and then simmering another 1 1/2 hours, but my broth was really tasty after 90 mins, so I skipped that step.)
| Skim off the scum that rises to the surface. That way your broth will be clear and clean! |
4. Strain broth into a large bowl and discard other ingredients. Add broth back to the pot and keep hot.
| I did not discard the meat around these bones. I just shredded it and used it place of the beef steak. |
5. Time to garnish! Add noodles and steak to bowl. Add in sauces, lime juice, and veggies. Pour hot broth over and enjoy a delicious meal!
Tuesday, April 23, 2013
Pupusas
Last night, my husband and I had a wonderful Skype session with his sister. We set the laptop up in our kitchen so we could talk while I cooked, which was wonderful because it was like we were all making dinner together. I had decided on a fun, easy recipe that wouldn't take up too much of my attention while I chatted: El Salvadorian Pupusas.
Pupusas are little masa dough pockets that are stuffed with a variety of ingredients, then fried and topped with pickled veggies. I have made these before, and while they are fun to make, they take a little bit of practice to get them just right. The hardest thing about this recipe is making sure the masa dough is the right consistency. If it is too dry, it will just fall apart, but if it is too wet, it won't fry up properly. So, it takes a little practice and experimentation to get just the right consistency. In this case, I throw out all measuring devices and just go by feel. The dough should be moist and pliable so they are easy to stuff.
The first time I made these, they were good, but clearly needed improvement. This time around, I was able to get them nice and crispy on the outside, and the inside was filled with spicy chorizo chicken sausage. It was a perfect combo. They were good enough to eat on their own, and they can easily turn into finger foods. This recipe would actually be wonderful for kids because they are both fun to cook and eat!
I topped my pupusas off with a super spicy roasted tomato salsa and cabbage salad, but the cookbook recommended making "Curtido" or pickled cabbage and carrots. I'll provide the recipe below because I think that combination of flavors would be fantastic. However, you could turn these into little "pupusa nachos" and top them with cheese, beans, tomato, sour cream, and cilantro. The best thing about this recipe is that the flavors are up to you. Once you get the masa dough right, you can use any ingredient to stuff them, and have fun with a variety of toppings!
NOTE: Masa flour is inexpensive and keeps for a long time. It is great to use for making homemade corn tortillas. Look for it in the International Foods at the grocery!
Pupusas
Adapted from LonelyPlanet's The World's Best Street Food
Makes about 10 pupusas
Masa Dough:
2 cups masa flour (maize flour)
water as needed (I used about 2 cups)
salt to taste (about 1 tsp)
oil for frying
Filling:
1 pound chorizo chicken sausage (in bulk)
Other Filling Options:
cheese
beans
jalapenos
minced, cooked pork, beef or chicken
1. Place masa flour in a bowl and pour in a little water at a time until a moist, pliable dough forms. Cover with wet paper towel or plastic wrap and set aside. Heat oven to 400F.
2. In a large skillet, heat oil and saute sausage until fully cooked through. Set aside to cool.
3. Divide dough into seperate portions and roll into small balls. Add more water as needed to keep dough pliable. With each ball, make an indent in the middle with your thumb and press the outsides open to make a small bowl. Fill the bowl with about 1 TB of sausage filling, then close the dough around the filling. Next, press the ball flat with your hands until it is about 1/2" thick.
4. Heat a large skillet (you can use the same one you cooked the sausage in for more flavor!), heat enough oil to coat the bottom of the pan. Fry pupusas on each side until they are light golden brown.
When pupusas are done frying, you can either place them on paper towels to drain and eat immediately or place pupusas on a cooling rack on a sheet pan in the oven and bake for about 10 minutes. I found that baking them allowed the oil to drain and keep them crispy on the outside. This also keeps the pupusas hot if you are frying them in batches.
5. Serve hot with salsa, cabbage salad, or Curtido or other toppings.
Curtido
(pulled from The World's Best Street Food)
1/2 green cabbage, shredded
1 carrot, grated
4 cup boiling water
1/2 cup water
1/2 cup apple cider vinegar
1/2 tsp salt
1 jalapeno or serrano, minced
3 green onions, minced
1. Place the cabbage and carrot in a large bowl. Pour over the boiling water to cover the vegetables and set aside for about five minutes. Then drain, pressing out the liquid.
2. Return cabbage mixture to the bowl and toss with remaining ingredients. Cover and chill for a couple of hours or overnight to lightly ferment.
ENJOY!!
Subscribe to:
Posts (Atom)