Thursday, August 29, 2013

Sweet Potato Gnocchi with Creamy Coconut Peanut Curry Sauce

Soft, sweet pillow-y dumplings in a creamy, rich curry sauce...what's better than that?  We had company in last night, so I decided to try out a new recipe that I thought sounded really good.  I really shouldn't do that to myself, because most of the time when I try a new recipe for guests, it totally bombs.  This time, though, it was a success!

The first time I ever had gnocci was about 8 years ago when a friend of my mom's brought over luscious homemade gnocci that was just swimming in butter.  Her friend was from Pennsylvania, and supposedly, that dish was a tradition on the east coast.  And it was good!  Ever since, I have had a deep love for gnocci.  In culinary school, I learned how to make it perfectly, so it would be soft, but firm, not too dense or chewy.  This dumpling goes great with just about any kind of sauce whether it be pesto or traditional tomato sauce.  Usually, gnocci is made with white, flaky potatoes (such as russets), but being the health nut I am, I like using sweet potatoes because they are more nutritious.  Plus, their sweet taste goes really well with spices, like the curry sauce below.  

Gnocci is one of my favorite things to make, but I have to admit that it is also very time consuming.  It requires boiling, straining, kneading, rolling, cutting, re-boiling, then frying (though frying is optional)!  If you're organized about it, the whole process takes about an hour...but it's worth it.  It is a lot like making bread; you take a long time to prepare it, but the end product justifies all the time and effort spent.  Gnocci takes the same amount of love and gentle nudging to come out right.  It might take a few tries to get it perfectly, but I have learned some things that will help you on your way:

1. Use normal white wheat flour...don't try to substitute in this recipe (sorry gluten-free-ers).  Other flours don't contain the gluten needed to hold the dough together.  Also, whole wheat flour is much too dense...it will make for some hard, chewy gnocchi.  
2. There is no need to knead!  The best way to make sure your gnocchi is pillow-y soft, is to add the flour in gently and not to knead it at all.  My dough was still relatively sticky, but still pliable.  A lot like play-dough.
3. Don't boil it too long.  As soon as the gnocci floats, it is cooked through.  Boiling it too long will also make it tough.
4. Frying is delicious...when you get it right.  If your gnocchi is still wet from boiling, and you throw it is hot oil, all it is going to do is stick to the bottom of the pan.  Make sure to let the gnocchi dry completely before frying.  Ideally, frying the gnocchi will make it golden and crispy on the outside, while staying soft and moist on the inside.

Also, on a side note, this gnocchi recipe is the basis for any kind of gnocci you want to make.  Just replace "sweet potatoes" with white potatoes, or even butternut squash.


Sweet Potato Gnocchi

2 medium sweet potatoes or yams
1 egg
salt to taste (about 2-3 tsp)
white flour, as needed (have several cups on hand!)
coconut oil for frying, if desired

1. Wash and peel the sweet potatoes, and cut into a large dice.  Put them a pot, cover with water, and set to boil for about 20 minutes, or until soft. I always judge this by using a butter knife to slice through them.  If it slices through easily, they are ready to go!


2. Drain sweet potatoes into a mesh colander, and let cool for a few minutes.  Use the back of a spoon to push the sweet potato through the mesh.  This will get out any lumps out of the sweet potato and make for a smooth dough.


NOTE: You can also use a ricer for this (see here), but I've never known a home cook that has one.  A mesh colander...or any thing with small holes works just fine.
NOTE #2: You can skip the colander step if you don't own one.  Just mash the sweet potato into a paste with the back of a spoon and remove any lumps or bits of skin left behind.

3. Taste your sweet potato and season with salt.  Add a little more than you think you need because the egg and flour will make the dough bland without enough salt.  I recommend at least 2-3 tsp.
4. Add the egg to the sweet potato and mix well.


5. Start adding flour to the sweet potato mix, until you have a soft, but not overly sticky dough.  Do not knead this dough too much!  You will come out with tough little nuggets, instead of pillows!  Gently add flour a little at a time until the dough comes together.  I used approximately 2 cups of flour.


6. Take a portion of the dough and roll it into a medium-sized log.  Use a butter knife to cut the log into little pillows. Place pillows on a lightly floured pan.  Repeat with the rest of the dough.


7. Using the same pan you boiled the potatoes in, heat a full pot of salted water to boiling.  Add in the gnocchi in small batches.  When they start to float, they are cooked through.  Use a slotted spoon to remove them, and place them on a flat pan or dish to let dry.


NOTE: At this point in the recipe, the gnocchi are good to eat!  They will be soft little dumplings that you can serve with the coconut curry sauce.  Or, if you want a bit more texture, you can also fry these up!  See below.
8. Serve hot with sauce OR heat a large skillet with enough coconut oil to coat the bottom on medium high heat.  Add dried gnocchi to the pan and fry until both sides are golden brown.  Drain on paper towels. Serve hot and enjoy!


T.E.A's Coconut Peanut Curry Sauce

This sauce, as my husband said, is "legit".  I guess this is a short way of saying that it tastes exactly how you want it to taste: creamy, peanut-y, spicy, yummy, another "y" adjective....anyway...it's good.  I know I make a lot of curry sauces, but this one is even easier!  And it isn't hot spicy like my other ones.  It is cool and creamy and I want to put it on everything!

1 cup onion, small dice
2 jalapenos, large dice
4 cloves garlic
1 thumb-sized piece of ginger, washed and trimmed of any dirty spots
1 1/2 cups whole coconut milk (more or less depending on the consistency you want)
1/2-1 cup peanut butter (more or less depending on how peanut-y you like it)
salt to taste (about 2-3 tsp)
honey to taste (about 1-2 TB)
coconut oil for sauteing

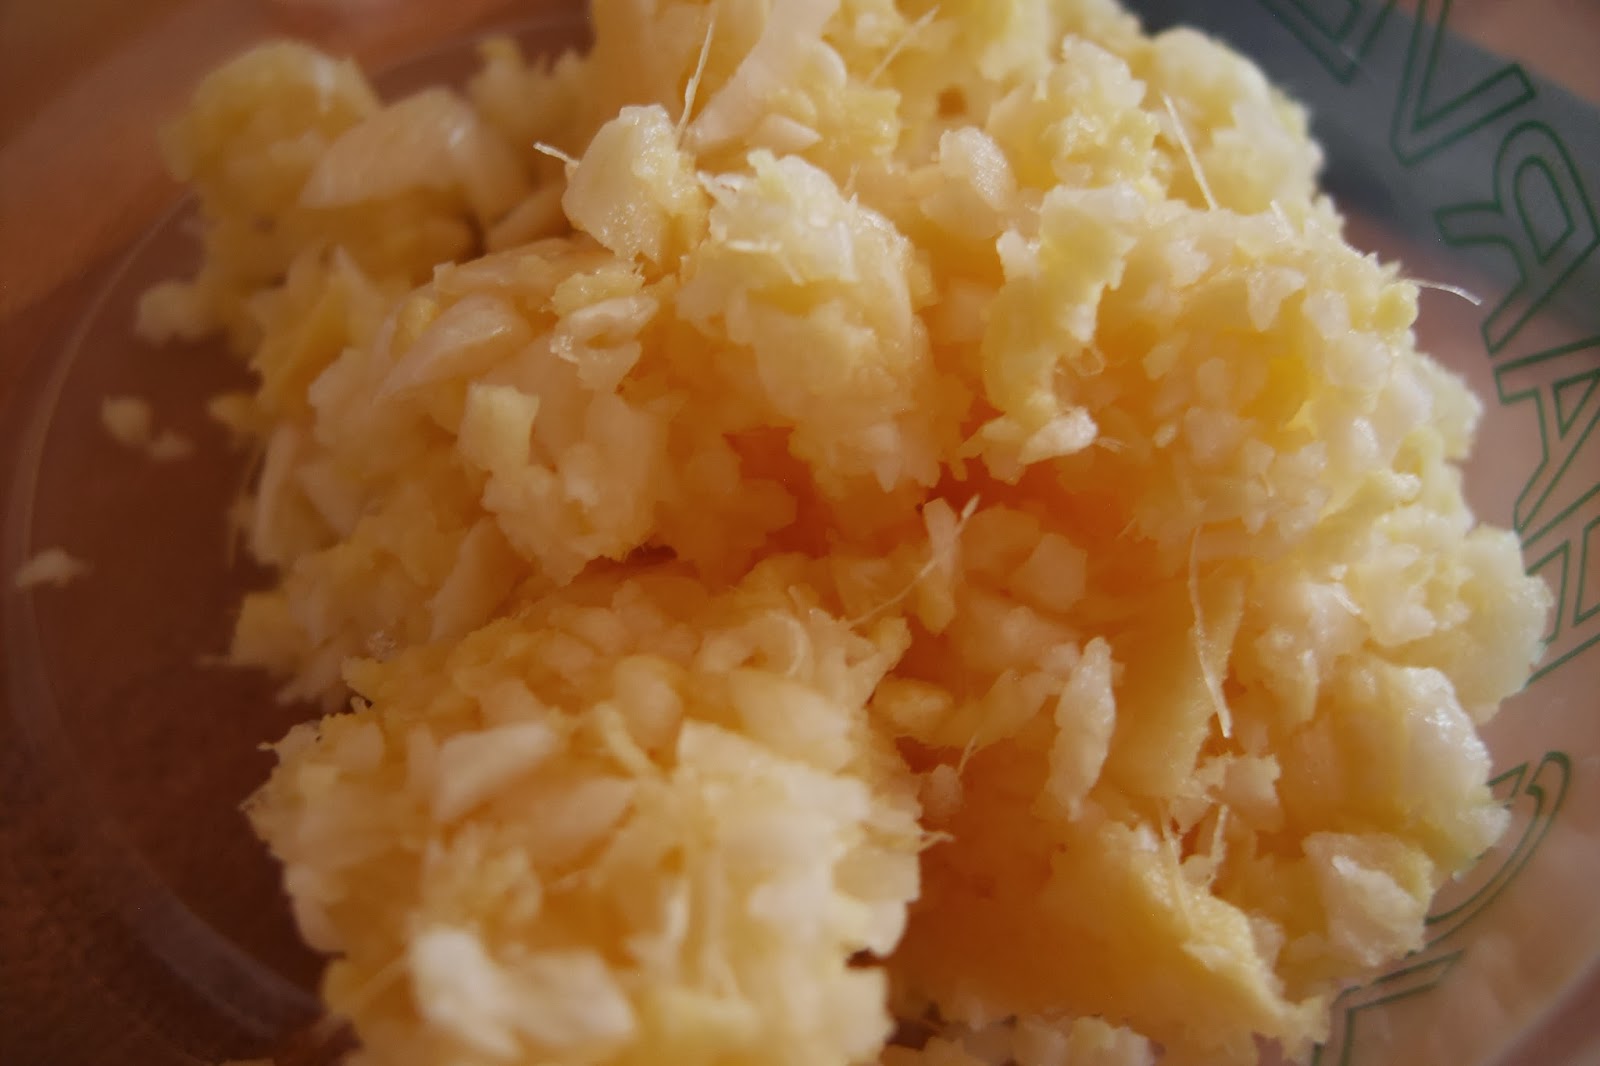
1. In a food processor, add jalapenos, garlic, and ginger.  Puree, adding a little water as needed, into a fine paste. Set aside.


2. In a medium skillet, heat about 1-2 TB coconut oil on medium high heat.  Add onions, and saute until they are soft and opaque.  It is ok if they brown a little...this will give it more flavor.


3. Add chili/garlic/ginger paste to onions and saute for 2-3 mins or until fragrant.  Take off the heat and set aside.
4. In a blender (or food processor, but a blender will achieve a finer pureed sauce), add peanut butter, onion mixture, and enough coconut milk to cover the ingredients.  Puree into a smooth sauce adding more coconut milk as needed, depending on how thick you like your sauce.


5. Taste and season with salt and honey.  This is a savory sauce, however, the honey enhances the sweet notes of the coconut milk.
6. Serve warm or at room temperature over gnocchi.  Or this sauce would be good on lots of things...like baked chicken or rice and veggies!
NOTE: You can reheat this sauce, but don't boil it!  The coconut milk will separate.  It is best to warm it gently on the stove on low heat, or for a few seconds in the microwave.  Or try it cold! :)

ENJOY!!!

Wednesday, August 28, 2013

It's Foul! Mudammas, that is!

And it's not foul, it is rich, fragrant, and slightly tart with lemon juice: a perfectly balanced combination!  Foul (pronounced "fool") Mudammas is a traditional Middle Eastern spicy bean dish that is topped with olive oil and served with pita bread. 

 My dad was lucky enough to travel to Saudi Arabia a few years ago, and the one thing he raved about most was the delicious, delicious food.  One of the dishes, in particular, that he has always wanted to recreate, was foul mudammas, which he ate everyday for breakfast.  I was intrigued, so I tried several versions of this dish.  It is traditionally made with fava beans, and according to my dad, is spicy with the consistency of refried beans. 

I wasn't expecting this dish to be hard at all because it is so basic: beans, spices, garlic, lemon juice, tomato.  However, fava beans are a mystery to me.  Unlike most beans, favas have a very tough, fibrous outer shell which doesn't break down, even after cooking it for a long time.  I have learned that for fresh fava beans, you need to blanch them first, then peel off the outer shell....meaning these beans take a long time to prep.  I took the short route, though, and bought canned fava beans, and they still had a very tough outside.  I'm not sure if they were prepped incorrectly and then canned, or if fava beans are just a tough bean!

So, I decided to scrap tradition (though I still feel a pang of guilt...I would really like to make this dish exactly how the Saudis do it...but oh, well), and use a bean I know works well: great northern beans.  I love these beans because they are very neutral in flavor and cook rather quickly.  I use them for soups all the time, and I've even made chocolate pudding out of them (see here)! Because of time restraints, I bought canned beans again, and the already soft beans made for a super quick meal!


On a side note, I used the liquid from the can in this recipe, but I usually never recommend this.  Most canned beans are packed in salted liquid, so if you add it to your recipe, you are adding more sodium than you might want.  I recommend for most recipes to pour out your beans (or whatever vegetable you might be eating from a can) into a colander and rinse them well.  With this technique, you have complete control over the salt content in your recipe.  Because I did add in the liquid to my foul mudammas, I made sure not to add any extra salt until the end.

I love the simplistic way this transports me overseas.  The spices are familiar, but the combination of garlic, tart lemon, and olive oil is quintessentially Middle Eastern.  Trying traditional recipes is the cheapest way to travel!  Though, next time my dad goes somewhere that exciting...he's going to have to take me along! :)

Foul Mudammas
(Adapted from a recipe online...but I didn't write down the source...sorry)


2 cans (15oz) great northern beans..or any neutral, white bean is fine
4 cloves garlic, minced
2 tsp ground cumin
2 tsp paprika
1 tsp chili powder, optional to taste
1 cup green onion, thin slice
1 large tomato, medium dice
juice of 1 lemon, about 2 TB or to taste
salt to taste, if needed
extra virgin olive oil, optional to taste
pita bread, option to serve

1. In a large soup pot, add beans with liquid from the can and enough water to cover the beans.  Bring to a boil, reduce to a simmer.  Let cook 5-8 mins, stirring occasionally.


2. Add cumin, paprika, chili powder, and lemon juice to beans.  Let cook another 5-8 mins, stirring occasionally.  Add more water if beans start to stick to the bottom of the pan.  Beans should be very soft and liquid should be thickened.


3. Add in green onion and tomato and more lemon juice if needed.  Cook for another 5 mins or until the tomatoes break down and the onions soften.


4. Serve hot topped with olive oil (if desired) and pita bread.  Or, use as refried beans in burritos or enchiladas, or as a side dish by themselves.  We ate ours as a spicy bean soup, which was great!  This dish is also great for breakfast, which is how it is traditionally eaten. :)


ENJOY!

Wednesday, August 21, 2013

Mom's Cobbler

It felt like fall yesterday....I'm so excited!  Fall is my favorite season, especially here in Portland.  The weather is warm, the breeze is cool, and the skies are clear and blue.  Stone fruits are in season right now at the end of the summer, and I bought some luscious peaches that just begged to be put in dessert!  I decided on something simple that my mom makes a lot: peach cobbler.


Although simple, cobbler is not to be underestimated.  When done right, it is a thick, gooey cake filled with syrupy stewed fruit.  It can be as good as any great pie, and is a quicker, easier way of making dessert.  
This recipe comes from my mom, though I believe it was passed down from some of my older female relatives.  It is a classic southern dish (my family is from Tennessee and Alabama), and it makes me happy to eat.

Mom's Cobbler

3 cups sliced peaches
1/2 cup sugar
1 1/2 cup self-rising (AP) flour (or add 1 tsp salt and 1 tsp baking powder to regular flour)
1 1/2 cup milk
1 stick butter

*You can use different fruit for cobbler such as other stone fruits or berries!

1. Preheat oven to 350F.   Melt butter in a 9x9 pan.
2. In a small bowl add sugar, flour, (salt and b.powder if needed), milk, and mix well. 
3. Pour flour batter over melted butter. Do not stir.  Pour fruit over batter. Do not stir.
4. Bake for 1 hour. Batter should be set and fruit should be bubbly and syrupy. Serve warm.

OR...I did it backwards and it was still good:

1. Preheat oven to 350F.  Add peaches to a casserole dish in a thick layer. 


2. In a small bowl add sugar, flour, (salt and b.powder if needed), milk, and mix well.  Melt the butter.  Add melted butter and milk to flour mixture and whisk until combined.


3. Pour batter over fruit.


4. Bake for 1 hour. Serve warm.


My cobbler was a little different from my mom's for several reasons, besides getting the directions backwards, haha.  I needed to make the batter non-dairy, so I used my butter-flavored shortening instead of butter.  I think this worked OK, however the batter was a little on the crusty side, instead of the soft chewy texture it was supposed to be.  Butter makes a softer crust.  I also used pastry flour and forgot to put any baking powder in.  This accounted for the flat nature of the batter.  


Despite that though, this was still delicious.  Roasted fruit is good no matter what, and the batter wasn't half bad.  I like recipes like this because they work even if you screw it up somehow.  :)
So, get some super ripe fruit and enjoy a delicious cobbler!  Serve with some vanilla or coconut ice cream for best results! 

Wednesday, August 14, 2013

Akoho sy Voanio: Chicken in Coconut Milk


Even though it is summer and still hot here in Portland, I've been craving curry.  Not the kind of curry that contains many spices and hot chilies, but a simple, creamy curry that takes advantage of summer produce.  I knew that I had a recipe that fit those criteria perfectly that we had made in World Cuisine class.  It is the perfect summer curry: creamy, tart, and contains juicy summer tomatoes!

This recipe comes from South Africa where they really know how to use coconut milk.  In class, I learned the beauty of coconut by making many dishes that used it in unique ways. This recipe is very simple, but takes advantage of the sweet taste of whole coconut milk.  I don't recommend getting lite coconut milk for this recipe.  For one, a lot of the thick texture is lost, and I don't think it tastes as good.  It is worth using the "good stuff" since it plays such a starring role.

I also recommend getting chicken with the skin on and bone in because you get more flavor out of it.  Browning the skin deepens the flavor, plus it creates a delicious "fond" on the bottom of the pan in which to saute the onions.  Also, the bone helps retain a lot of the chicken flavor while braising (meaning the simmering method used below) without drying out the meat.  I love using chicken thighs because I prefer dark meat.  To me, it is more tender, flavorful and is hard to dry out.  If you prefer using chicken breasts, that is OK, but I would use skinless breasts and completely skip the browning stage.  You can add the raw chicken to the simmering liquid and cook them until they are just done, and they will retain most of their moisture and still be delicious.  However, if you simmer them too long, they will toughen up...so be careful!

Also, on another note, I added the original recipe because I like seeing the different proportions that different cooks use.  Plus, the original recipe recommends marinating the chicken (in lemon juice, zest, salt, pepper, and cayenne) for about an hour before cooking.  I believe this would make the whole dish more flavorful, although, I don't believe it is completely necessary.  I opted out of this step in my recipe.  I also decided to add more cayenne and ginger, though my version isn't very spicy...just very flavorful.  

If you need a good "end of the summer" kind of dish, this is one I can recommend.  It reminded me of hot weather and happy days. :)


Akoho sy Voanio: Chicken in Coconut Milk (Original Version)
serves 4

2 1/2 pound chicken cut into 8 pieces
2 TB lemon juice
1 tsp lemon zest
1 tsp salt
1/2 tsp black pepper
1/4 cayenne pepper
1/4 cup coconut or peanut oil
1 1/4 cup onion, small dice
1 TB garlic, minced
1 cup tomatoes, peeled, seeded, medium dice
1 tsp ginger, minced
1 cup coconut milk
as needed: cooked rice, hot

1. Combine chicken, lemon juice, zest, salt, pepper, and cayenne.  Marinate 1 hour.
2. Heat oil over medium heat and saute onions and garlic, 3-5 mins.  Add chicken and cook until chicken is almost cooked, 12-15 minutes.
3. Add tomatoes and ginger. Stir well and cook 3 minutes.
4. Add coconut milk and simmer until chicken is completely cooked.  Remove chicken pieces as they cook.  Reduce sauce to desired consistency and serve over rice.


T.E.A's Version
serves 4

4 chicken thighs (or whole legs) with skin and bone-in
1 cup onion, small dice
1TB garlic, minced
2 TB ginger, minced
1/2 tsp cayenne (or more if you like it spicy!)
2 cups tomato, large dice
juice of 1 lemon
1 1/2 cup whole fat coconut milk (or one can)
coconut oil for frying
salt and black pepper to taste

For serving: 2-4 cups cooked rice (I used short grain brown rice)


1. In a large skillet, heat enough coconut oil to cover the bottom of the pan (2-4 TB) until it is shimmery.  Salt and pepper your chicken well, then place it skin side down into the hot oil. Saute until it is golden brown, then turn cook for about 2-3 mins on the other side.  There is no need to brown the non-skin side...it will just make the meat tougher.  Take chicken out of pan and set aside.  Drain if needed on paper towels or cooling rack.


2. Pour out some of the oil in the skillet until there is about 1 TB.  Set skillet back on heat and add the onions and a dash of salt.  Saute on medium heat until opaque and soft.
3. Add garlic and ginger to onions.  Saute for 1-2 mins or until fragrant.


4. Add tomatoes, lemon juice, and cayenne to onion mix.  Saute for about 5 mins or until the tomatoes have softened and a sauce begins to form.


5. Add coconut milk to tomato mixture.  Stir to combine.  Add chicken, and make sure sauce covers most of the meat.  Bring to a simmer (Do Not Boil...the coconut milk will begin to separate), cover the skillet, and continue simmering slowly for about 20 mins or until the chicken is cooked through.  Taste the sauce and add more salt/pepper as necessary.


6. Serve immediately over hot, cooked rice.


Enjoy! :)

Tuesday, August 13, 2013

Avocado Chocolate Pudding

My mom bought me a blender for my birthday! Whooo!  I have a food processor, but blenders are great when you want a smooth, silky puree.  I broke in my blender with a delicious strawberry/blueberry smoothie, then I tried a new recipe: "healthy" chocolate pudding.  I found this recipe, like, a million years ago, but never tried it because it didn't have a blender.  It has been hiding in among the rest of my loose leaf recipes, until I dragged them all out yesterday in order to find cooking inspiration.  Between my craving for chocolate and my desire to use my new blender for everything, it was time to try out this chocolate pudding.

Now, I was almost thought that this recipe was a failure.  The avocado that I picked out was very dark green and slightly soft...indicating that it was perfectly ripe.  After I blended the ingredients to the perfect velvety texture, I tasted it...and it was a little grassy.  The avocado taste was overwhelming and slightly unpleasant.  But I patiently packed it up and put it in the fridge to cool.  After dinner, my husband had a major sweet tooth, and pulled out the chilled pudding cups.  And....it was delicious!  I realized that I had tasted the pudding when it was still slightly warm which enhanced the vegetable-ly taste.  Chilling dampens flavors, and after the pudding cooled, the avocado taste in the pudding was nearly hidden.


If you get a sweet, creamy avocado, this probably won't be as big of an issue, but I recommend chilling this pudding for at least an hour.  Not only will it improve the taste, but it will also set up beautifully.  Mine had the texture of great panna cotta with the sweet crunch of vanilla cookie crumbs.  Yum!

The other great thing about this pudding is it is super, super easy to make, and it's healthy.  Avocado and coconut milk contain very healthy fats!  And there is only a small amount of sugar from the chocolate chips. Plus, if you use dark chocolate, you're ingesting some yummy antioxidants!  

Avocado Chocolate Pudding
makes about 2 cups

1 ripe avocado
1 cup chocolate chips (I used semi-sweet, but would have preferred dark chocolate.  Use whatever you like!)
1/4-1/2 cup whole coconut milk (more or less to make the pudding come together)

Optional, though highly recommended:

1 cup cookie crumbs for topping (I used Newman's Own vanilla cookies)

1. In a double boiler (Place a sauce pot with a little bit of water in the bottom on high heat.  Put a stainless steel or glass bowl on top, then ingredients in then bowl.  The steam will melt the chocolate).  Add chocolate and a small amount (about 1/4 cup) of coconut milk into the bowl.  Heat until melted and well blended.  Add more coconut milk if needed to make it smooth.


2. While the chocolate is melting, add about 1 cup or more vanilla cookies (or whatever cookies you like) into a blender or food processor and blend into fine crumbs.  Pour into another container and set aside.


3. In a blender, add avocado flesh and chocolate mixture.  Puree on high until smooth and velvety.  Add more coconut milk as needed.


4. Pour pudding into cups (I used small plastic containers with lids).  Top with cookie crumbs.  Refrigerate for at least 1 hour.  Eat and enjoy! (should keep 3-5 days in the fridge)


ENJOY!! :)