Wednesday, March 20, 2013

Kimchi Fried "Rice"

So, I was looking at the OBP website (our local NPR/PBS station) the other day searching for interesting local videos.  I immediately found a short video about how to make kimchi fried rice.  I was stoked because I have been wanting to try kimchi for some time now.  Kimchi is fermented cabbage and spices, kind of like the Asian version of sauerkraut, except it is much less sour, and has more flavor since it contains garlic and chilies.  I have been reading lately that fermented foods (like kimchi, sauerkraut, yogurt, and kefir) are really good for you because they contain healthy bacteria and well as essential vitamins and minerals.  I have never tried kimchi before, but it seemed like a good time to try it out.

I also thought I would substitute cauliflower "rice" for regular rice.  I've been making this as a low-carb substitute and its taste and texture are very similar to rice.  Plus, it is is much faster to make.  All you need to do is chop it in the food processor, then blanch it quickly in boiling, salted water, then drain it and it is ready to go!

This dish, however, was not completely successful.  First of all, I decided to use only tofu in the recipe as the protein.  There is nothing wrong with this, but I did not prep the tofu correctly, so it became a mushy mess.  Firm tofu needs to be "squeezed" and dried thoroughly in order to stir fry it.  Otherwise, it is too wet and will stick to the pan and fall apart...which is exactly what happened to me.  Whoops.  I was in a hurry, and hungry, but I learned my lesson and will be more prepared next time.


Secondly, the cauliflower rice does not substitute as well for fried rice.  There is a density to rice that allows it to be fried and still hold up. Cauliflower, on the other hand, just gets softer as it is cooked, and will become slightly mushy if cooked too long.  While mine was not mushy, it didn't hold up as well to cooking as I had hoped.  In hindsight, I would only have just blanched it, then served the stir fry on top of it, instead of trying to stir fry it with the rest of the ingredients.

Even though the texture of this dish did not turn out as intended, I found that I'm a big fan of kimchi.  It is extremely flavorful on its own which means it doesn't need a whole lot of manipulation or extra seasoning to be delicious.  It has the potential to be a staple in my household... I would add it to stir frys, soups, or even use it as a garnish for meat or fish.  The kimchi alone made my stir fry very flavorful.  My next long project will be making kimchi from scratch!


T.E.A.'s Kimchi Fried "Rice"
serves 6-8 people

NOTE: Adding in meat of your choice would also be great.  You can do both tofu and chicken/pork/beef/seafood.

1 head cauliflower, cut into florets
1 or 2 blocks firm tofu
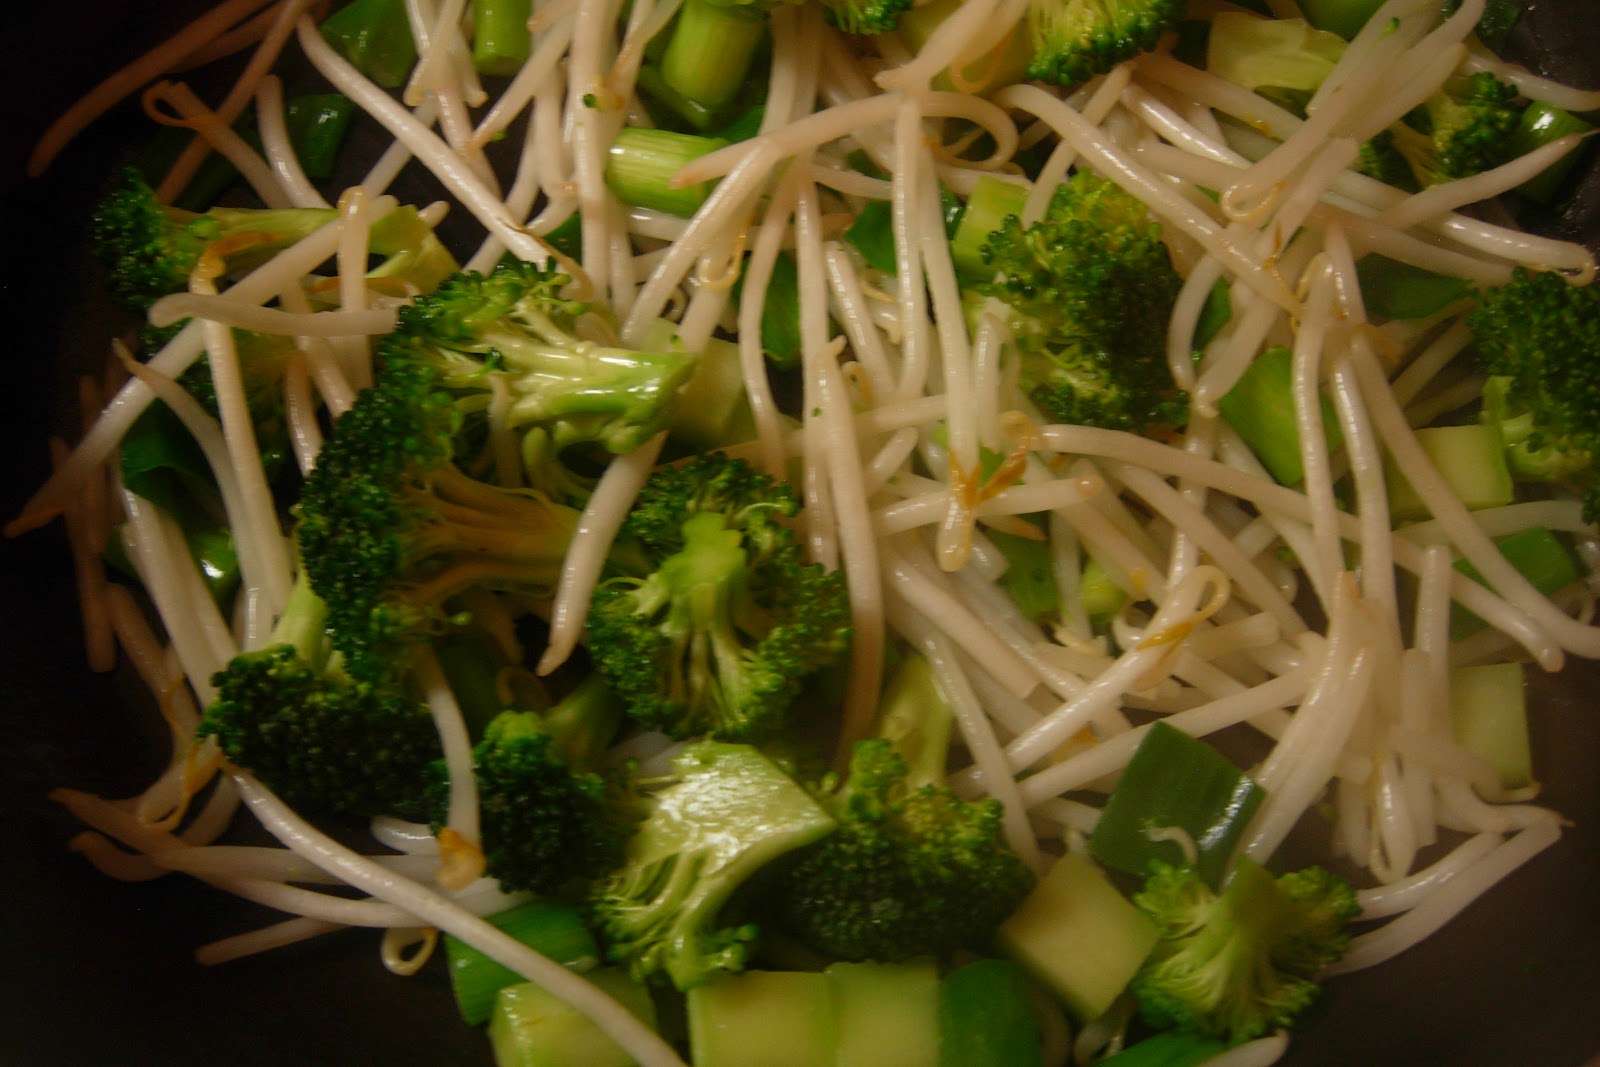
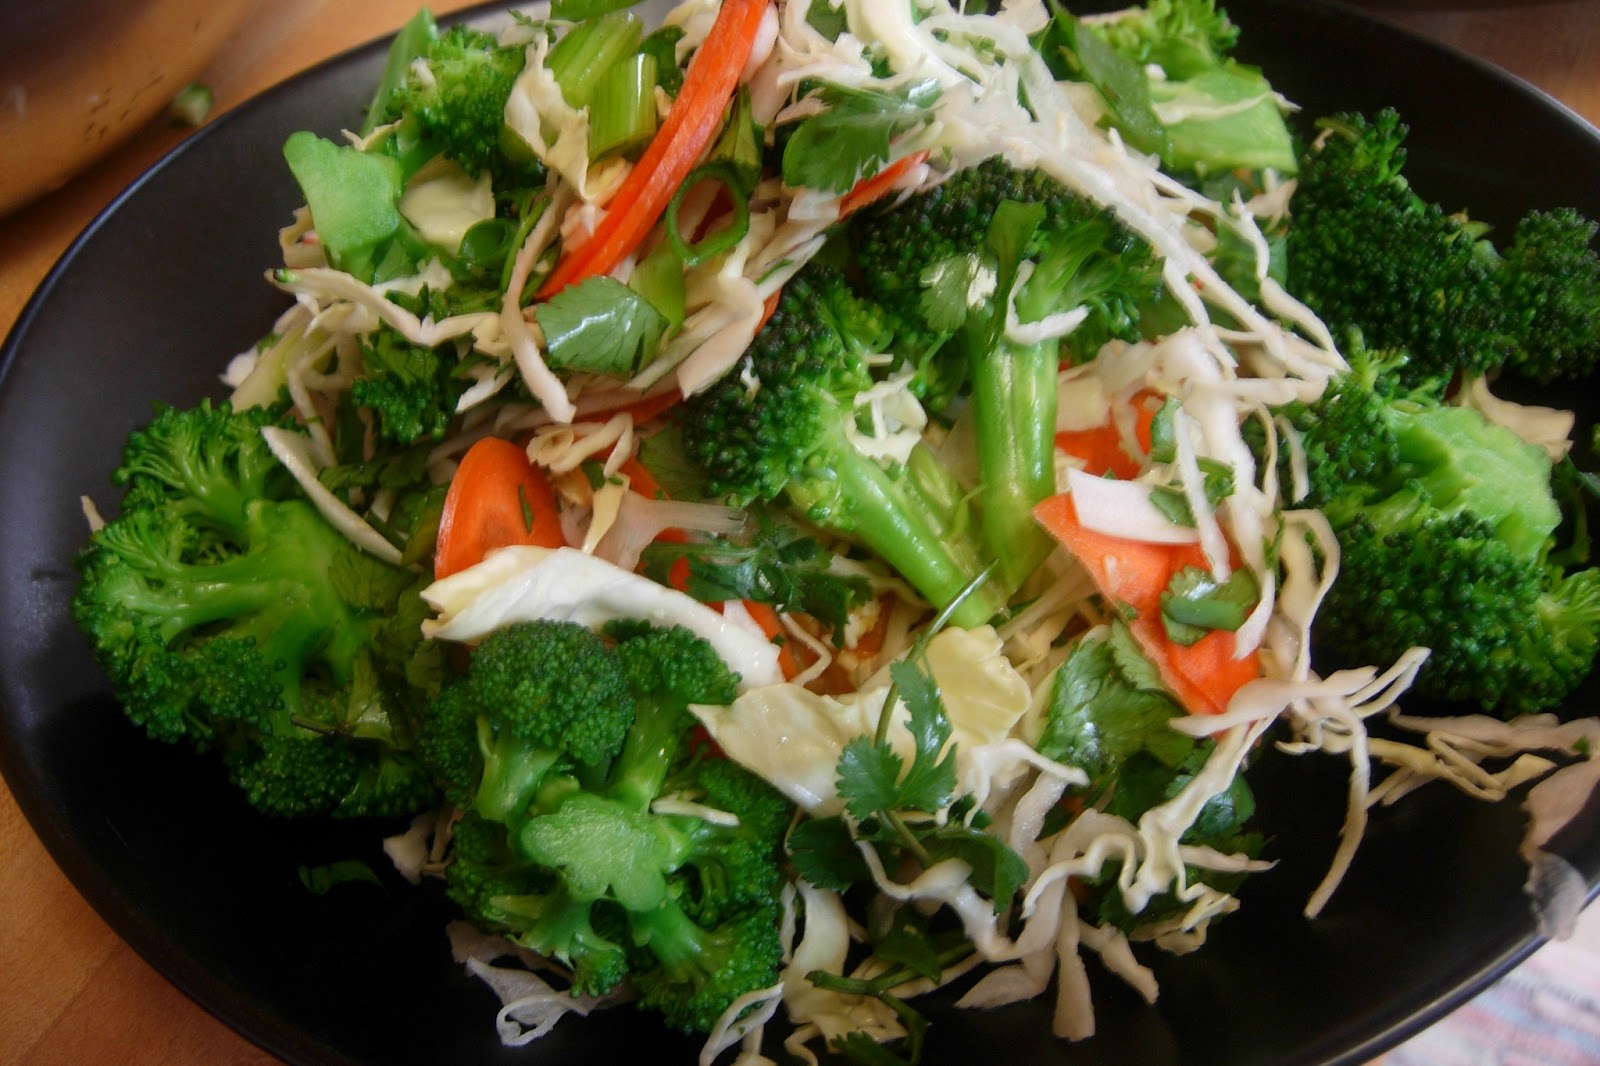
2 heads broccoli, cut into florets
1 package bean sprouts (about 2 cups)
1 cup green onion, chopped
1 bottle kimchi (about 16 oz or 2 cups)
1 TB red curry paste

soy sauce, to taste as needed
coconut or vegetable oil as needed for frying

fried egg for garnish, optional


1. Place the tofu block between paper towels (or very clean kitchen towels) and weight it down with a plate.  Leave to drain off its moisture for about 20-30 mins.  This should dry the tofu enough to stir fry without falling apart. After it has drained, cut tofu into 1" cubes and set aside.


2.  Place cauliflower florets in a food processor and pulse until the size of rice grains.  Place "grains" in a large pot of boiling salted water for about 1 minute.  Drain off and rinse with cold water.  Set aside.


3. In a large skillet, heat about 1 TB coconut oil and add bean sprouts, broccoli, and green onion.  Saute for 2-3 minutes or until broccoli is bright green.  Remove from skillet and set aside.


4. In the hot skillet, add tofu cubes, kimchi, curry paste, and a little soy sauce if necessary.  Saute until heated through, about 2-3 minutes.  Add in "rice" and sauteed veggies.  Mix until heated through, about 1 minute.


5. Serve hot with a fried egg, green onion, and cilantro as desired.


Also, it is my husband's spring break!  So, I might not be on for the next week or so...I'm going to be gaming, eating, drinking, hiking, dog-walking, and spending good times with friends!

Monday, March 18, 2013

Chocolate Stout Cake

Time for chocolate cake!  Hopefully, you have at least one bottle of Guinness left over from yesterday's festivities!  If not, this cake would actually be yummy with any type of dark, sweet beer.  We had Guinness Extra Stout, which (in my opinion) is almost too bitter to drink.  And it made this cake ever so slightly bitter, too.  I think, in hindsight, I would have loved to use a chocolate stout, or some sort of porter.  Porters are my favorite beers because they are smooth and rich.  I found that the beer flavor was subtle, yet distinct, so if you're interested in making this cake, I recommend using a beer you really like to drink.


Last week, the entire Internet was swarming with St. Patty's Day recipe ideas.  That's where I found the inspiration for this cake.  I had the hardest time, though, finding a recipe that fit with what I was looking for.  I wanted a recipe that included a lot of beer...I actually wanted to taste it and not have it hidden by a lot of other ingredients.  I also wanted a dairy-free version, but not necessarily vegan because those sometimes taste weird.  Most of the Chocolate Stout Cake recipes I found on all the popular recipe sites were the exact same recipe.  Just one recipe was getting tossed around!  I guess it must be a good one, but it also included sour cream.  Now, if a recipe includes just milk or even buttermilk, that is easy to substitute with a non-dairy option (and a little vinegar, if needed).  However, sour cream has a completely different consistency to milk or buttermilk.  It contains more fat and is pretty thick, which means that it was bringing both moisture and bulk to the recipe.  It is not an easy task to find a non-dairy substitute for sour cream.  I could have used some dairy-free yogurt, but I didn't have any on hand.  I found a recipe that used silky tofu instead of sour cream, but not only did I not have any tofu, but I thought that it might make the cake taste less appetizing.  So, I combined some of the recipes that I found with what I know about baking to come up with this very simple cake recipe.  And it worked!  And it tasted like chocolate beer...so I was pretty happy.

The only thing I would change was the cooking time.  I added in chocolate chips, so when I went in for a toothpick test, the melted chocolate chips made it seem like the whole cake was still wet inside.  I left it in the oven for a little bit longer than needed to keep it moist and rich.  However, coconut oil keeps baked goods very moist, so the end product wasn't overly dry, just a little flakier than I had hoped.  This could also be due to using whole wheat flour, but the overall result and taste were good.

The other thing that I didn't do was make a frosting for this.  My husband and I devoured this cake without needed anything added to it, though I do think if you wanted a sweeter, or fancier cake, this would be delicious with an Irish cream frosting, or other vanilla-flavored frosting of your choice.

T.E.A.'s Chocolate Stout Cake
makes 1 9" cake

1 1/4 cup whole wheat pastry flour
1 cup brown sugar
1/2 cup cocoa
1/2 tsp baking soda
1/2 tsp salt
2 eggs
3/4 cup stout
1/2 cup coconut oil, melted
1 cup dark chocolate chips
non-stick cooking spray

1. Preheat the oven to 350F. Oil your 9" cake pan.
2. In a large bowl, sift flour, sugar, cocoa, baking soda and salt.  Mix thoroughly.


3. In a separate bowl, whisk together eggs, stout, and coconut oil.  Pour into dry ingredients and mix until incorporated.  Do not over-mix.  Fold in chocolate chips.


4. Pour batter into oiled cake pan, and bake for about 20 minutes or until a toothpick comes out clean. (Baking this cake will take more or less time depending on your oven.)
5. Take cake out of the oven and invert it onto a wire rack.  Let cool completely. Frosting the cake, if desired, or enjoy as is!

NOTE: For frosting: cut cake in even halves, add frosting to the top of one half, add the next half of the cake, then frosting the entire outside. If there are a lot of crumbs in your frosting on the outside of your cake, put the cake in the refrigerator until the frosting sets up, then add another thin layer on top.  This will cover up any spots of crumbs.


YUM! :)

UPDATE: For those of you who do not want to use beer, I made this cake again with whole coconut milk and it turned out just great!  Any whole, thick milk or yogurt will work as well. :)

Saturday, March 16, 2013

Make Your Own Corned Beef Part 2

Whoo! Corned beef!!  Just in time for St. Patty's!  Here is the continuation of the corned beef recipe.  The rest of the procedure is very simple:

Cooking Corned Beef

1. Drain meat and discard brine and spices. Rise meat well under cold water.
2.  Put meat into a large pot and cover with 1" cold water (or more if you want it slightly less salty).  Add in 1TB new pickling spices if you desire.  Bring to a boil, then reduce to a slow simmer.  Cook for 2-4 hours or until fork tender.
3. Take meat out of cooking water, and let cool for 15-20 minutes.  Once it is cool, slice thin.  If you are not going to eat it immediately, make sure to lay the slices out in thin layers to cool quickly, then store in the refrigerator for about 5 days.


My corned beef is "grey" (though that sounds unappetizing!) compared to the  popular red color of corned beef made with nitrates.  However, it is no less delicious!

I found that my meat was a little on the salty side because I wasn't able to cover it with more than 1" of water.  I would recommend adding in more water at the beginning of the cooking process, or as it evaportates during cooking.
My corned beef took 3 hours to cook, and it probably could have gone about 30 minutes more if I wanted to....I was just hungry, haha!  But it turned out really nice and tender, but still firm enough to slice.


Corned Beef and Cabbage:

1.  Taste cooking liquid for salt content.  If it is too salty (mine was), pour out about half of it, and add in more cold water.  Add shredded green cabbage plus other veggies of your liking (potatoes, carrots, etc) to cooking liquid, bring to a boil and simmer until just tender*.
2. Enjoy with sliced beef.

*I only added cabbage to my dish, so it only took about 5 minutes to cook.  If you are going to simmer carrots and potatoes as well, add them first, then put in the cabbage later.  This way, your cabbage will stay not overcook.


I added some bite-sized beef chucks into my cabbage to make it a soup!

My next project tonight is....Guiness Stout Chocolate Cake!  Stay tuned!

Friday, March 15, 2013

Irish Soda Bread

Have you ever wanted to make fresh bread, but didn't want to spend all day doing it?  I mean, who doesn't?  Yeast based breads are fantastic, but they take forever.  I usually turn to simpler bread recipes, and since it's almost St. Patty's Day, I wanted to share quick and easy soda bread!

I have a fantastic Irish cookbook that I love dearly.  I went to Ireland for my honeymoon, and looking at the pictures in this book brings back great memories.  I have made the Irish vegetable stew with dumplings about a thousand times.  


I have also made soda bread a lot, but since I have cut bread almost completely out of my diet, I haven't made it in years.  But this weekend is time for celebration, so soda bread it is!

Soda bread is risen with baking soda instead of yeast, so it is much more like a muffin.  It has a softer crust, is fairly dense inside, and is slightly sweeter than most breads.  It takes about 5-10 minutes prep time and 45-1 hour to cook.  It is great as toast, or (as the Irish like it) fried for breakfast. I can attest that fried bread is one of the more delicious things in the world, even if it is a bit fattening.

I'm putting some egg salad on mine today, and it will also be a great compliment to my corned beef and cabbage that is coming up soon!

Here is the original recipe!

Wheat Soda Bread
adapted from Irish Cooking
makes 1 loaf

9 oz (about 2 cups) whole wheat pastry flour
1/2 tsp baking soda
1/2 tsp salt 
1 tsp brown sugar
1 cup soy milk
1 tsp apple cider vinegar
spray oil

NOTE: The original recipe used buttermilk, which is totally delicious, too.  I just made my version dairy-free.
I did use my scale for this.  Scaling ingredients is much more accurate than measuring cups, and is important when baking.

1.  Preheat oven to 400F.  Add vinegar to milk, stir until thickened and set aside. 


2. Mix together all dry ingredient in a medium bowl.  Pour in milk mixture and mix until soft dough comes together.  You can add a little more milk if necessary.


3.  Immediately pour dough into oiled loaf pan.  Bake for 20-30 minutes, then reduce oven to 300F and cook for another 20-30 minutes or until crust is golden brown and a tooth pick comes out clean.


Enjoy!

Tuesday, March 12, 2013

"Pad Thai"

I'm trying to be better about food budgeting.  In the past few months, when our pantry runs low, I am more likely to suggest that we go out to eat, than spend the small amount of time needed to figure out what I can make at home.  Sometimes, the desire to have someone else cook for a change is strong, and I long for some of our favorite restaurant dishes.  The two restaurants we frequent most are Cha Cha Cha (Mexican food) and Mee Sen (Thai food).  Instead of impulsively going out to dinner, I've decided to bring some of those flavors into my kitchen.  One dish, in particular, that I've been wanting to make from scratch is Pad Thai.  

I have this tiny little Thai Cookbook called The Best of Thailand that I found in a used bookstore years ago.  


I rarely use it, however, because it is REAL Thai food, meaning there are many ingredients that are plentiful in Thailand, but are hard to find in the states...like galangal, tamarind, or dried shrimp.  Groceries are getting better at stocking a wide variety of ethnic foods such as Thai, Mexican, and Indian, but some of the more exotic ingredients are still only sold at specialty stores.  I couldn't even find green papaya (for Thai Papaya Salad), even though papaya is in season right now.  The cookbook contains great recipes for curry pastes, which I really wanted to make, but I just was unable to find all the ingredients.  So, I broke down and bought some. The store bought kind is made up of all the ingredients that I couldn't find, so it's not a bad trade off.  It has all the things I was looking for...galangal, lemongrass, garlic, kaffir lime, and chilis.


Pad Thai doesn't even call for curry paste, but I also couldn't find dried shrimp which are essential to the recipe in the book, so I decided to make my own version of Pad Thai...hence the quotations.

I will include the original recipe because I do believe it has merit.  However, I also don't own a proper wok, which is nearly essential to making great Pad Thai.  I say 'nearly' because I made a dish that tasted a whole lot like Pad Thai, but it didn't have the nice fry on it that you get from a really hot wok.  Since woks are much thinner than typical skillets, they heat very quickly and evenly, so you can get a nice sear on the food you're cooking.  I had trouble with my noodles because my skillet was not hot enough, so they stuck to the bottom of the pan instead of frying.  I recommend using a very hot pan for this recipe.  A very hot skillet means that you have to work very quickly (so your food doesn't burn!) and use a little bit more fat/oil that you might feel you need.  It is also important to have all your "mise en place" or prepped ingredients ready, so that you can throw them in the pan when needed.  Because your working quickly, prep time is the longest part of this recipe.  The actual cooking will only take a few minutes.

The original recipe also gives you an idea of where classic Pad Thai gets its flavors.  It contains dried shrimp, preserved radish (for spicy and sour), and a surprising amount of sugar.  It is a good example of many Asian foods that try to include all flavors in one dish: sweet, sour, bitter, hot, and salty.  I tried to achieve the same balance with red curry paste, some fish sauce, serrano chilis (I couldn't find Thai chilies which are much smaller and hotter than serranos), a little soy sauce, and fresh veggies and herbs.  I would say I was pretty successful, and managed to make something that is very easy to recreate with the ingredients available in most grocery stores.  

Original Pad Thai Recipe from The Best of Thailand
6 servings

1/2 pound rice noodles (about 1/4" wide)
12 small dried shrimp
3 TB vegetable oil
1 garlic clove, minced
8 medium shrimp, shelled and deveined
1 cake spiced tofu, sliced 1/4" thick
1 TB minced preserved radish
2 large eggs
2 TB distilled vinegar
2 TB nam pla (fish sauce)
3-4 TB sugar
2 tsp paprika
2 cups bean sprouts 
1/2 cup skinless roasted, unsalted peanuts, crushed

Garnish:

scallions
slivered red chili peppers
coriander (cilantro) sprigs

1. Soak dried noodles in warm water and cover 30 minutes to 1 hour until just softened.  Do not let noodles become mushy.  Drain and set aside.
2. In a food processor, pulse dried shrimp until finely chopped and set aside.
3. In a wok, heat oil over medium high heat until hot and beginning to smoke.  Add garlic and fry 20 seconds or until fragrant and just beginning to brown.  Add fresh shrimp and fry 2-3 minutes or until just orange.  Add tofu and cook stirring constantly until lightly coated with oil.  
4. Push shrimp and tofu to one side of the wok, and add 1 egg stirring constantly, about 1 minute.  Push the egg to the side, add the next egg and repeat.
5.  Add radish and push all ingredients to the side of the wok.  Add noodles, ground shrimp, vinegar, fish sauce, 3 TB sugar, and paprika and toss gently for 1-2 minutes until well combined.  Add scallions and bean sprouts and toss gently.  Add in remaining sugar if more sweetness is desired.
6. Place mixture on a large platter and sprinkle with peanuts.  Garnish with scallions, chilis, and coriander. 


T.E.A.'s "Pad Thai"
makes 2 portions

NOTE: I decided not to add meat to this dish, and instead added more egg, but it would be easy to add in some cooked chicken, shrimp, beef, or tofu.  

1/4 pound rice noodles (about 1 handful)
4 large eggs
2-3 TB coconut or vegetable oil
1-2 serrano chilies, minced

Sauce: (there might be a little left over, or pour a little over the top to garnish)

2 TB red curry paste
1 TB soy sauce
1-2 tsp fish sauce
1-2 TB peanut butter (in place of raw peanuts)
a touch of sugar or molasses for sweetness (about 1 tsp)


Garnish:

scallions, chopped
cilantro, rough chop
green cabbage, shredded
carrots, sliced thin
broccoli, lightly steamed


1.  Bring a pot of water to a boil, add salt and rice noodles.  Cook for about 5-7 minutes until just al dente.  Watch these because they can get mushy quickly.  Drain them immediately and rinse under cold water to stop them from cooking.  Set aside.
2.  While your pasta boils, you can put a steamer on top of the pot (if you have one) and steam your broccoli.  Steaming broccoli should only take about 4-5 minutes...just until it is bright green and slightly tender.  


3.  Heat oil in a large skillet on high heat until very shiny and almost smoking.  Add in serrano chilis and saute 1-2 minutes.  Add in drained noodles and 3 TB sauce.  Stir until noodles are well coated.  Fry for 3-5 minutes.  At this point you can add in your garnishes and saute for about 1-2 minutes to slightly wilt and warm them.  I just put them on top of my noodles as a raw salad garnish.  Taste and add more sauce if needed.


4.  Pour Pad Thai onto plates.  In the hot skillet, add eggs and stir until scrambled and cooked through.  Add them to the Pad Thai.  Garnish with veggies and Enjoy!


Monday, March 11, 2013

Make Your Own Corned Beef Part 1

I had a creative dilemma this week, so I reached out to my Facebook friends, and fellow foodies, to see if they had any great ideas.  They all reminded me that St. Patty's Day is this Sunday and recommended I make something to celebrate!  Irish food is one of my favorites, and I recently found a recipe for homemade corned beef, so thank you, Facebook buddies, it looks like St. Patty's Day food it is!

I have made corned beef before in school, and it is the easiest of all the handmade cured meats.  All it takes is a simple brine of salt and spices, some time, and a couple hours of poaching. I needed a recipe for this one, though, since the proportions need to be correct to make a good brine.  Plus, I haven't made this in over a year.  I found a good recipe from SimplyRecipes: http://www.simplyrecipes.com/recipes/home_cured_corned_beef//.  I changed it a little bit, but used the general outline.

This is "part 1" of corned beef because all I did today was make the brine and put my tip roast in it.  Now, I have to wait several days while the meat cures in the fridge.  I have to apologize since this recipe is coming a little late to the party.  The meat in the recipe can be brined for 5-10 days, and the longer it is brined, the more flavor it will have.  Starting mine today ensures that I can make it for St. Patty's Day, but if it is made in the next day or so, it will be ok, too.  However, corned beef is yummy at any time of the year, not just in March.  So, if you don't get to it this week, there are plenty more weeks to try it out!  Who doesn't love corned beef and cabbage for dinner or corned beef hash for brunch?  So many yummy possibilities!

NOTE: I did not use Saltpeter or pink curing salt/Prague Powder #1/DQ Curing Salt #1.  We did use this in class, but it is toxic in large doses and needs to be used properly.  Plus, there is a lot of talk about how nitrates in meats (which is the curing salt) are bad for you.  I can't confirm this or not.  But I can confirm that I'm not a fan...mainly because I don't like chemicals in my food...though it is, obviously, edible.
 The main reason to use this curing salt is that it keeps the nice, pink color of meats (think ham).  Without it, my corned beef will probably be a dull brown.  It obviously helps to cure the meat too, but with the amount of salt that goes into the brine, and the fact that is is kept refrigerated means that there is little worry of food contamination.  Use it if you want to, but please use a recipe with proper amounts and do a little research on how to use it properly.

Corned Beef
Adapted from SimplyRecipes

2.5 lbs tip roast (you should use brisket, but I couldn't find any.  Hopefully this will work!)


Brine:

1 cup salt (preferably sea salt)
2 quarts/8 cups cold water
pickling spices
1/4 cup brown sugar

Pickling spices:

1 tsp allspice berries
1 tsp mustard seeds
1 tsp coriander seeds
1 tsp whole cloves
1 tsp black peppercorns
1 tsp fennel seeds
1 tsp red pepper flakes
3 cardamom pods
1 tsp ground ginger
1/2 cinnamon stick


Allspice berries

mustard seeds

coriander seeds

fennel seeds

cloves

cardamom pods, cinnamon stick, ground ginger


1. In a small, dry skillet on medium high heat, add allspice, mustard seeds, coriander, whole cloves, peppercorns, and fennel.  Saute until fragrant and you hear the mustard seeds start to pop.  Make sure you shake or stir the spices continuously so they don't burn.  Toasting spices should only take 1-2 minutes if your pan is hot.  Once these are done, pour into a large soup pot.


2.  In your large soup pot, add the rest of the spices, salt, sugar, and water.  Bring to a boil, then take off heat.


twirly swirly gumdrops...

3.  Create an ice bath to cool down the brine.  Two stainless steel bowls (one large, one smaller) with ice water in between them work well for this.  Add in hot brine and stir often in order to cool it quickly.

NOTE: Cooling down the brine quickly is important because it will reduce bacteria formation.  Since the meat will be brined for several days, you want to make sure to have a very clean, safe brine.  Also, never put the meat into hot brine because that will not only help bacteria along, but it will start cooking the meat, which is not what we want to happen.  


I didn't have any ice cubes...but necessity is the mother of invention...


Having a food thermometer is great for this recipe.  It isn't totally necessary because you can feel if the brine is hot/warm/cold, but it certainly helps!

4.  Once the brine has cooled down sufficiently, put it in the container you want to use to brine the meat.  Loosely cover the brine and set it in the fridge to cool to 40F.  


5.  Once the brine is completely chilled, it's time to add in the meat.  Make sure your container is large enough to fit all the brine and meat without overflow.  A plastic tupperware with an airtight lid is good for this.  If the meat floats (which is probably will) put another small, plastic container on top (if you have one...a plastic measuring cup might work), then put on the airtight lid.  You can also use a large plastic bag, but make sure to remove all the air in the bag and set it in a bowl to prevent spills. Refrigerate for 5-10 days.


This is the container I used to help keep the meat submerged. 
I stored mine in the back of the fridge where it's coldest.

6. Now we wait...more to come in a few days!