Tuesday, March 12, 2013

"Pad Thai"

I'm trying to be better about food budgeting.  In the past few months, when our pantry runs low, I am more likely to suggest that we go out to eat, than spend the small amount of time needed to figure out what I can make at home.  Sometimes, the desire to have someone else cook for a change is strong, and I long for some of our favorite restaurant dishes.  The two restaurants we frequent most are Cha Cha Cha (Mexican food) and Mee Sen (Thai food).  Instead of impulsively going out to dinner, I've decided to bring some of those flavors into my kitchen.  One dish, in particular, that I've been wanting to make from scratch is Pad Thai.  

I have this tiny little Thai Cookbook called The Best of Thailand that I found in a used bookstore years ago.  


I rarely use it, however, because it is REAL Thai food, meaning there are many ingredients that are plentiful in Thailand, but are hard to find in the states...like galangal, tamarind, or dried shrimp.  Groceries are getting better at stocking a wide variety of ethnic foods such as Thai, Mexican, and Indian, but some of the more exotic ingredients are still only sold at specialty stores.  I couldn't even find green papaya (for Thai Papaya Salad), even though papaya is in season right now.  The cookbook contains great recipes for curry pastes, which I really wanted to make, but I just was unable to find all the ingredients.  So, I broke down and bought some. The store bought kind is made up of all the ingredients that I couldn't find, so it's not a bad trade off.  It has all the things I was looking for...galangal, lemongrass, garlic, kaffir lime, and chilis.


Pad Thai doesn't even call for curry paste, but I also couldn't find dried shrimp which are essential to the recipe in the book, so I decided to make my own version of Pad Thai...hence the quotations.

I will include the original recipe because I do believe it has merit.  However, I also don't own a proper wok, which is nearly essential to making great Pad Thai.  I say 'nearly' because I made a dish that tasted a whole lot like Pad Thai, but it didn't have the nice fry on it that you get from a really hot wok.  Since woks are much thinner than typical skillets, they heat very quickly and evenly, so you can get a nice sear on the food you're cooking.  I had trouble with my noodles because my skillet was not hot enough, so they stuck to the bottom of the pan instead of frying.  I recommend using a very hot pan for this recipe.  A very hot skillet means that you have to work very quickly (so your food doesn't burn!) and use a little bit more fat/oil that you might feel you need.  It is also important to have all your "mise en place" or prepped ingredients ready, so that you can throw them in the pan when needed.  Because your working quickly, prep time is the longest part of this recipe.  The actual cooking will only take a few minutes.

The original recipe also gives you an idea of where classic Pad Thai gets its flavors.  It contains dried shrimp, preserved radish (for spicy and sour), and a surprising amount of sugar.  It is a good example of many Asian foods that try to include all flavors in one dish: sweet, sour, bitter, hot, and salty.  I tried to achieve the same balance with red curry paste, some fish sauce, serrano chilis (I couldn't find Thai chilies which are much smaller and hotter than serranos), a little soy sauce, and fresh veggies and herbs.  I would say I was pretty successful, and managed to make something that is very easy to recreate with the ingredients available in most grocery stores.  

Original Pad Thai Recipe from The Best of Thailand
6 servings

1/2 pound rice noodles (about 1/4" wide)
12 small dried shrimp
3 TB vegetable oil
1 garlic clove, minced
8 medium shrimp, shelled and deveined
1 cake spiced tofu, sliced 1/4" thick
1 TB minced preserved radish
2 large eggs
2 TB distilled vinegar
2 TB nam pla (fish sauce)
3-4 TB sugar
2 tsp paprika
2 cups bean sprouts 
1/2 cup skinless roasted, unsalted peanuts, crushed

Garnish:

scallions
slivered red chili peppers
coriander (cilantro) sprigs

1. Soak dried noodles in warm water and cover 30 minutes to 1 hour until just softened.  Do not let noodles become mushy.  Drain and set aside.
2. In a food processor, pulse dried shrimp until finely chopped and set aside.
3. In a wok, heat oil over medium high heat until hot and beginning to smoke.  Add garlic and fry 20 seconds or until fragrant and just beginning to brown.  Add fresh shrimp and fry 2-3 minutes or until just orange.  Add tofu and cook stirring constantly until lightly coated with oil.  
4. Push shrimp and tofu to one side of the wok, and add 1 egg stirring constantly, about 1 minute.  Push the egg to the side, add the next egg and repeat.
5.  Add radish and push all ingredients to the side of the wok.  Add noodles, ground shrimp, vinegar, fish sauce, 3 TB sugar, and paprika and toss gently for 1-2 minutes until well combined.  Add scallions and bean sprouts and toss gently.  Add in remaining sugar if more sweetness is desired.
6. Place mixture on a large platter and sprinkle with peanuts.  Garnish with scallions, chilis, and coriander. 


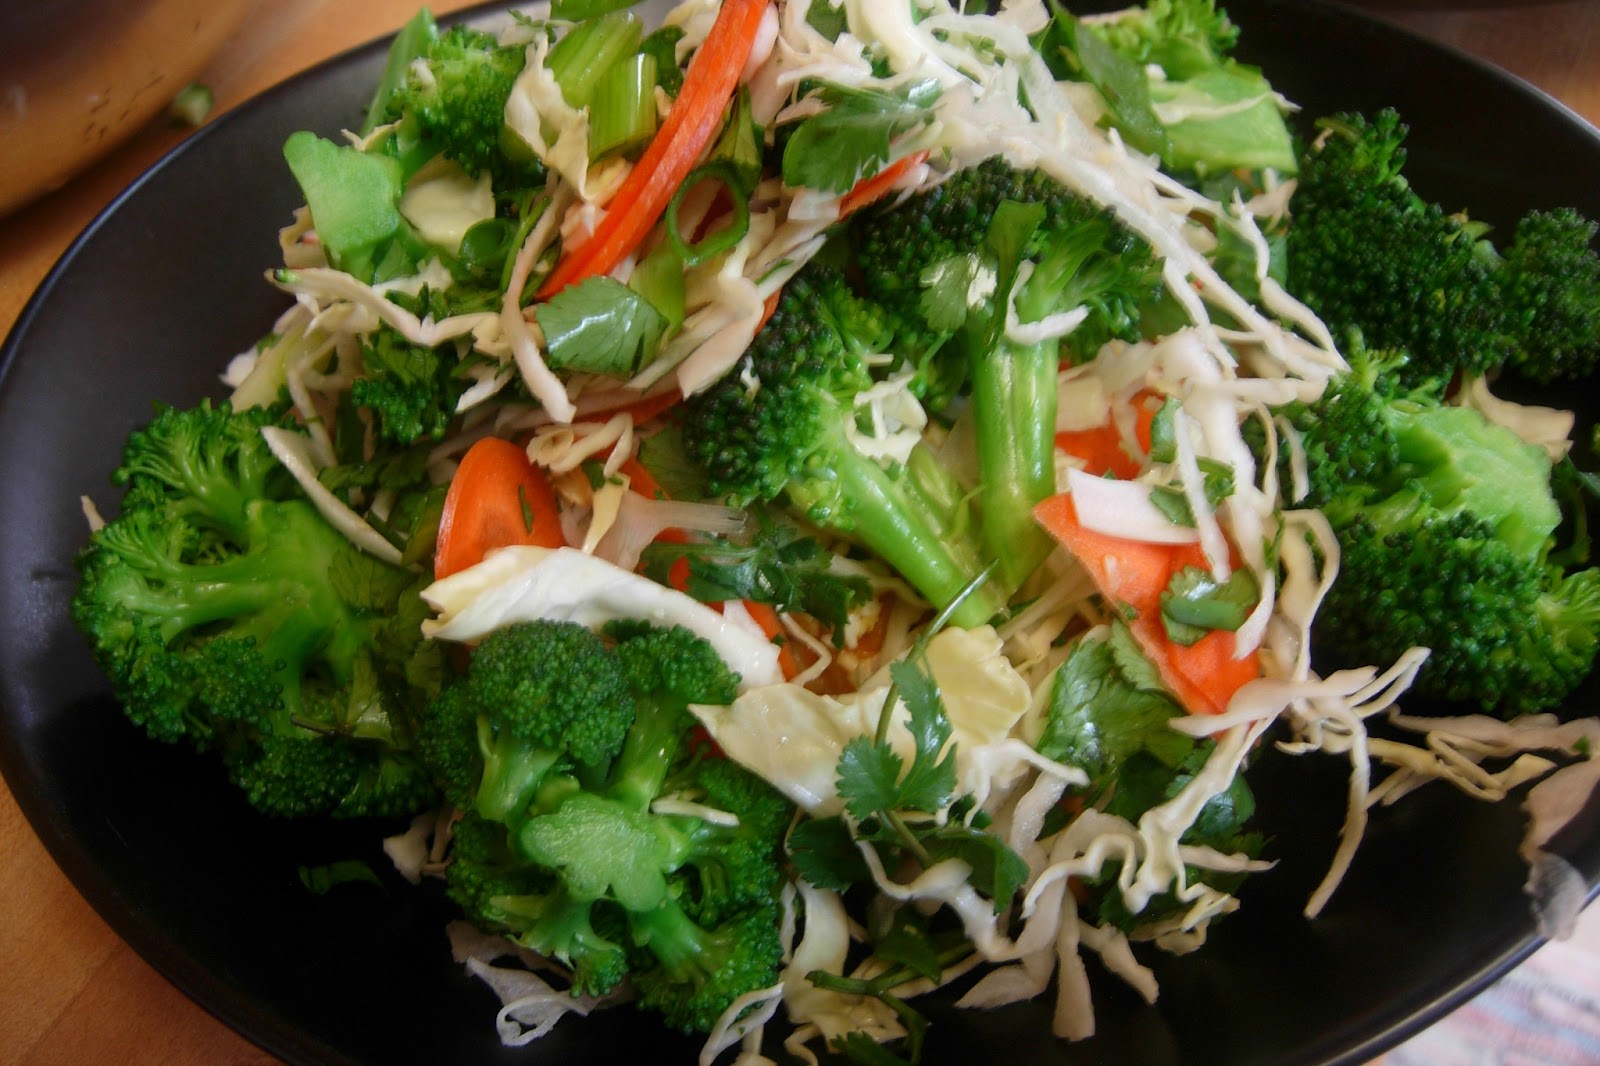
T.E.A.'s "Pad Thai"
makes 2 portions

NOTE: I decided not to add meat to this dish, and instead added more egg, but it would be easy to add in some cooked chicken, shrimp, beef, or tofu.  

1/4 pound rice noodles (about 1 handful)
4 large eggs
2-3 TB coconut or vegetable oil
1-2 serrano chilies, minced

Sauce: (there might be a little left over, or pour a little over the top to garnish)

2 TB red curry paste
1 TB soy sauce
1-2 tsp fish sauce
1-2 TB peanut butter (in place of raw peanuts)
a touch of sugar or molasses for sweetness (about 1 tsp)


Garnish:

scallions, chopped
cilantro, rough chop
green cabbage, shredded
carrots, sliced thin
broccoli, lightly steamed


1.  Bring a pot of water to a boil, add salt and rice noodles.  Cook for about 5-7 minutes until just al dente.  Watch these because they can get mushy quickly.  Drain them immediately and rinse under cold water to stop them from cooking.  Set aside.
2.  While your pasta boils, you can put a steamer on top of the pot (if you have one) and steam your broccoli.  Steaming broccoli should only take about 4-5 minutes...just until it is bright green and slightly tender.  


3.  Heat oil in a large skillet on high heat until very shiny and almost smoking.  Add in serrano chilis and saute 1-2 minutes.  Add in drained noodles and 3 TB sauce.  Stir until noodles are well coated.  Fry for 3-5 minutes.  At this point you can add in your garnishes and saute for about 1-2 minutes to slightly wilt and warm them.  I just put them on top of my noodles as a raw salad garnish.  Taste and add more sauce if needed.


4.  Pour Pad Thai onto plates.  In the hot skillet, add eggs and stir until scrambled and cooked through.  Add them to the Pad Thai.  Garnish with veggies and Enjoy!


Monday, March 11, 2013

Make Your Own Corned Beef Part 1

I had a creative dilemma this week, so I reached out to my Facebook friends, and fellow foodies, to see if they had any great ideas.  They all reminded me that St. Patty's Day is this Sunday and recommended I make something to celebrate!  Irish food is one of my favorites, and I recently found a recipe for homemade corned beef, so thank you, Facebook buddies, it looks like St. Patty's Day food it is!

I have made corned beef before in school, and it is the easiest of all the handmade cured meats.  All it takes is a simple brine of salt and spices, some time, and a couple hours of poaching. I needed a recipe for this one, though, since the proportions need to be correct to make a good brine.  Plus, I haven't made this in over a year.  I found a good recipe from SimplyRecipes: http://www.simplyrecipes.com/recipes/home_cured_corned_beef//.  I changed it a little bit, but used the general outline.

This is "part 1" of corned beef because all I did today was make the brine and put my tip roast in it.  Now, I have to wait several days while the meat cures in the fridge.  I have to apologize since this recipe is coming a little late to the party.  The meat in the recipe can be brined for 5-10 days, and the longer it is brined, the more flavor it will have.  Starting mine today ensures that I can make it for St. Patty's Day, but if it is made in the next day or so, it will be ok, too.  However, corned beef is yummy at any time of the year, not just in March.  So, if you don't get to it this week, there are plenty more weeks to try it out!  Who doesn't love corned beef and cabbage for dinner or corned beef hash for brunch?  So many yummy possibilities!

NOTE: I did not use Saltpeter or pink curing salt/Prague Powder #1/DQ Curing Salt #1.  We did use this in class, but it is toxic in large doses and needs to be used properly.  Plus, there is a lot of talk about how nitrates in meats (which is the curing salt) are bad for you.  I can't confirm this or not.  But I can confirm that I'm not a fan...mainly because I don't like chemicals in my food...though it is, obviously, edible.
 The main reason to use this curing salt is that it keeps the nice, pink color of meats (think ham).  Without it, my corned beef will probably be a dull brown.  It obviously helps to cure the meat too, but with the amount of salt that goes into the brine, and the fact that is is kept refrigerated means that there is little worry of food contamination.  Use it if you want to, but please use a recipe with proper amounts and do a little research on how to use it properly.

Corned Beef
Adapted from SimplyRecipes

2.5 lbs tip roast (you should use brisket, but I couldn't find any.  Hopefully this will work!)


Brine:

1 cup salt (preferably sea salt)
2 quarts/8 cups cold water
pickling spices
1/4 cup brown sugar

Pickling spices:

1 tsp allspice berries
1 tsp mustard seeds
1 tsp coriander seeds
1 tsp whole cloves
1 tsp black peppercorns
1 tsp fennel seeds
1 tsp red pepper flakes
3 cardamom pods
1 tsp ground ginger
1/2 cinnamon stick


Allspice berries

mustard seeds

coriander seeds

fennel seeds

cloves

cardamom pods, cinnamon stick, ground ginger


1. In a small, dry skillet on medium high heat, add allspice, mustard seeds, coriander, whole cloves, peppercorns, and fennel.  Saute until fragrant and you hear the mustard seeds start to pop.  Make sure you shake or stir the spices continuously so they don't burn.  Toasting spices should only take 1-2 minutes if your pan is hot.  Once these are done, pour into a large soup pot.


2.  In your large soup pot, add the rest of the spices, salt, sugar, and water.  Bring to a boil, then take off heat.


twirly swirly gumdrops...

3.  Create an ice bath to cool down the brine.  Two stainless steel bowls (one large, one smaller) with ice water in between them work well for this.  Add in hot brine and stir often in order to cool it quickly.

NOTE: Cooling down the brine quickly is important because it will reduce bacteria formation.  Since the meat will be brined for several days, you want to make sure to have a very clean, safe brine.  Also, never put the meat into hot brine because that will not only help bacteria along, but it will start cooking the meat, which is not what we want to happen.  


I didn't have any ice cubes...but necessity is the mother of invention...


Having a food thermometer is great for this recipe.  It isn't totally necessary because you can feel if the brine is hot/warm/cold, but it certainly helps!

4.  Once the brine has cooled down sufficiently, put it in the container you want to use to brine the meat.  Loosely cover the brine and set it in the fridge to cool to 40F.  


5.  Once the brine is completely chilled, it's time to add in the meat.  Make sure your container is large enough to fit all the brine and meat without overflow.  A plastic tupperware with an airtight lid is good for this.  If the meat floats (which is probably will) put another small, plastic container on top (if you have one...a plastic measuring cup might work), then put on the airtight lid.  You can also use a large plastic bag, but make sure to remove all the air in the bag and set it in a bowl to prevent spills. Refrigerate for 5-10 days.


This is the container I used to help keep the meat submerged. 
I stored mine in the back of the fridge where it's coldest.

6. Now we wait...more to come in a few days!

Thursday, March 7, 2013

UPDATE: A Work in Progress

Although I really want this blog to contain great recipes, it is also a place where I can explore my mistakes.  I have been somewhat embarrassed to show my failures, but a large percentage of what I actually do is cooking the same thing over and over again trying to get it right.  The first time might be perfect, but the second or third, or even forth time might not be.  For the most part, my recipes fail because I simply don't follow the recipe to the letter or I invent a completely new recipe out of my head.  Or, I try recipes that are new and not rigorously tested like vegan or gluten-free options.  I'm confident enough in my cooking skills that I feel I don't need to pay close attention to every step.  However, I can be overly confident, and that's where mistakes are made.   

This blog was made to document my progress, to show when things went right or wrong, and to bring a more scientific approach to my cooking.  Looking back over these past weeks, it is amazing to see what has come out of my kitchen, but it has also made me very aware of the changes in the way I approach food.  In school, some of my instructors had us keep a journal for each class, which I found very rewarding.  Writing down both my thoughts and feelings about the food I made, and the specific ways in which I created it (changes to the recipes, cooking times, equipment, what I would do differently next time) was a valuable way of analyzing my progress.  This blog has been all that and more.  

So, today, I would like to share some of the things that went wrong in my kitchen over the past few days.  This kind of analysis, I have learned, is extremely beneficial.  Hopefully, it will mean the next meal will be even better.

First off, in my last post about Potato Leek Soup with Spicy Sausage, I mentioned I had trouble with the raw sausage I had bought.  I feel pretty dumb about it all because I forgot, for a minute, how to actually cook raw sausage.  But I did go back and fix it.  All it took was cooking the sausage first, then cutting it and frying the coins:


These little sausage bites were crispy and delicious and made a perfect garnish to my hot Brussels sprouts slaw (even though I slightly overcooked the brussels, as you can see from the olive green color...they should be a fresh, spring green).


Secondly, I tried the paleo pizza crust again.  I knew my first attempt was less than adequate, but the major problem with the original recipe was that it contained mozzarella.  I can't eat mozzarella, so I had to find another way to bind the cauliflower together.  My first attempt was to add more egg to the mixture, but that just made it soft and eggy...not crispy like I wanted it to be.  This time, I added in only 1 egg and about 1/2 cup garbonzo bean flour.  I use garbonzo bean flour all the time, and it crisps up nicely, so I though that adding it the cauliflower would create a nice dough for the crust.  I pureed the cauliflower, egg, salt, and garbonzo bean flour together so it created a fine dough.


You can clearly see that it did not work out as well as intended.  And, yes, I did oil this baking sheet!  I think I didn't add enough flour to the mixture because the dough was very wet.  The taste was actually very delicious (we still enjoyed it!), but I have yet to make it perfectly.  Eating gluten-free is sometimes quite hard.  But I do feel like I'm on to something...I think I just need more flour...or maybe a different kind of flour?  I need something to both make a dry dough and hold the cauliflower together.  Well, I will keep trying.  And I'll let you know of my progress!

Although I did go to school to learn how to cook, I'm obviously still a novice.  I have not yet perfected anything, though a lot of good food comes out of my kitchen, and it keeps getting better.

If any of you are interested in seeing a real master, I recommend watching Jiro Dreams of Sushi.  It is about a man who spends his whole life devoted to perfecting the art of sushi.  It is both humbling and inspiring.  It reminds me that I have my whole life to make mistakes, but hopefully, someday, I will get things right. :)

Wednesday, March 6, 2013

Potato Leek Soup with Spicy Sausage

This past week, I thought that spring had finally come!  It has been warm and sunny, with clear, blue skies.  I've been spending a lot of time in the garden and have already planted some lettuces (mesclun which includes a variety of greens, and mizuna, which is an Asian mustard green...slightly spicy like arugula) and some cilantro!  Grocery stores are starting to stock early spring veggies like leeks, Brussels sprouts, and asparagus.  Now is the time to start stocking up on these bright green veggies because they are higher quality and cheaper!  Eating seasonally is a practical way to save money, but it does mean that you have to be a bit creative in the kitchen.  When your pantry is overflowing with new, tender greens, it's time to find many uses for them!

Although the weather is warming, the past couple days have been gray and rainy.  It is still March after all.  And that means more hot soup!  This week I made an old time favorite: leek and potato soup.  As good as this soup is on it's own, neither me or my husband can stay away from spice, so I decided to add in some spicy sausage.

My original intention was to fry up some sausage links (cut into coins) until they were nice and crispy and use them like croutons on top of the soup.  However, I bought some "homemade" sausage that is made in-house at my grocery.  I love that the meat department cases the bulk sausage they make because it is a very fresh option.  I have made sausage in school, and it is a pain in the butt, so I can empathize with their efforts...because the sausage they made was not cased well at all.  There was a lot of air within the casing, so the sausage was loose and impossible to cut into coins.  What I realized (too late) was that boiling or frying the sausage links whole would have firmed up the meat and allowed for me to cut them.  Instead, I opened the casings and sauteed up the meat inside.  This won't be an issue if you buy pre-made sausage, but I mention it because you could use both pre-made cased sausage or bulk sausage for this recipe.

I also wanted to mention that I used chicken sausage.  I buy this because we don't eat pork, but I have to admit that it is quite inferior to pork sausage for one main reason: fat.  Pork sausage has a LOT of lard in it.  I know, I've made it.  Most sausage recipes are almost 1 to 1 meat and fat.  This makes them, of course, delectable, and also allows for them to be fried until they are brown and crispy.  Chicken sausage, on the other hand, has very little fat in it.  Plus, poultry fat just doesn't hold up well to cooking.  It is thin and watery, and does not stand up to frying.  So, when I fried my chicken sausage, it didn't become crispy.  The taste was good, but the texture was slightly rubbery which was odd in the smooth, silky soup.  However, I don't want to give up.  I think I need to boil the cased sausage until it's firm, then cut the link into coins and fry them again in oil.

I'm always fascinated by how one ingredient can change a whole dish.  In this case, I did not succeed at making a lovely, crispy sausage crouton.  So, I recommend if you're interested in making this dish (and you eat pork), use a pork sausage.  Or use the sausage in a totally different way.  Tiny sausage meatballs would be great, or don't put sausage in the soup...you could instead put it on garlic toast to accompany the soup.  

T.E.A.'s Potato Leek Soup with Spicy Sausage

1/2 pound spicy chicken sausage
olive or coconut oil, as needed for frying
2 leeks (about 2 full cups), cleaned well and sliced thin
3 medium potatoes, but into bite sized cubes (I used a yellow, waxy potato so I could keep the skin on.  If you use russet potatoes, you have to peel them)
2 TB garlic, minced
1 quart chicken broth plus more water if needed
salt and pepper to taste


NOTE: to keep your potatoes from turning brown/pink while you cook, immerse them in water.  They will stay fresh until you're ready to use them!


1. In a large soup pot, heat a little oil on medium high heat.  Add in sausage and saute until cooked through, about 5-8 minutes.


2. Remove sausage and any extra fat, and set aside and keep warm.


3. Add in leeks to pot and saute until wilted and soft, about 8 minutes.


4. Add in garlic, saute 1 minute or until fragrant.


5. Add in potatoes, chicken broth, and a sprinkle of salt.  Bring to a boil, reduce to a simmer and cook until potatoes are tender.


6.  Turn off heat and strain solids from broth.  Keep the broth and set aside.  Add solids to a food processor and puree until silky smooth, adding in broth when necessary.


7.  Add pureed mixture back into broth, and stir until smooth.
8.  Add in sausage and warm soup back up or garnish with warm sausage.


Friday, March 1, 2013

Gluten Free Brownies

I thought I was going to have to write this recipe off as a failure.  Yet, when I talked to my husband about it, I admitted that I didn't follow the recipe to the letter.  In fact, I added in things that I knew might prove to be a mistake.  How un-scientific of me to write off a recipe when it hasn't been tested properly!

I found this recipe on a cute little blog (http://barefeetinthekitchen.blogspot.com/2013/02/dark-chocolate-brownies-gluten-free-casein-free-recipe.html) and it was exactly what I had been looking for.  In my quest to find low-carb alternatives to tried and true favorites, I wanted a great gluten-free brownie recipe.  I had found a vegan brownie recipe, and although it proved tasty, it was also heavy on the wheat flour.  This recipe, on the other hand, uses almond and sorghum flour.  My first question was "What is sorghum flour?"  I didn't google it, but I did look at the Bob's Red Mill section of my grocery trying to find it.  They have a huge selection of GF (gluten-free) options, as well as many nut flours, but I could not find sorghum.  However, I was not fazed because I knew I could find an alternative.  My first thought was ground flax seed!  I have been using ground flax meal in smoothies and granola for a few weeks now, and since I heard it could be an egg-replacer (because it congeals when cooked), I thought it might be a good ingredient to hold the brownies together.  The recipe called for 1/2 cup almond meal and 1/2 cup sorghum flour, so I just substituted 1/2 cup flax meal for the sorghum.  I had no idea if this would work, but I was delusionally confident that the brownies would be delicious.  That was my first mistake.

My second mistake I'm not going to take full credit for because cooking times can be very inconsistent when baking.  The recipe might call for a certain temperature and time, but if your oven is on the cold (or hot) side, your temp and time will not be the same.  You must get to know your oven intimately in order to judge how long your baked goods will take.  This recipe said that these brownies need to be cooked for 30-35 minutes.  I know I have a good, hot oven, and most of my baked goods take less time than most.  I decided to set the timer for 25 minutes thinking that would give me enough time to catch the brownies before they overcooked.  Twenty-five minutes was, unfortunately, too long.  The brownies were not burnt, but the edges got very dark, and the overall consistency was dry.  I should have known better because this recipe only makes enough batter to fill a 9" cake pan half-way, which means it shouldn't take long to cook.

The consistency was also very chewy...which was due to the flax meal.  Although my spice/coffee grinder grinds the seeds very fine, flax seeds have a very thick outer shell which doesn't break down easily.  It just breaks down into smaller, chewy bits.  In small amounts, this is nothing to worry about...it just means your getting your daily dose of fiber.  But in large amounts, like these brownies, the flax meal was overly chewy and stuck in our teeth unpleasantly.

Initially, like I said, I wasn't sure this recipe would be something I would try again.  But despite the less pleasant texture, the flavor was actually really good.  I just wanted a softer, gooey brownie.  Last night, I was craving chocolate again, so I gave this recipe another shot.  Instead of adding so much flax meal, I concentrated on making nice, soft almond meal to make up most of the flour bulk.  I used my spice grinder to grind the almonds fine (though a food processor might also work) like the first time, but added in 3/4 cup almond meal to 1/4 cup flax meal.  I also cooked them for less time, about 15 minutes.

As I said, I made these last night.  As of 10am this morning, they were all gone.  They were that good.  I fixed my mistakes, and produced a thin, but soft, gooey, luscious brownie.

Would sorghum have produced a perfect brownie to begin with? Probably. But that's not what I'm about.  I like using what I have and seeing what new combinations can be made because you might discover something delectable!


T.E.A.'s Gluten Free Brownies
(adapted from Barefeet in the Kitchen)

1 cup dark chocolate chips (I use 60% chocolate)
1/2 cup coconut oil
3/4 cup almond meal (homemade by grinding whole, unsalted almonds into a fine meal)
1/4 cup flax meal (ground like the almonds)
3/4 cup brown sugar
1/2 tsp salt
1/4 tsp baking soda
2 eggs
1 tsp vanilla

Equipment:

9" cake pan
spice/coffee grinder or food processor
double boiler or microwave

1. Heat oven to 350F.  Oil a 9" cake pan with non-stick spray.
2. In a heat-proof bowl, melt chocolate chips and coconut oil over a double boiler or in the microwave. (If using the microwave, heat 30 seconds at a time, and stir in between to make sure chocolate does not burn)


3.  Combine all dry ingredient in a medium bowl and stir to combine.


4. Mix eggs and vanilla. Pour egg and chocolate mixtures into dry mixture and mix thoroughly.


5. Pour batter into oiled cake pan and bake for about 15 mins or until a toothpick comes out clean.
6.  Cool and enjoy.  These are also good chilled in the fridge!


This was my first batch.  They look ok, but were dry and chewy.  My second batch is below....SO much better!


ENJOY! :)