Wednesday, November 28, 2012

Game (hen) Time!

GAME HENS ARE MY FAVORITE!!!
Ok, now that I got that out in the open, we can really start talking about delicious, delicious game hens.  I have only made game hens twice, now, and I've only eaten them at one other place...the awesome Thai place down the road, Mee Sen that does BBQ game hen with papaya salad...yum.  Mine isn't that fancy, but I have to say, it is no less tasty.  Plus, when you make game hen at home, you get to eat ALL of it, and spend time picking off those tasty little bones.
Why else are game hens so great?  They are small, which makes them very easy to roast without drying them out.  Every game hen that I've eaten and made has been incredibly juicy and tender.  They are also better tasting than chicken.  They have a mellow flavor and are slightly gamy the way good meat should be.  Even the free range chickens that I buy can be fairly bland tasting, but game hens have their own unique flavor.
Let's start with where to buy them.  I have tried finding game hens year round at my local New Seasons, but I have only been able to find them during the holidays.  I guess that is because they are a specialty item, and probably don't sell well the rest of the year, which is unfortunate because I think they should be a year-round staple.  Not only are they easy to cook and taste great, but they are also pretty cheap...I got mine for less than $5 each.  One game hen feeds two people easily (unless you have some really hungry people).  So, make sure you stock up, because once the holiday season is over, it's going to be a lot harder to find them.  They would freeze well, and won't take up too much room because they're tiny.

So, how to prepare them?  I roast mine like you would a chicken.  Since they are small, they don't take long, but remain wonderfully juicy.  This time, I went very simple on the seasoning, though there are a lot of variations that you could make to make them even more delicious.  I'm really going to have to try to make my own version of the Thai BBQ one day!

Roasted Game Hen

2 game hens (about 1-1 1/2 pounds each)
butcher's twine
roasting pan with rack (or I used a baking sheet with a cooling rack...works great)

Marinade (enough for 2 game hens):

1/2 cup olive oil
1/4 cup lemon juice or white wine
1 tsp thyme
2 TB salt
black pepper to taste

I like to mix all of these ingredients together until most of the salt is dissolved.

Then, I place the game hens on the baking sheet/roasting pan and pull the skin away from the meat gently.  You don't want to displace or tear the skin, but you want it away from the meat (on the breast and legs) so that you can massage your marinade into the meat itself.  Pour the marinade under the skin of each bird and massage it well into the meat.  Make sure to get it everywhere so that the entire bird is seasoned.  Also massage it into the skin so that the skin will become flavorful and crispy as it roasts.
Heh! These are some ugly buggers...but oh, so delicious!


Next step is to truss your hen.  Cut a length of butcher's twine about 12" long, or more if needed.  Turn your bird breast side down, with the head away from you.  Place the middle of the twine around the neck area and under the wings.  Cross the twine over the back (right next to the wings), then turn the hen over.  Bring the twine around the inside of the legs and wrap it around the end of the drumsticks.  Tie the drumsticks together and tie off the twine.  Make sure the twine is snug around the chicken.  Then, you can tuck in the wings under the twine.  Make sure all parts of the chicken are snug and secure.


NOTE:  Everyone trusses a chicken differently.  I have watched several YouTube videos and everyone has their own way of doing things.  But it is a good skill to know and to practice whatever way you choose to do it.  But there are some things that are very important:
1.  Make sure all parts of the chicken are secure to the body of the chicken.  This will ensure that all parts cook evenly and the juices stay in the meat. (This is why you truss after all!)
2.  Don't cross the twine over the breasts.  This will leave unsightly lines on your cooked breasts, and could squeeze them too tightly which could dry them out.
3.  Here's a video of trussing a chicken. She does it the exact opposite of how I do, but it still works...and sometimes videos help more than written instruction! http://www.chow.com/food-news/53715/how-to-truss-a-chicken/

Next is roasting!  Preheat your oven to 350F and roast game hen for 45-60 minutes until juices run clear or a meat thermometer reads 160F.  Make sure that you rest your game hen after roasting for 10-15 minutes.


Then, eat and enjoy!  This was so good that I will guiltily admit that I picked the bones clean.  It wasn't pretty...but I certainly enjoyed myself!


Tuesday, November 27, 2012

The Ultimate Pie


So, I guess blogging about pies twice in a row is a little weird, but this time, we're doing sweet pie!  And from a recipe!  There are just some recipes that you can't go wrong with because they are so simple and so perfect.  This is one of them.  My mother-in-laws famous cranberry raisin pie.  My husband requests it from her every holiday season and it never disappoints.
The only little change I made was to the crust because I can't handle dairy, so I used coconut oil.  But this change doesn't seem to effect the texture of the crust (it is still wonderfully crispy and flaky), plus it has the added bonus of making your crust taste slightly of toasted coconut, which in this pie worked beautifully.

Kathy's Cranberry Raisin Pie
One 9" pie with double crust

Crust:
1 3/4 cup flour
3/4 cup butter, chilled
1 tsp sugar
1/4 tsp salt (omit if using salted butter)
3-4 TB ice water (or more in order to bring dough together)

My version of the crust:
1 3/4 cup whole wheat pastry flour
3/4 cup unrefined coconut oil, chilled (the unrefined oil is the one that still tastes like coconut, though you can use refined as well)
1 tsp sugar
1/4 tsp salt
ice water


In a food processor (or you can always use your hands!), add flour, sugar, salt, and coconut oil or butter.  Pulse until mixture looks like coarse cornmeal.  Add ice water little by little while pulsing until dough comes together.  Roll dough into a flat ball and divide into two equal portions.  Roll each portion in to a ball, and then flatten into a disk.  Wrap each disk separately in plastic wrap and refrigerate at least 30 minutes.


Filling:
3 cups fresh cranberries
1 cup raisins
1 cup sugar
2 TB flour
2 TB butter

Coarsely chop the raisins and cranberries in a food processor.  Fill the bottom pie crust with the fruit and sprinkle on sugar and flour.  Dot with butter.  Cover with top pie crust.

My version:
2 cup cranberries (I didn't have enough for 3 cups, whoops)
1 cup raisins
1/2 cup sugar

Coarsely chop fruit in food processor.  Pour into bowl with sugar and mix.  Refrigerate with pie crust about 30 mins.  This will macerate the fruit a bit, drawing out moisture and creating a sauce.


Pie Assembly:

Spray pie pan with non-stick spray.  Roll out 1 portion of chilled pie dough to 1/4" thick.  Roll dough onto rolling pin and gently lay it in your pie pan.  Lift up the sides of the dough and gently press into place.  Cut off any major excess, but leave some on the sides to press the top crust onto.  Fill the bottom pie crust with macerated fruit.
For the top crust:  You can either roll out the top crust much like the bottom crust, wash the bottom crust with a little water, and lay the top crust on top of the fruit.  Then, cut vent holes in the top.
OR
You can roll out the top crust and cut it into strips with a pizza cutter.  Then you can lay or weave the strips in a crosshatch pattern.  I had a little extra crust on the bottom, so I folded that over the top.  This made it look more rustic, but I didn't have enough filling to reach to the top, so I had to modify the crust slightly.


Last step is baking!  

ONE BIG NOTE!!!!!: Refrigerating the completed pie for a few hours before baking ensure that your pie will have a delightfully flaky crust.  My mother-in-law says this never fails...and since my crust came out perfectly, I'm going to say she's 100% right! :)

Bake at 450F for 10 minutes, then turn down the oven to 425F and bake for another 15-20 mins or until the crust is golden brown.  Cool for 30 minutes, then enjoy! 

 I love this pie because it is both sweet and tart.  Most pies are overwhelmingly sweet, and even a small piece can be too much.  Fortunately (or unfortunately, ha!), this pie is something you can eat a lot of.  I'm not a huge raisin fan, but the mix of fresh and dried fruit is inspired.  The raisins soften and plump up while cooking, and the tartness of the cranberries balances their sweetness.  The crust is not too sweet, but is a perfect vessel for very intensely flavored fruit.  My husband and I finished off this pie quickly, but not before he discovered that it also goes great with sweet yogurt sauce!  I like mine with a hot cup of chai tea and almond milk. :)


Sweet Yogurt Sauce:

1 cup vanilla Greek yogurt (or plain is fine too)
1/2 tsp vanilla extract
1-2 TB honey
1 TB lemon juice


Saturday, November 24, 2012

After Thanksgiving: Chipotle Chicken Pot Pie

This Thanksgiving was just going to be my husband and me.  Both of our families are far away and we couldn't take the time to travel.  However, we had planned an entire Latin feast for Thanksgiving.  Our menu consisted of: 

Chipotle Turkey Potpie
Pablano Peppers stuffed with Cranberry Pine Nut Pilaf
Homemade tortillas
Calabasitas (corn, zucchini, and cheese saute...simple and delicious)
Fried Plantains
Cranberry Raisin Pie (my mother-in-law's delicious recipe!)

We had our day all planned out, but we got a call a few days before Thanksgiving from our friends inviting us to celebrate with them.  Of course we jumped at that chance!  Spending the holiday with friends is the best, even if it meant that I wouldn't be cooking for Thanksgiving.  I begin missing family terribly during the holiday season, and it meant a lot to me to spend the day with good people.  And I have to admit that, even though my husband doesn't love the traditional Thanksgiving fare...I really do!  I was more than happy to pile my plate with turkey, stuffing, green bean casserole, the best sweet potato pie I've ever had!  With good food, beer, football, and overly generous friends, it was a fantastic day.
The only downside is that we didn't have any leftovers!  But I was prepared for that fact, and am still going to make our "Thanksgiving Feast," but in a much slower, several-day run instead of all at once.  My plan is to prepare each of these over the next week.  Spread out that Thanksgiving feeling a little longer!  I prepared some chicken on Wednesday so that it would be ready for my chipotle chicken potpie which would be our "day after Thanksgiving" meal.  
I have made this recipe once before and it was so successful that I have made it a staple in our house.  I initially experimented with it because I'm not a fan of potpie, but my husband is.  I wanted to make something we would both enjoy.  Since Mexican and Latin food is some of my favorites (and usually the type of food I turn to), I decided to take the flavors I love and put it into the basic structure of a potpie.  As it turns out, these flavors really work.  The techniques are simple, and the flavors comforting.  A perfect pie to celebrate the holiday.

Chipotle Chicken Potpie:

For the Crust (recipe from Joy of Cooking):
-Makes one 9 or 10" double crust

This is the original Joy of Cooking recipe:
2 1/2 cup AP flour 
1tsp salt
3/4 cup shortening or lard
3 TB butter
6 TB ice water (more or less as needed)

This is my version in order to make it dairy free:
2 1/2 cup whole wheat pastry flour
1 tsp salt
3/4 cup refined coconut oil (chilled)
6 TB ice water

Add flour, salt, and coconut oil into a food processor.  Blend until mixture is like coarse cornmeal.  Add in the water a little bit at a time while pulsing the food processor until dough comes together.  It should not be too wet, or it will be hard to work with and could stick to your pie pan.  

Divide dough into two portions.  Flatten into disks and wrap with plastic wrap.  Refrigerate 30 minutes.


Take one portion of dough and roll it out to 1/4" thick.  A good trick for getting the dough in the pie pan is to gently roll the dough around the rolling pin and then gently unroll in over the pie pan.


Then, gently lift the sides of the dough, and press it down into the pan.  Cut off some of the excess, but leave enough on the sides to stick to the top crust.


Cover the crust with plastic wrap until you are ready to it.


For the Filling:
1 pound chicken or turkey, pre-cooked and cut into 1" cubes
1 cup onion, medium dice
1/2 cup carrot, med dice
1/2 cup celery, med dice
1/2 cup mushrooms, medium dice
1 TB minced garlic
1/2 to 1 cup tomato juice (I used the juice from a can of tomatoes)
1-2 TB chipotles in adobo sauce (I put in about 3-4 TB, but this was very spicy!)
3-4 TB cilantro, minced
2 TB olive oil
3-4 TB flour
salt and pepper to taste
extra water if needed
1/2 cup grated cheese (if desired)


Heat olive oil on medium high heat in a large saute pan.  Add (with a pinch of salt) onions, carrots, mushrooms, and celery and sweat (do not brown) until onions are translucent and tender.  Add in garlic and cook 1 min or until fragrant.
Stir in the cilantro.  Add in the flour and mix until all the veggies are coated.  Cook about 1-2 minutes to remove the raw flour flavor.


Then add the tomato juice, chipotles in adobo sauce.  Add in a little water at this point if it is too dry.  But the sauce should be thick.  This is also the point to add in any cheese.  Stir until it melts.  Season with salt and pepper.


Pour the sauce in the pie shell.  Roll out the other portion of dough like the first and place it on top.  Cut vent holes at the top in whatever design you like!  My pie could have been prettier...but I'm not too stressed out about it.  Taste is key!


Bake at 400F for 45 minutes or until crust has browned and filling is bubbly!
Note: you could put grated cheese on the top pie crust for a crispy, cheesy topping!
And the final result!


This pie is not only a great way to use your turkey leftovers, but it is the perfect winter pie.  It is warm, spicy, and filling.  It would be great topped with more grated cheese or sour cream.
Enjoy! :)


Tuesday, November 20, 2012

Put an Egg on it: The Simple, Satisfying Breakfast

Breakfast in my household is extremely important...and decidedly simple.  I elevate whatever creations I concocted the day before into a fantastic breakfast with a simple fried egg.  It is not only a great way to use leftovers, but it is sufficiently satiating.


After the grey, rainy day yesterday, it is sunny today!  I can stop moping about in my PJs and take advantage of the nice weather!  Time to take the pups to the dog park!


Monday, November 19, 2012

A Day in the Life of the Experimental Alchemist

It is November, which means it is the darkest month of the year.  I have to tell myself to just hunker down and hibernate, because the sun will start coming back eventually!  But when it is gray and rainy all day and gets dark at 4:30 pm, all I want to do is lay around in my PJs and drink some hot tea.  So, I set out to get cozy because I love when house is warm, and the stove is steaming and bubbling away!  Today on the menu was homemade chai, falafel with fried egg, spicy shredded beef, pot beans, homemade salsa, and homemade tortillas.

Last Night: We ran out of my favorite, non-caffeinated Chai Rooibos tea last night.  It is the perfect cup of sweet, spicy goodness topped with creamy almond milk.  It is the best thing to send you off to a good night's sleep.  But since we didn't have any left, I decided to make my own.  I have made homemade chai before, though I've never been satisfied with the results.  Unfortunately, tonight was no different.  I was trying to make a non-caffeinated version, so I left out the black tea:

#1 Version of Chai Tea:

3 ginger tea bags
1 large cinnamon stick
1 TB cardamom pods
1 TB fennel seeds
1 TB whole cloves
1 quart hot water

Add all ingredient to a large drink container (I used a quart-sized glass pitcher) and let steep.

Although tasty, this was a very weak combination. I decided to put it in the fridge and let it keep steeping overnight.

This Morning:  This morning I decided to add black tea to my chai infusion to give it more flavor (and caffeine).  I made 1 quart of black tea and added it to the chai mix.  I then added about 1 cup of milk.  I could have used more milk, but I ran out this morning...grocery time!  It was still too weak, so I added about 1 TB of honey to sweeten it.

Well, I'm still not satisfied.  I think it was too weak, not creamy enough, and not quite the spicy sweetness that I desired.  It is certainly drinkable, but it needs some more experimentation!!


Later This Morning:  I was happily frying up my falafel patties,

loading the dishwasher, and daydreaming up my new blog post...when this happened:
FAIL: this is what happens when your pan is too hot...and you turn your back on it.
Lesson Learned: Don't turn your back on frying falafel!

Hopefully my pot beans and spicy shredded beef will turn out better!

Mid-Afternoon to Early Evening:
After a fail-er-ific breakfast, my late lunch/early dinner was much more successful.  I keep several pots simmering on the stove all afternoon and came out with some pretty tasty food!

Pot Beans:

4 cups beans
2 quarts stock or water
1/2 cup onion...medium dice

Soak beans overnight (or at least 8 hours).  Put all ingredient in a pot.  BTAB/RTAS. Simmer uncovered until beans are very soft and liquid has reduced significantly...about 1 1/2 hours.  Add more liquid if necessary.  Add salt and pepper to taste.
NOTE:  Adding salt before the beans are soft slows the cooking process meaning your beans will take a lot longer to soften if you add salt right away.


Spicy Shredded Beef:

1 pound chuck roast
1 cup tomatoes, rough chop (canned are fine)
1 cup onion, medium dice
3-4 cloves garlic, rough chop
1 quart chicken stock (or whatever you have on hand.  Water is good, too)
2-3 chipotles in adobo sauce or to taste
1 tsp cumin seed
1 tsp oregano
salt and pepper to taste

Add everything into a pot.  BTAB/RTAS.  Simmer for 2-3 hours or until beef is soft enough to shred.  Skim off any fat on the top.

Take beef out and shred (I used 2 forks).  Add back to liquid and use as burrito filling, enchilada filling, or eat as it with beans and rice.


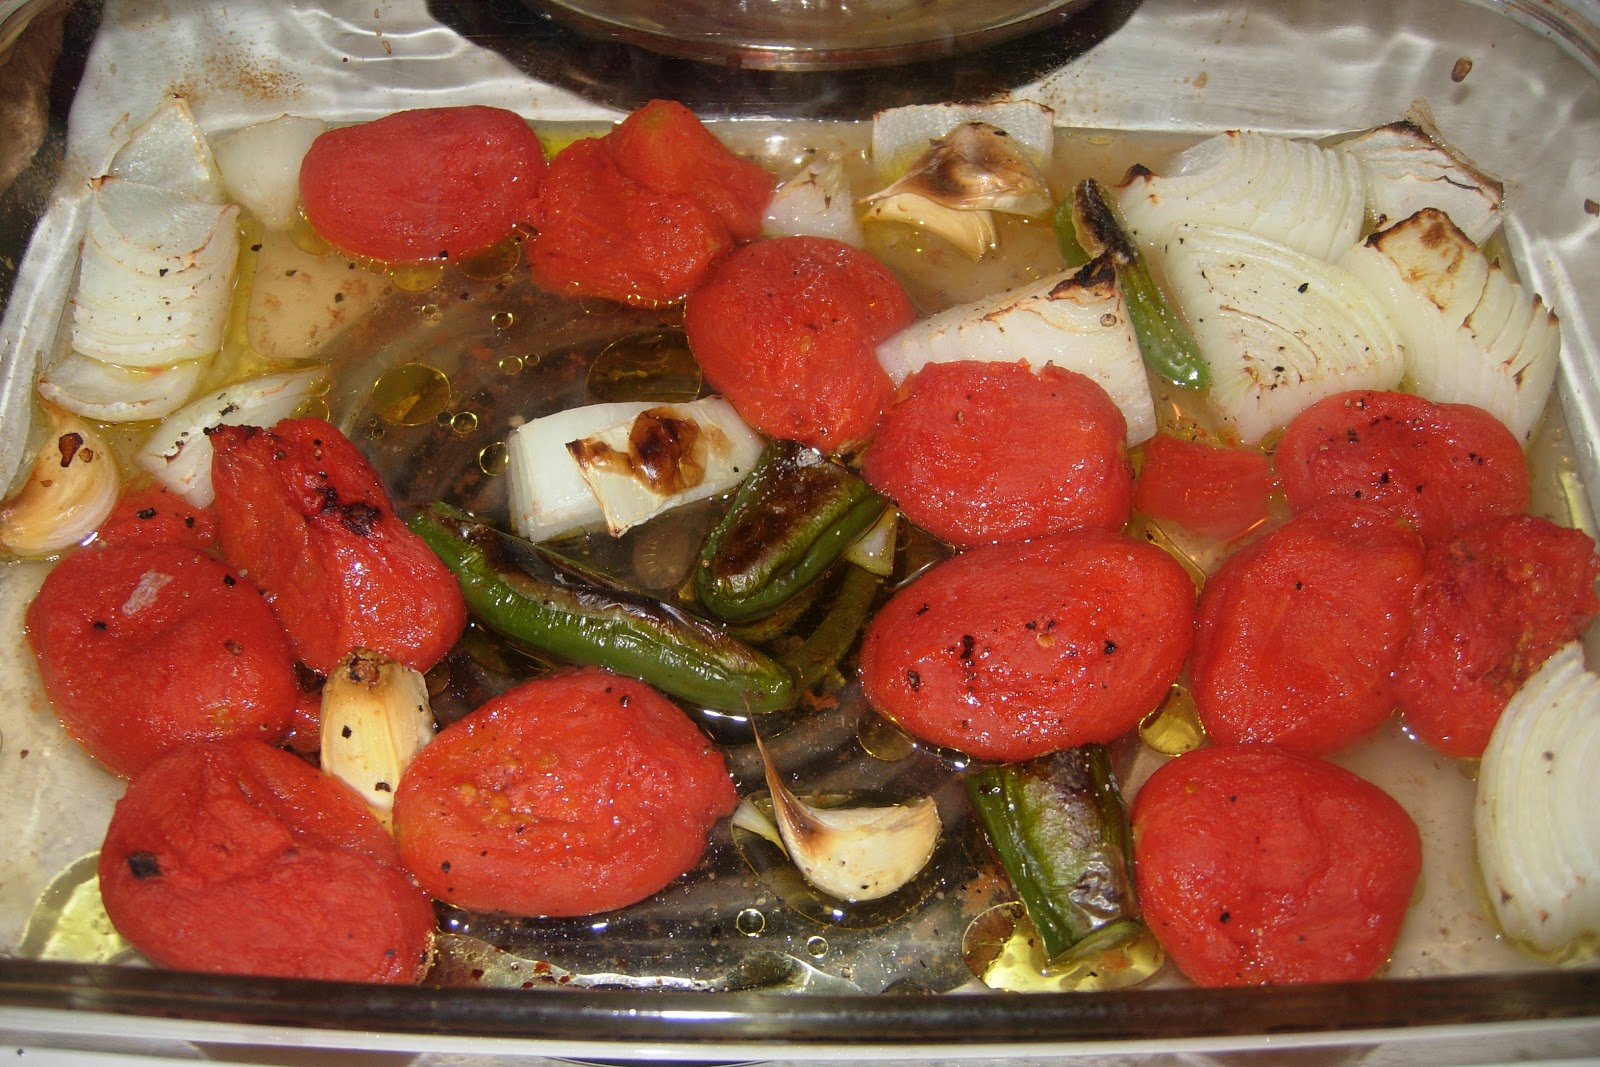
Roasted Salsa:

1 cup onion, rough chop

1 cup tomatoes, rough chop (I used whole canned tomatoes)
3 jalapenos, whole (more or less depending on how spicy you like it)
3-5 cloves garlic, in skins
salt and pepper to taste
1/4 cup olive oil

Put vegetables (and fruits) in a shallow baking dish.  Leave room between veggies so they have room to brown.  Pour olive oil over and sprinkle with salt and pepper.  Broil in oven (or bake at 450F) until tender and browned. Cool and peel garlic.  Then puree in food processor until smooth.  Adjust salt to taste and serve.

Flour Tortillas (from the Joy of Cooking):

2 cups bread flour (I used whole wheat pastry flour)
1 tsp baking powder
1/4 cup shortening or lard  (I used coconut oil...refined, so it doesn't taste like coconut)
1 tsp salt
3/4 cup hot (115-130F) water

Add ingredient into a dough mixer and mix until smooth.  Divide dough into 8 equal portions and let rest 20 minutes.  Roll each ball into a flat circle about 1/4 inch thick.  Heat a skillet to medium high heat and cook tortillas on both sides about 30 secs to 1 min each.  Serve warm.
Note:  Whole wheat flour will make these tortillas denser than you may like.  This was the only flour I had available, and I also like the taste, so I made them with wheat flour.  I also don't like shortening, and usually don't have lard on hand, so I used coconut oil which is hard at room temp.  I have also use olive oil and vegetable oil, which works pretty well, too.  Though, as you can see from the pictures, I have not yet perfected the perfect circle! Lol!

So, all in all, it was a good day.  I didn't perfect the falafel, but I made some tasty food that was tender, spicy, tomato-y, beefy goodness.  I succeeded in staying in my PJs all day, and drank lots of tea.  And with a glass of red wine and some Skyrim...I think I can get through November just fine!


Friday, November 16, 2012

Notes on Experiment #2

So, I went back and made the beef stew where I browned the meat, and the veggies.  I thought that maybe this would made a major difference in the taste...plus this is how your supposed to do it (or how we were taught in school...though "supposed to" is relative in my opinion).


Did I notice a difference?
Yes, but not as big a difference as I expected.  There was more depth of flavor, and more "beefyness" from the caramelized beef.  However, the color of the broth was a bit muddier than the stew made without caramelization, though this rich, deep broth is more traditional.

"fond"...those delicious crispy bits you get from caramelizing


Would I make it by browning the beef/veggies again?

In this case, I don't think it matters.  In fact, I preferred the stew that did not have caramelization.  However, it is good to know that however you decide to make it...it will be delicious!


*Side note...I paired this stew with kale rice:

Kale Rice

1 bunch kale, shredded
2-3 cloves garlic, minced
4 TB olive oil
2 cups brown rice
about 3 cups water (less water if you use white rice)
salt to taste

Heat 2 TB olive oil in a pot (for rice) until almost smoking.  Add in rice and saute until rice is coated with oil and slightly toasted (about 1-2 mins).  Add in water and salt.  BTAB/RTAS until tender.
While rice is cooking, heat 2 TB olive oil in a saute pan.  Add in garlic and cook about 30 secs until fragrant.  Add in kale and salt.  Saute until bright green and tender (4-5 mins).

Put kale into food processor and puree until fine.  Add into rice when rice is done cooking.

Pour stew over rice and enjoy!
-you can substitute kale for spinach, or your favorite greens
-this is a great, easy way to get in your recommended daily dose of leafy greens!  But just beware not to over cook them...when they turn bright green, they are usually ready to eat!  Then, again, make sure you always taste, taste, taste!  And you'll figure out just how you like them!

Thursday, November 15, 2012

I've Stewed and now I'm Souped: Experiment #2

What better represents the alchemist's steaming cauldron than a delicious, simmering soup?  And what better representation of the perfect food?  Soup and stews can be made from almost any ingredients and is a very cheap way to create a satiating meal.  I make soup several times a week.  It is a good way to use up those items in your pantry that might be slightly wilted or that need using up.
This week, I had slightly wilted celery, old carrot sticks, and half an onion left in my refrigerator.  I also had a pound of chuck roast left in my freezer.  And I always have some homemade chicken stock lying around. So it was definitely a beef stew night.  But once this soup was done, no one would have known the celery was wilty!  This particular beef stew benefits not only from a whole cup of red wine, but from long cooking.  The vegetables become soft and soak up flavor.  The beef cooks long enough to either shred or cut in small, tender pieces.  The broth itself reduces down, thickens, and has a beautiful balance of acid, salt, and umami.

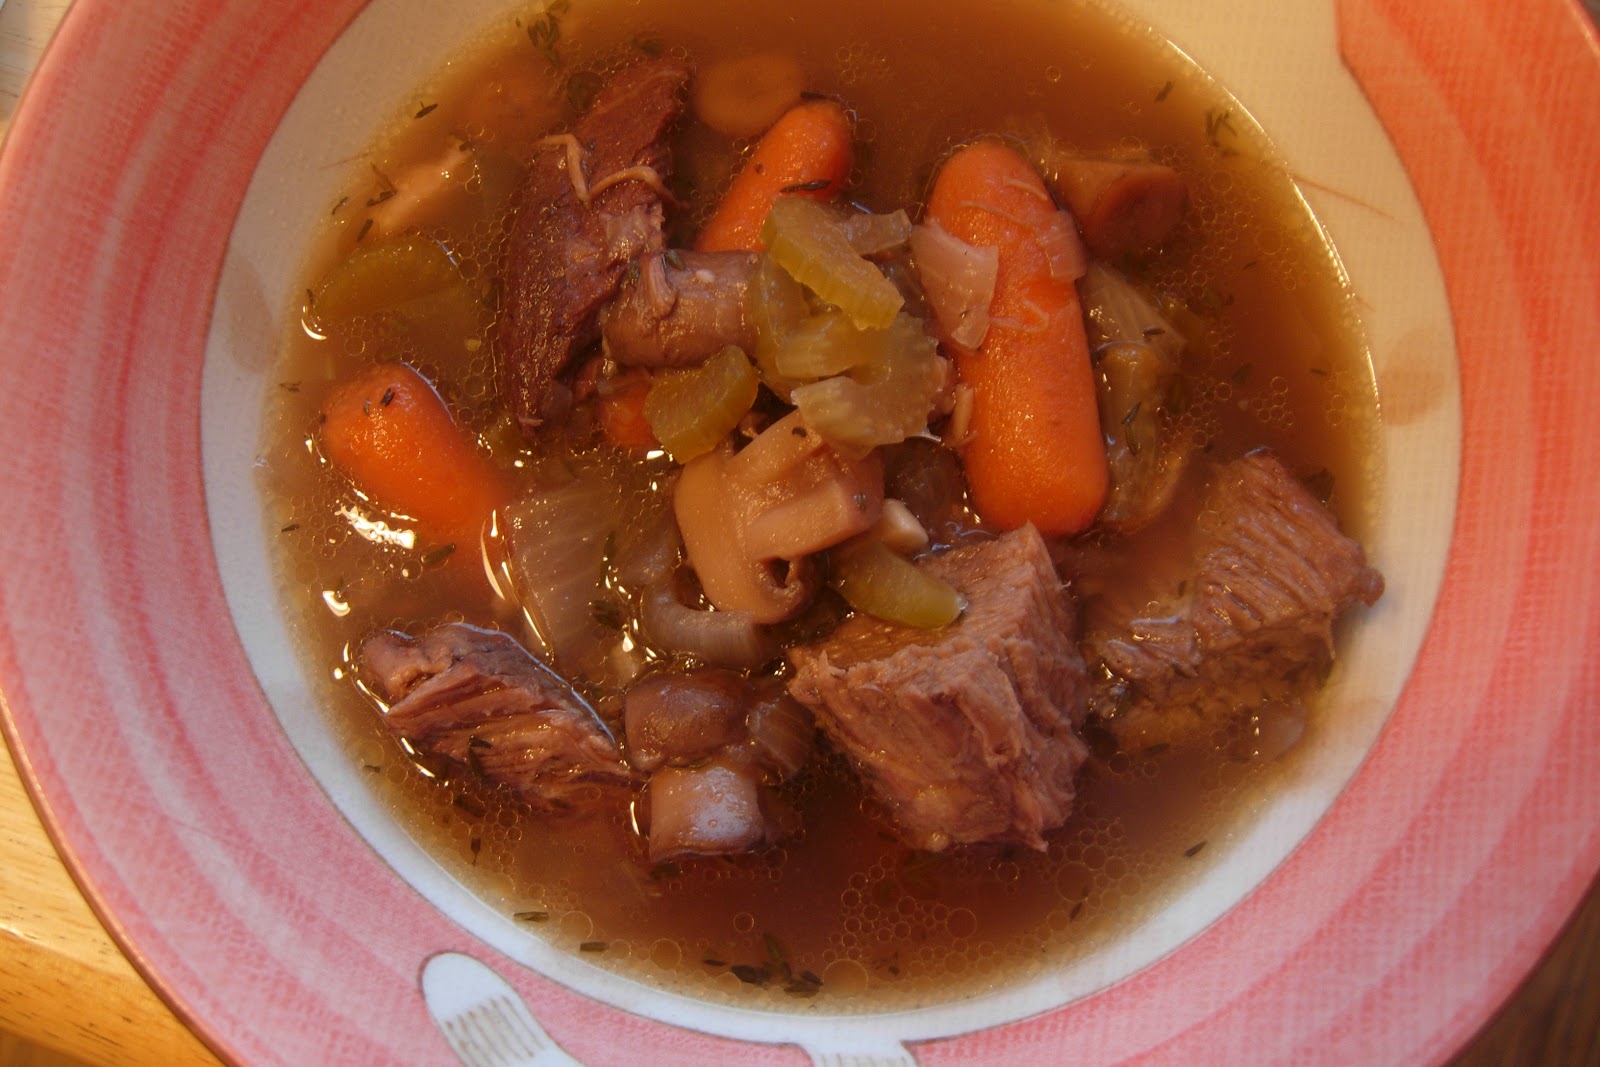
One Pot Beef Stew:

1 # chuck roast or stew meat  (can be whole or in pieces)
1 cup red wine (cheap is fine!)
1 qt chicken/beef/veggie stock (whatever you have on hand)...or water!
1/2 cup onion
1/2 cup carrot
1/2 cup celery
1/2-1 cup mushrooms
1 bay leaf
1 tsp dried thyme (fresh is fine, but use a little more)
salt to taste (about 1 1/2 tsp)
black pepper to taste

Directions:
Large dice (about 1 inch) the onions, carrots, celery, and mushrooms. Add everything into a pot that allows for the liquid to just cover the beef.
That ice block is my homemade chicken stock

Cover, bring to a boil (BTAB), reduce to a simmer (RTAS), and simmer for 2-3 hours.

If you have left the beef whole, it should be at the shredding stage, so you can either shred it or cut it into 1 inch pieces.
Don't have time to watch a hot stove?  You can use a crock pot as well.
-Note: My soup ended up with a lot of fat on the top.  You can skim this off with a spoon and discard it.
Beef Stew in my cute kitty bowl :)

So, that's it?  Well, yes, however, this is the lazy version (but just as yummy).  For more color and flavor:

Heat 1-2 TB of olive oil in your soup pot until almost smoking.  Add in your beef with a little salt (dry it with paper towels if it is too moist) and brown it until it has a nice, brown crust.  Remove the beef, and add in your veggies (and a little salt...this helps them break down) until they are slightly brown and tender.  Then, add back in the beef and the rest of the ingredients.  Simmer for 2-3 hours.
The caramelization on the beef and veggies will create both depth of flavor, and a beautiful dark, rich color.

Not enough veggies for you?  Add in some kale or spinach near the end (last 5 mins or so).
Need more carbs?  Add in potatoes (1 inch dice) about 20 mins before it's done, or pour the stew over rice.


This is why I love simple recipes: because they provide countless opportunities to create something better, or new, or different.  Just think, if you just changed the protein, it would be a whole different soup!  Never underestimate the power and flavor of each ingredient.  They each play their part and it is your job to make them work together nicely.  But when you involve wine...then everyone is happy! :)